1.7.2 Notes on installing
Note
◆ Always renew cylinder head bolts.
◆ In case of repair, carefully remove gasket remains from cyl-
inder head and cylinder block. Ensure that no long scores or
scratches are made on the surfaces. When using abrasive
paper do not use a grade less than 100.
◆ Carefully remove emery and abrasive remains.
◆ Do not remove new cylinder head gasket from packaging
until it is ready to be fitted.
◆ Handle gasket very carefully. Damage to the silicone coating
or the indented area will lead to leaks.
– Before fitting cylinder head, remove crankshaft stop
-T10050-, and turn crankshaft in opposite direction of engine
rotation until all pistons are nearly uniformly below TDC.
– Cylinder head gasket must lie with identification facing up-
wards.
Note
Note identification on cylinder head gasket ⇒ Fig. on page 191.
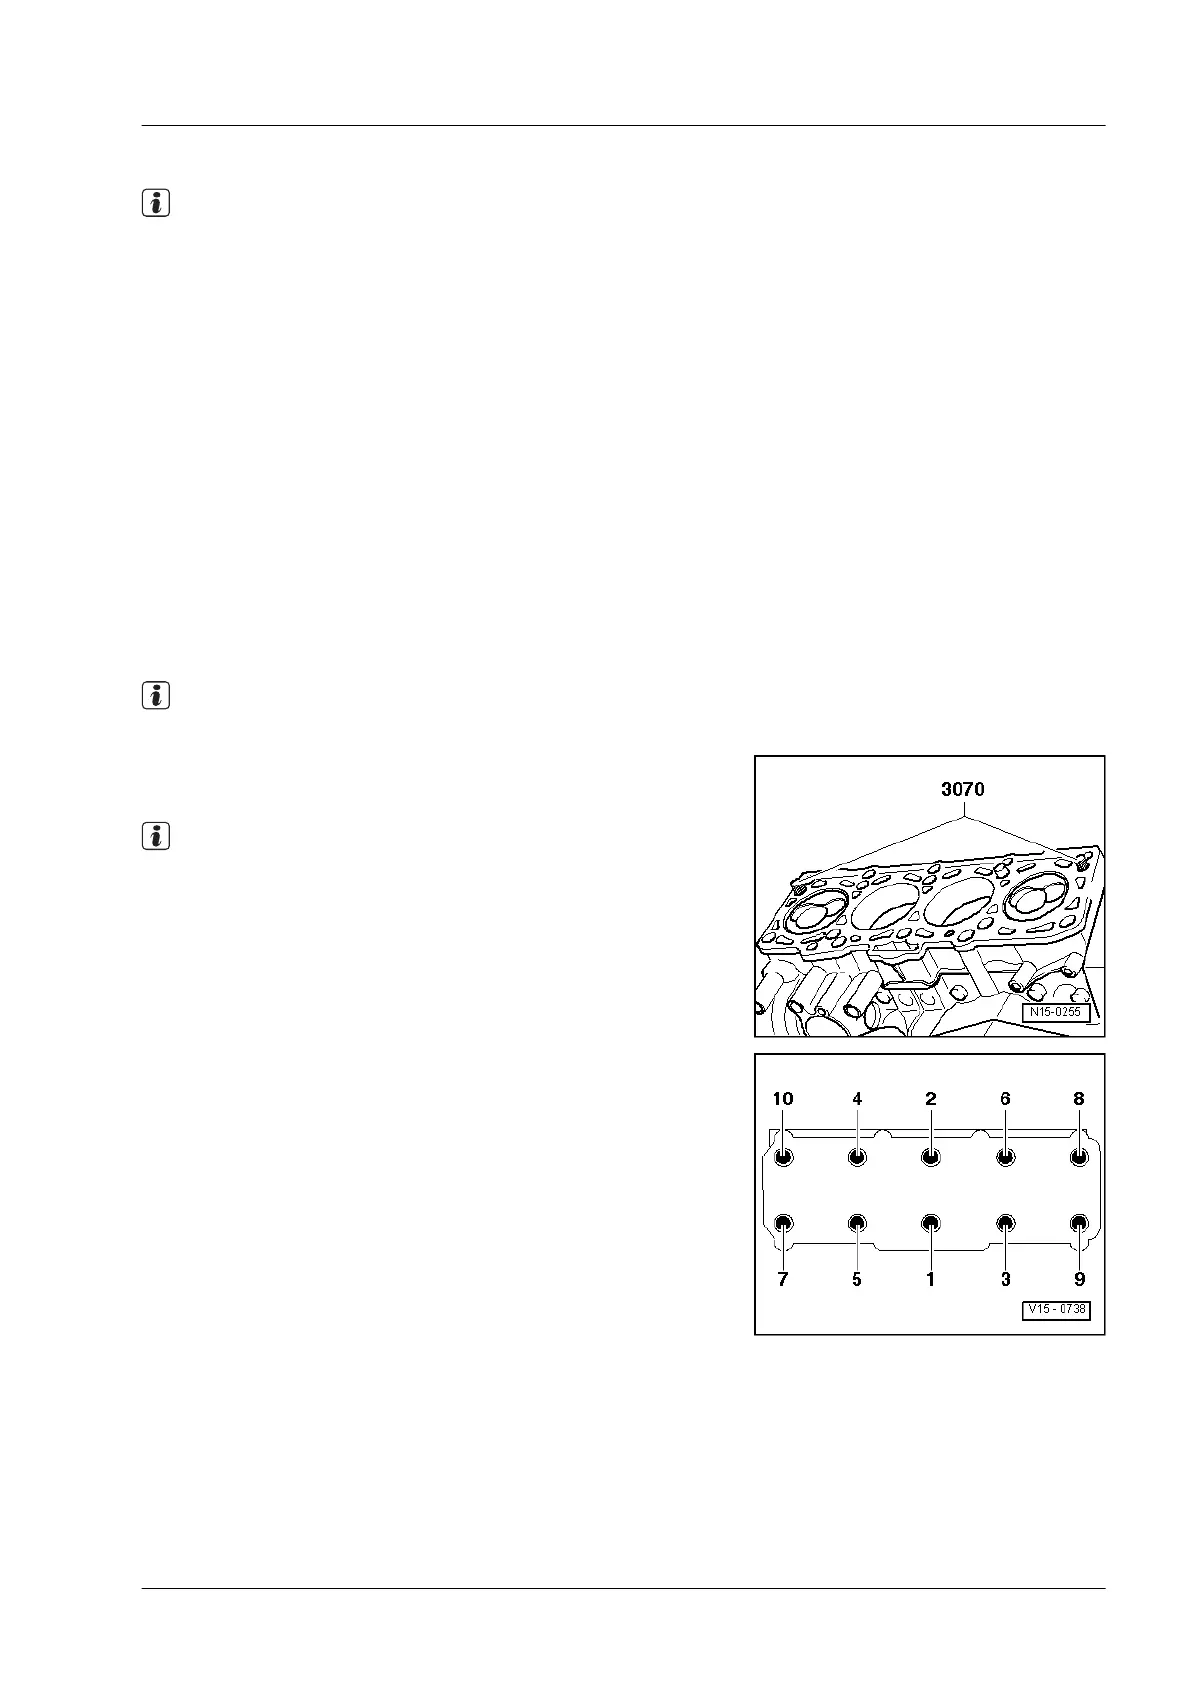
– To centre, screw guide pins -3070- into outer threaded holes
on intake side.
Note
Tensioning roller must be pushed onto studs when fitting cylin-
der head.
– Fit cylinder head, install 8 cylinder head bolts and hand-tight-
en.
– Remove guide pins through bolt holes using removal tool
from 3070 and install cylinder head bolts.
– Tighten cylinder head in 4 stages in sequence shown as fol-
lows:
1 - Tighten initially with torque wrench:
Stage I = 30 Nm
Stage II = 50 Nm
2 - Turn further with rigid spanner:
Stage III = 90°
Industriemotoren - Industrial Engines 2009 ▶
Workshop Manual for Diesel Engine (2.0 l/36-75 kW_EA 189) 05.2015
3
1 Cylinder head
225
 Loading...