GE Healthcare Senographe DS
Revision 1 Service Information and Procedures Class A 2385072-16-8EN
Job Card D/R A207 - Lift Belt
Page no. 1191 Chapter 9
JC-DR-A-207.fm
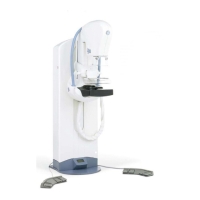
4. Use circlip pliers to pull the clip (6), and push the inner pin
to free the belt.
WARNING
Be careful to avoid any slapping effect of the belt
when freeing it.
5. Release the four screws securing the fixing plate (7)
(5 mm allen wrench, 8 mm open-ended wrench); remove
the fixing plate.
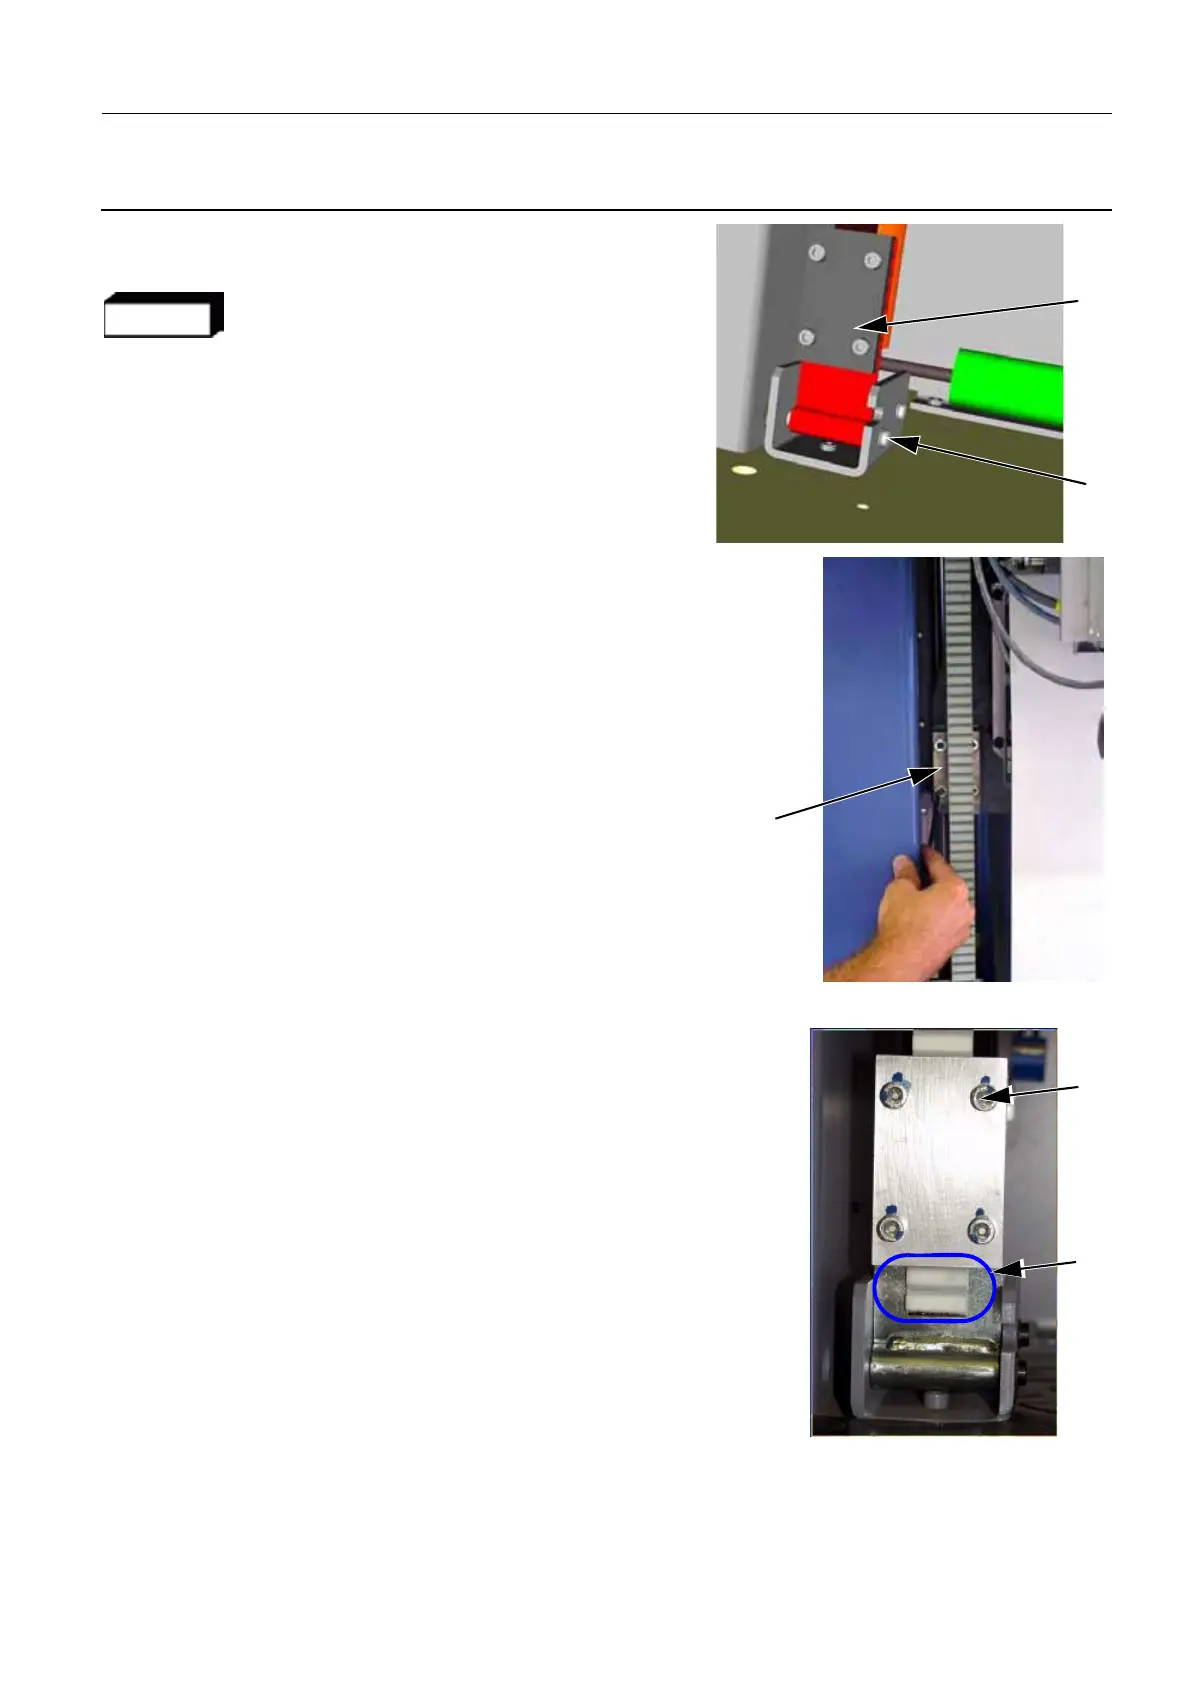
6. Release the four screws securing the upper fixing plate (8)
(8 mm allen wrench), but do not remove the plate.
7. Release the belt.
6-2 Reassembly of the Lift Belt
Proceed to the following steps:
1. Insert the lower end of the belt (9) so that it protrudes by 20 mm
from the edge of the lower fixing plate (two teeth = 20 mm).
2. Insert the end of the belt at the edge of the upper fixing plate
(8).
3. Apply blue Loctite to the threads of the four securing screws
(10) before tightening them.
4. Tighten the four screws securing the belt to the upper fixing
plate (8) (8 mm allen wrench).
5. Remove the Gas Spring stirrup. Discard it, and use a new one
in its place.
6. Turn the endless screw (3) counter-clockwise (13 mm hex
socket) and move the arm down 50 mm to tighten the belt. This
places the Gas Spring under pressure.
7. Use the four bolts to secure the lower X plate (10 mm open-
ended wrench) to the Gantry framework.
6
7
8
9
10
 Loading...


