REP 4.1.4 Lamp Sockets
Parts List on PL 6.1
Removal
WARNING
High Voltage
Switch off the Scanner and disconnect the Power
Cord.
1. Remove the Right and Left Side Panels (REP 4.1.1).
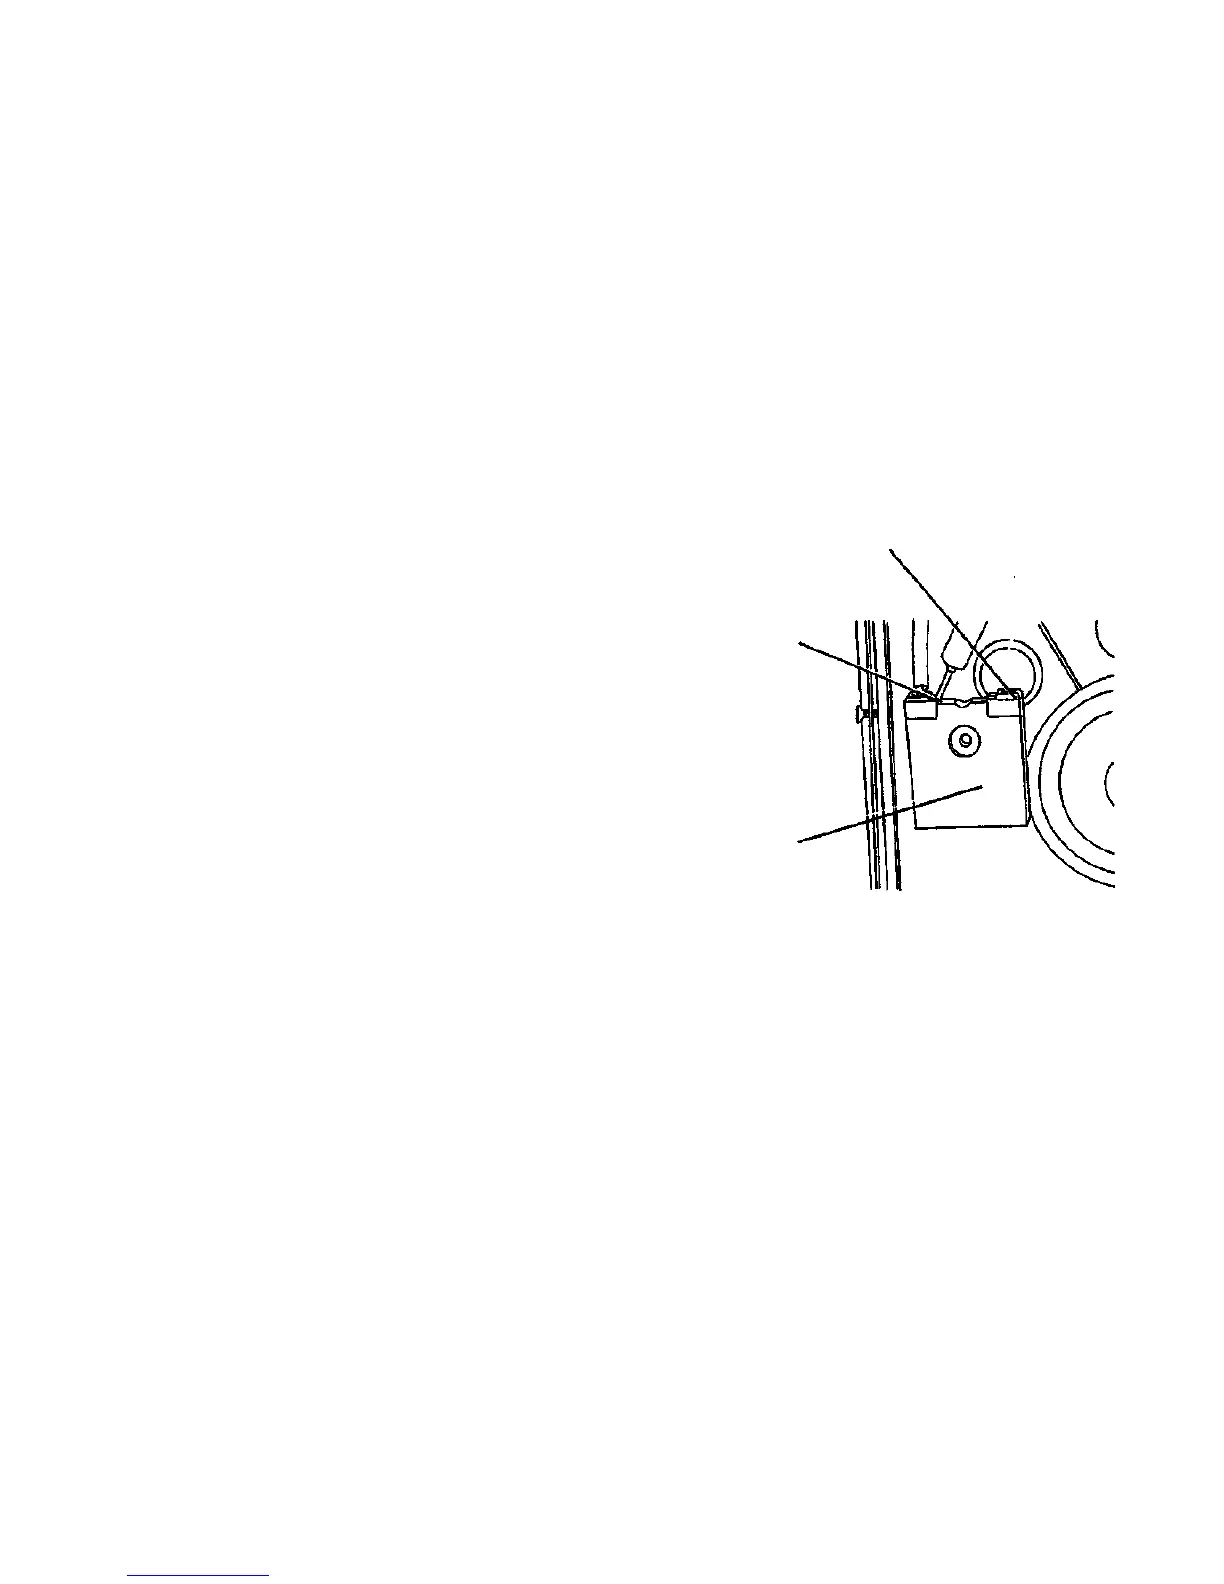
2. (Figure 1): Disconnect the Lamp Socket.
Replacement
WARNING
High Voltage
Switch off the Scanner and disconnect the Power
Cord.
3. if the existing end of the connection wire has been damaged, cut off
the damaged portion and remove 1/3 inch (1 cm) of insulation from
the end.
4. Position the socket so that the two round connection holes are
facing upward.
5. insert the bare end of the wire into one of the round connection
holes on the top of the connector. Continue to insert the wire until no
bare wire is exposed.
6. Connect the Lamp Socket to the Exposure Lamp such that the
connection wire comes out of the top of the socket.
WARNING
High Voltage
Do not touch the Lamp Sockets while the Scanner is
energized.
7. Connect the Power Cord and switch on the Scanner.
8. Ensure that the Exposure Lamp illuminates.
NOTE: If the lamp does not illuminate, ensure that the sockets are
correctly connected to the lamp and that the connector wires are not
broken. If the lamp still does not illuminate, go to Section 2 and isolate
the fault.
9. install the Left Side Panel and the Right Side Panel (REP 4.1.1).
B
Connection
Hole (2)
Insert a probe into
the Removal Slot,
and simultaneously
remove the
connection wire
Disconnect the
Lamp Socket
Figure 1. Disconnecting the Wire from the Lamp Socket
7356 SCANNER
4/97
4-7
REP 4.1.4
 Loading...


