5-17
CAMSHAFTS
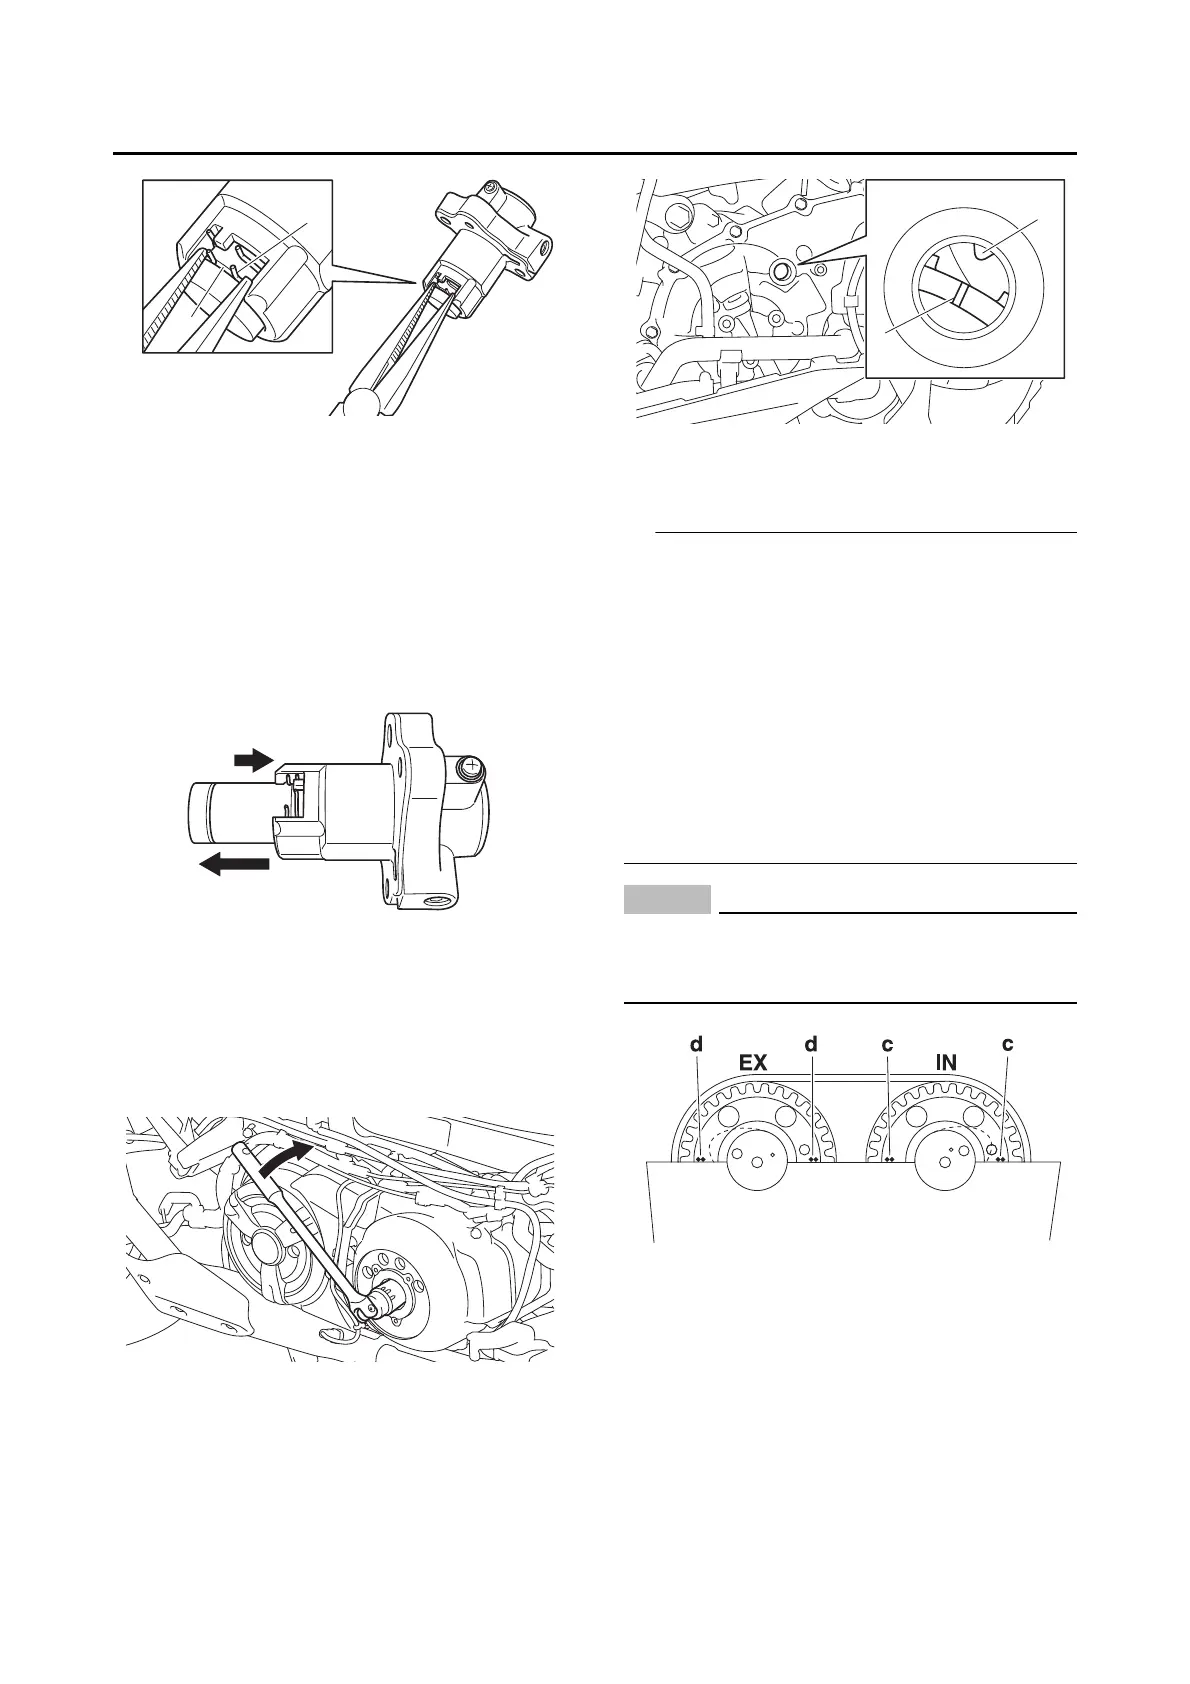
c. Push the timing chain tensioner rod “c”.
d. If the circlip does not unlock even though
you press the timing chain tensioner rod in
the “c” direction, rotate the timing chain ten-
sioner rod clockwise.
e. Make sure that the timing chain tensioner
rod comes out “d” of the timing chain ten-
sioner housing smoothly. If there is rough
movement, replace the timing chain ten-
sioner.
EAS30269
INSTALLING THE CAMSHAFTS
1. Install:
• Exhaust camshaft
• Intake camshaft
a. Turn the crankshaft clockwise.
b. When piston #1 is at TDC on the compres-
sion stroke, align the “I” mark “a” on the
generator rotor with the stationary pointer
“b” on the generator cover.
c. Install the timing chain onto both camshaft
sprockets, and then install the camshafts
onto the cylinder head.
• Lubricate the camshaft journal with the molyb-
denum disulfide oil.
• When installing the timing chain, start with the
exhaust camshaft and be sure to keep the tim-
ing chain as tight as possible on the exhaust
side.
• The camshafts should be installed onto the cyl-
inder head so that the alignment marks “c” on
the intake camshaft sprocket and the align-
ment marks “d” on the exhaust camshaft
sprocket align with the cylinder head mating
surface, as shown in the illustration.
ECA13740
Do not turn the crankshaft when installing
the camshaft(s) to avoid damage or improper
valve timing.
2. Install:
• Dowel pin
• Exhaust camshaft cap “1”
• Intake camshaft cap “2”
5
4

 Loading...