Trigger setups Set up trigger controls (Options tab)
Set up trigger controls (Options tab)
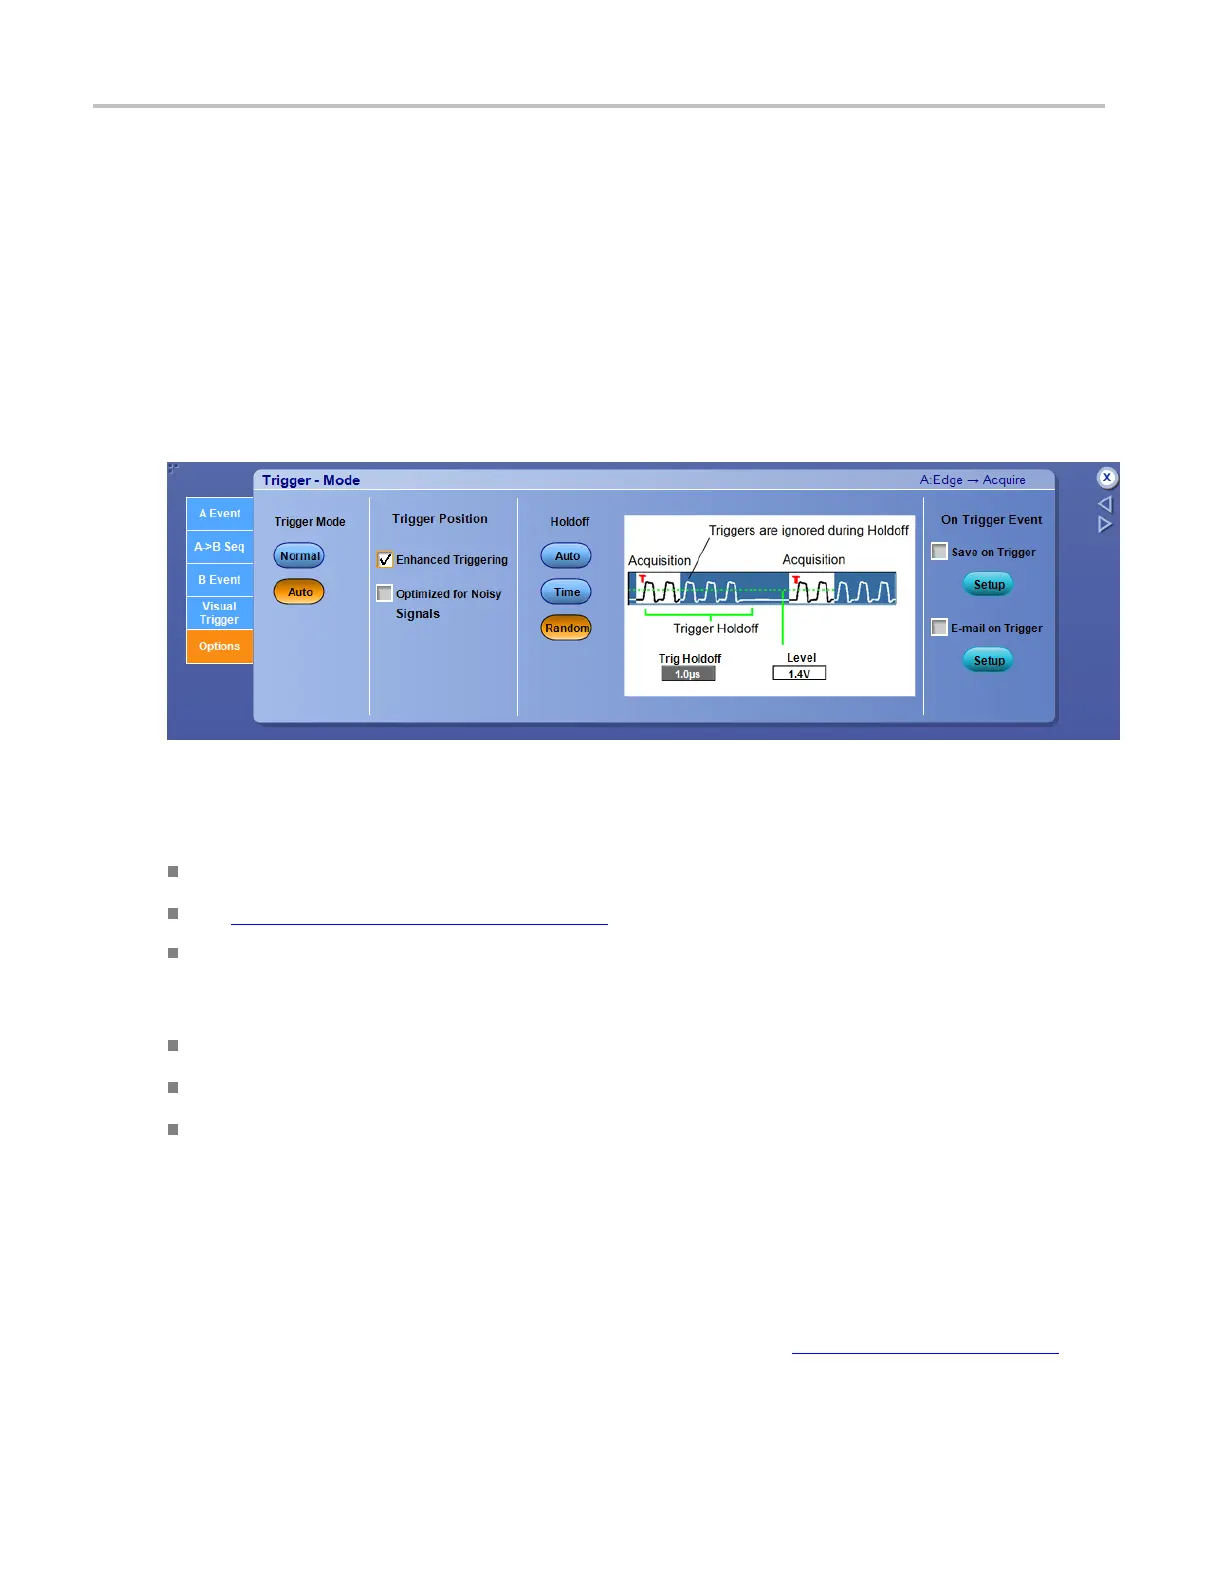
From the Trig menu, select the A Event or B Event Trigger Setup; then open the Options tab.
Overview
Use the controls in this window to set up the trigger mode.
For information on the controls, click the buttons.
To use
To set the Trigger Mode, click either Auto or Normal.
To enhance trigger positioning (see page 475), click in the option boxes.
To set the Trigger Holdoff time manually, click Time, and then use the multipurpose knob to set the
holdoff time. The Holdoff range is 250 ns (minimum holdoff available) to 100 s (maximum holdoff
available).
To enable Save on Trigger, click the check box.
To enable E-mail on Trigger, click check box.
To set up the e-mail on event parameters, click Setup. Set the A Event trigger level using the A
Trig Level control and the multipurpose knob.
Behavior
Use the trigger holdoff time to delay the trigger system for a specified amount of time between triggers, or
click Auto to let the instrument calculate the time for you. You can also set the holdoff to a Level that
synchronizes the instrument with an incoming signal to generate a stable display and avoid triggering on
undesired events. When you click on the trigger window controls, the trigger graphic
(see page 386)
shows the trigger sequence.
474 DSA/DPO70000D, MSO/DPO/DSA70000C, DPO7000C, and MSO/DPO5000 Series
 Loading...