9-4 CASE Revision C
2060290-201
Selecting Patient Records
Selecting Patient Records
101A
A
K
C D FE H I J
L
M
N
Q
R
B G
O
P
S
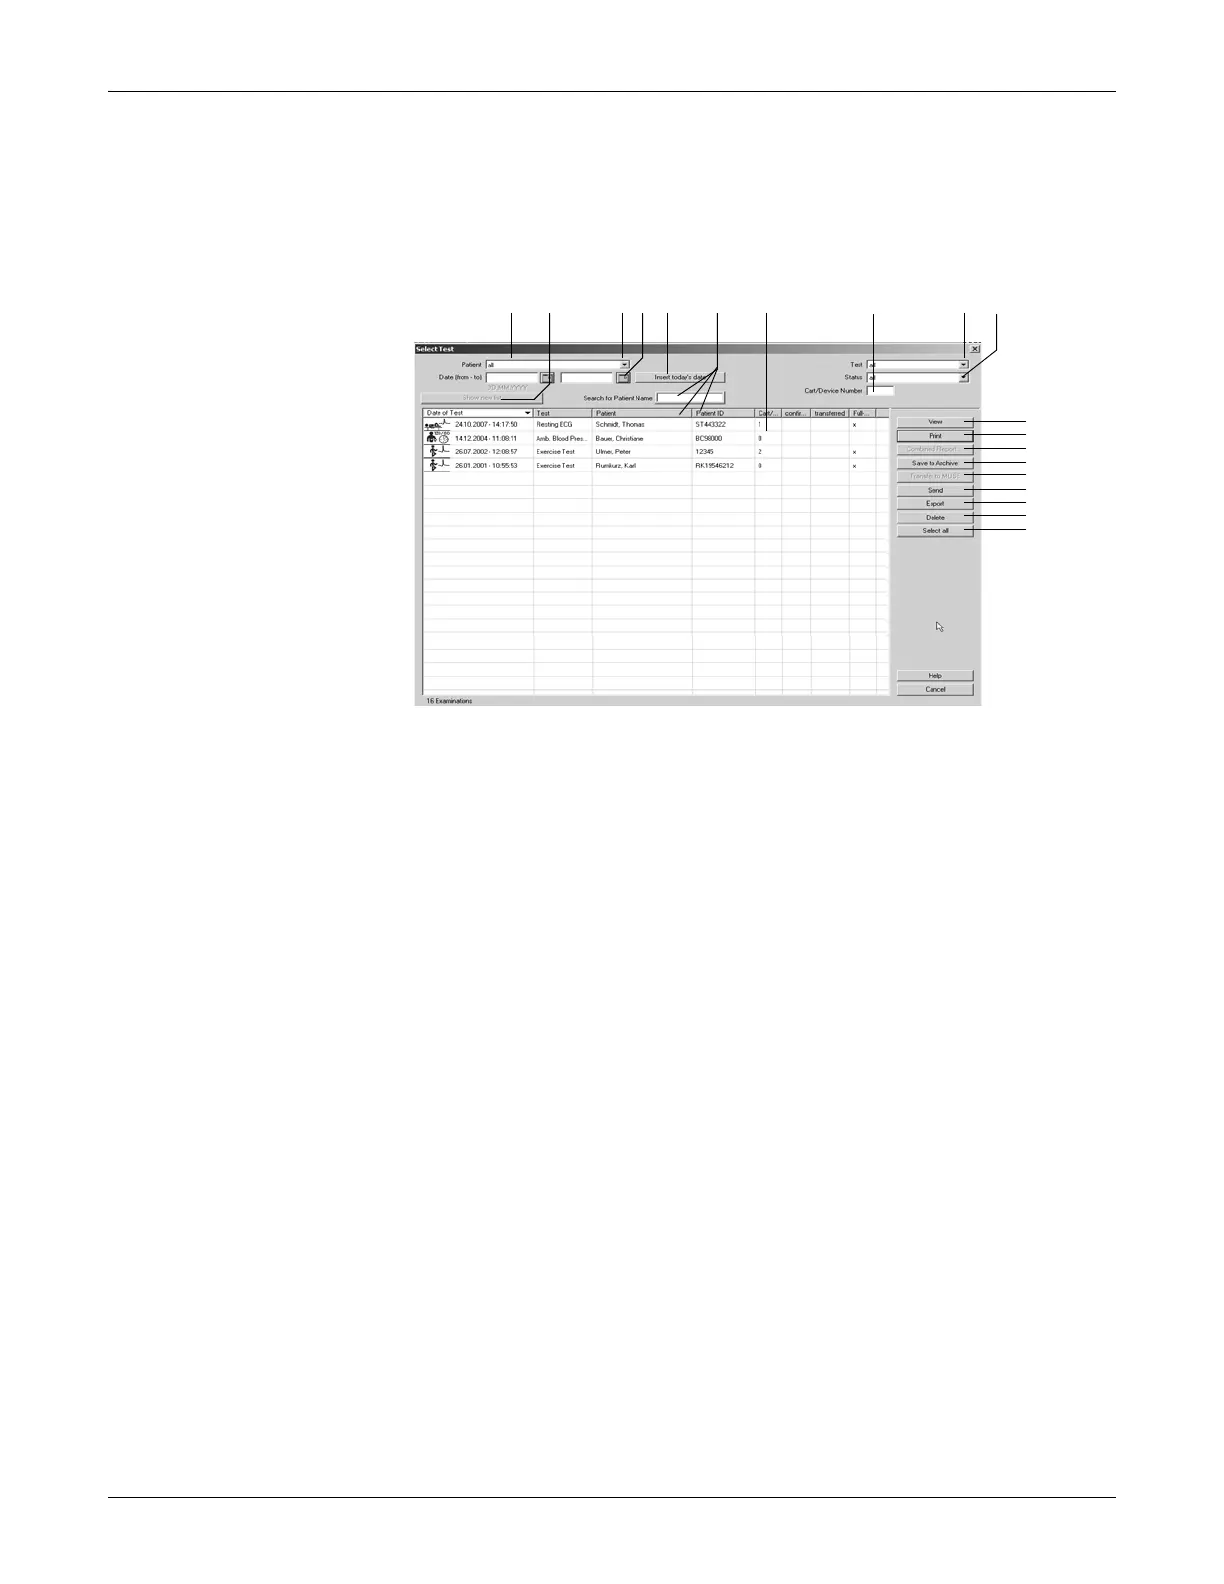
A Selected patient (only this patient's records are shown).
B Click button to update the current list according to the selection criteria.
C Click down arrow to open the list box with the option all (i.e., all records stored
in the database will be shown).
D Enter dates, if you wish to view only the patient records acquired in that time
period.
E Click button to insert the current date at D.
F Search for patient by name or ID (depending on whether the Patient or the
Patient ID column is selected).
G Columns with details of the patient records: Cart/Device Number: ID number of
the acquisition device, confirmed: the test results have been reviewed and
confirmed by a physician, transferred: the patient record was transferred to the
MUSE system, Full disclosure ECG: the full disclosure ECG has been stored,
Patient: patient's name when all tests in the database are listed.
The list can be sorted by columns. To do so, click on a column header with the
left mouse button.
The right mouse button is used to restore the original width of a column.
H Enter a Cart/Device Number, if you wish to see only the patient records
acquired with the specific cart/device.
I Click down arrow to display a list with all test types and select.
J Click down arrow to display a list with the different test statuses and select:
confirmed or unconfirmed patient records only, or all patient records.
K Click button to view the selected patient record.
L Click button to print the final report of the selected patient record.
M Click button to generate a Combined Report for the current patient (see section
“Printing a Combined Report” on page 9-6).
 Loading...