10-34 Chapter 10
Removal and Replacement Procedures
5. Route the ribbon cable through the slot on the EMI bracket, and position the bracket into place.
6. Secure the EMI bracket with a screw (be careful not to pinch the power cables).
7. Push in the tab on the EMI bracket to secure the ribbon cable.
8. Reconnect the SCSI ribbon cable to the System/Core I/O Board.
Remove Single-Ended SCSI Hard Disks
1. Remove the power and SCSI ribbon cables from the rear of the disk drive.
2. Remove the two screws in the front of the chassis that secure the disk drive tray assembly.
3. Slide the disk drive tray assembly out of the lower peripheral bay.
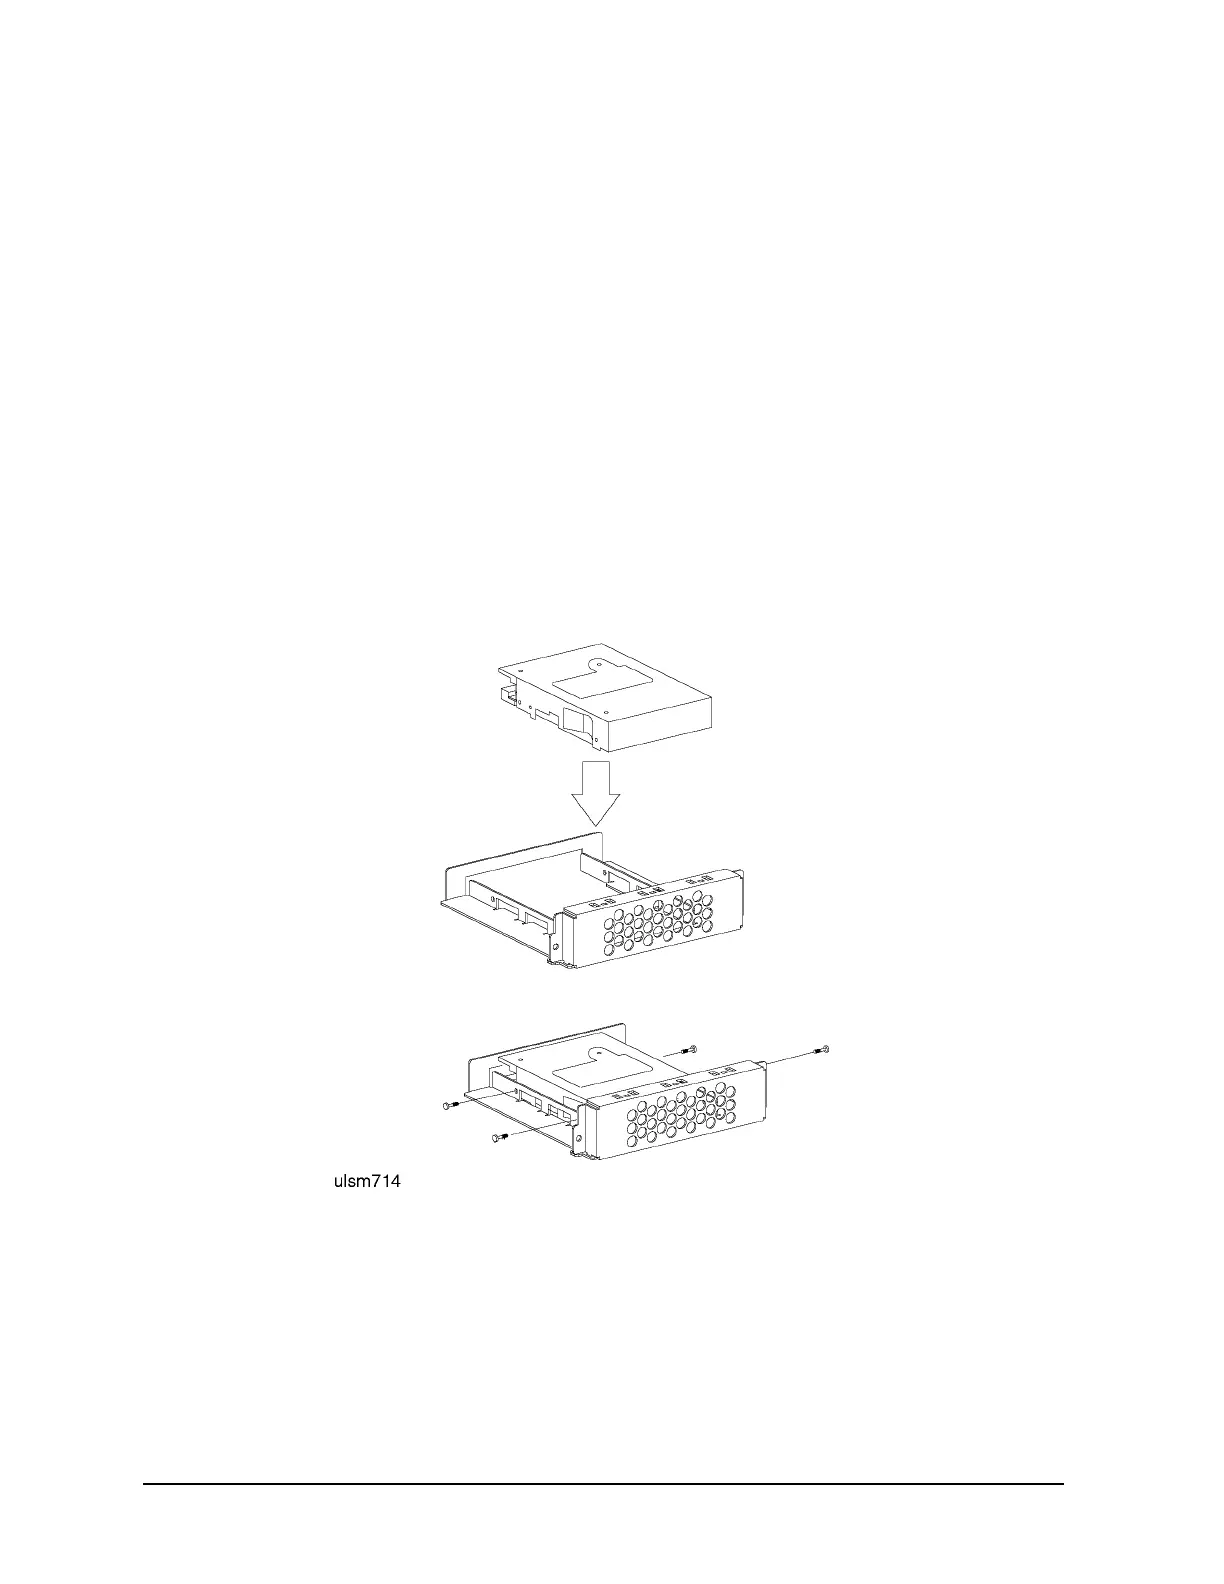
4. Loosen and remove the four screws securing the disk drive to the disk mounting tray.
5. Lift the disk drive off the mounting tray and set it aside.
Figure 10-23 D2xx Disk Assembly Removal/Replacement
 Loading...