CABIN
B2650HSDC, B3350HSDC, WSM
9-S36
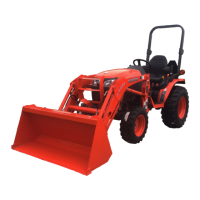
(2) Removing Compressor Assembly
Compressor Assembly
1. Discharge the refrigerant from the system. (See page 9-S17.)
2. Disconnect the low pressure pipe (suction) (4) and high
pressure pipe (discharge) (1) from the compressor, then cap the
open fitting immediately to keep moisture out of the system.
3. Disconnect the 1P connector (3) of magnetic clutch.
4. Remove the air conditioner belt (2) and remove the compressor
(4) with stay.
(When reassembling)
• After reassembling the compressor, be sure to adjust the air
conditioner belt tension and recharge the refrigerant to the
system. (See page 9-S19, 9-S22.)
• Apply compressor oil (DENSO CO. ND-OIL8 or equivalent) to
the O-rings and be careful not to damage them.
• "S" letter is marked on the compressor for connecting the low
pressure pipe (suction side).
• "D" letter is marked on the compressor for connecting the high
pressure pipe (discharge side).
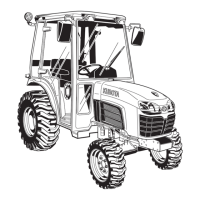
• When replacing the compressor with a new one, meet the oil
amount with old one.
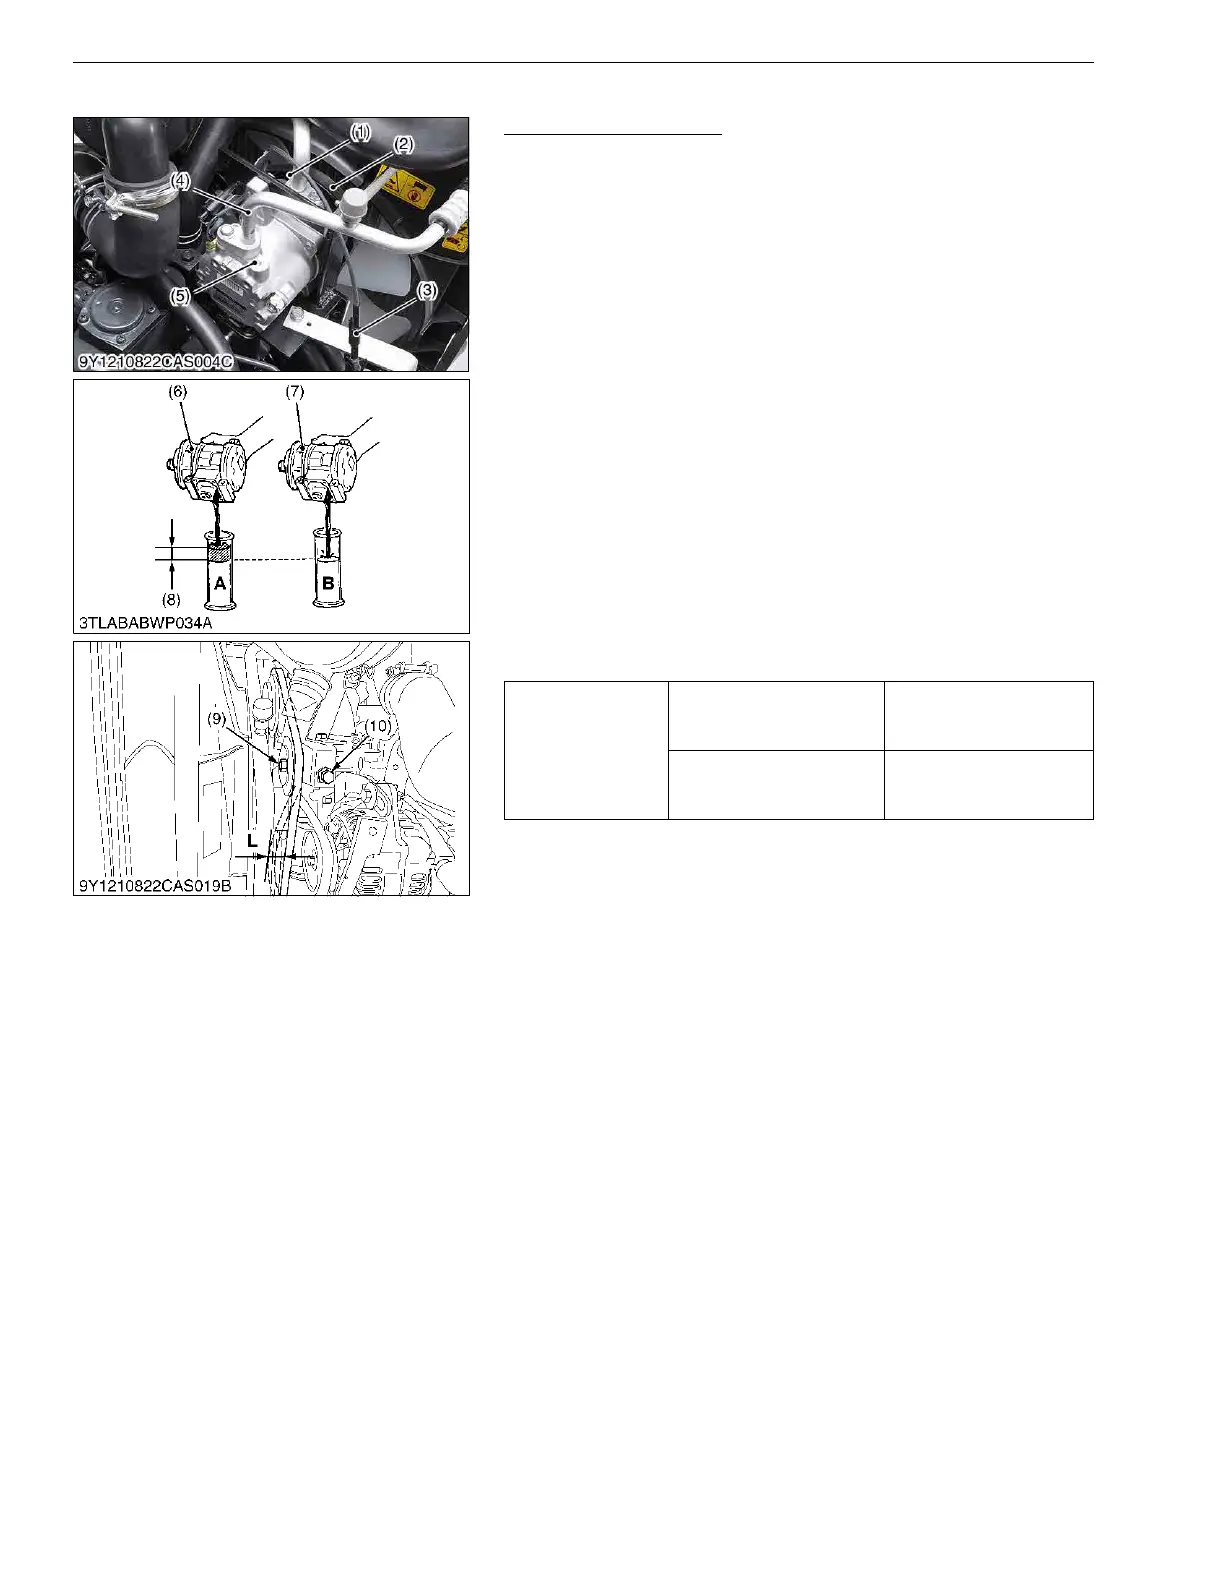
• Push on the belt between the pulleys with a finger. Deflection
"L" of 10 to 12 mm (0.40 to 0.48 in.) under a 98 N (10 kgf, 22 lbf)
load is appropriate.
9Y1210822CAS0053US0
Tightening torque
High pressure pipe and low
pressure pipe mounting
screw
7.90 to 11.8 N·m
0.806 to 1.20 kgf·m
5.83 to 8.70 lbf·ft
Compressor mounting
screws
24.5 to 29.4 N·m
2.50 to 2.99 kgf·m
18.1 to 21.6 lbf·ft
(1) High Pressure Pipe 1
(2) Air Conditioner Belt
(3) 1P Connector (Magnetic Clutch)
(4) Low Pressure Pipe
(5) Compressor
(6) New Compressor
(7) Old Compressor
(8) Remove the Excess Oil (A-B)
(9) Tension Pulley Bolt
(10) Adjusting Bolt
A: Oil Flow New Compressor
B: Oil Flow Replace Compressor
L: Deflection
(10 to 12 mm (0.40 to 0.48 in.))
 Loading...