9.1 Overview on RS-485 Communication
9-7
Chapter 9 RUNNING THROUGH RS-485 COMMUNICATION
[2] Requirements for the cable (COM port 1: for RJ-45 connector)
Use a standard 10BASE-T/100BASE-TX LAN cable (US ANSI/TIA/EIA-568A category 5 compliant,
straight type).
The RJ-45 connector (COM port 1) has power source pins (pins 1, 2, 7 and 8) exclusively
assigned to keypads. When connecting other devices to the RJ-45 connector, take care not to
use those pins. Use pins 4 and 5 only.
[3] Requirements for the cable (COM port 2: for RS-485 connector)
To ensure the reliability of connection, use twisted pair shield cables for long distance transmission AWG
16 to 26.
Recommended LAN cable Manufacturer: FURUKAWA Electric Co., LTD AWM2789 Cable for long
distance connection
Type (Product code):
DC23225-2PB
[4] Branch adapter for multi-drop
RJ-45 connectors are used for communications. When standard LAN cables are used for the multi-drop
connection, branch adapters for RJ-45 connector are required.
Recommended branch adapter
SK Koki (Japan): MS8-BA-JJJ
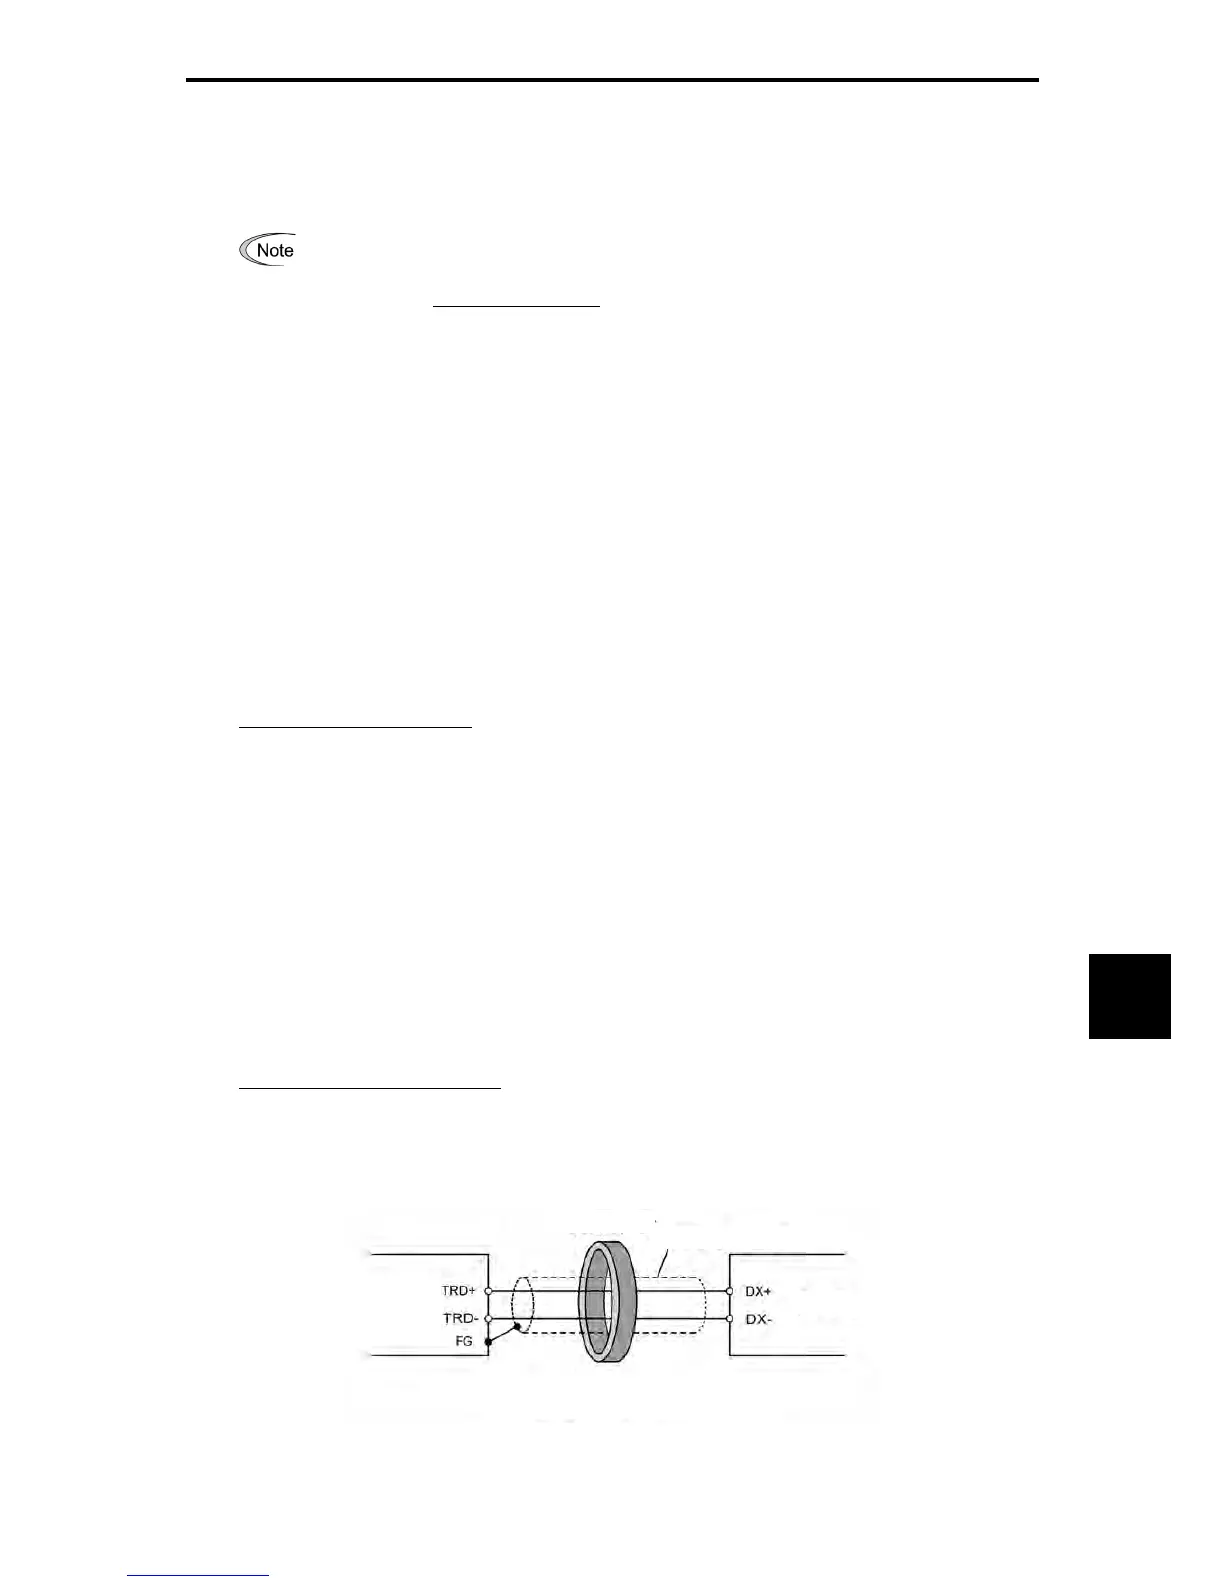
9.1.5 Noise suppression
Depending on the operating environment, instruments may malfunction due to the noise generated by the
inverter. Possible measures to prevent such malfunction are: separating the wiring, use of shielded cable,
isolating the power supply, and adding an inductance component. Shown below is an example of adding
an inductance component.
Refer to the RS-485 Communication User's Manual, Chapter 2, Section 2.2.4 "Noise suppression"
for details.
Adding inductance components
To suppress or eliminate noise for keeping the network in high noise immunity level, insert inductance
components such as choke coils in series in the signal circuit, or pass the RS-485 communications cable
through a ferrite core ring or wind it around by 2 or 3 turns as shown below to keep the impedance of the
signal lines high.
RS-485
converter
RS-485 communications cable
Ferrite core
Inverter
Pass the wiring through the ferrite core or
wind the ferrite core with the wiring a few times
Figure 9.1-4 Adding an Inductance Component

 Loading...