EasyManua.ls Logo

HEIDENHAIN QUADRA-CHEK 2000 User Manual

HEIDENHAIN QUADRA-CHEK 2000
420 pages
To Next Page IconTo Next Page
To Previous Page IconTo Previous Page
Page #302 background imageLoading...
Page #302 background image
Measurement evaluation | Adding annotations
11
11.4.1 Adding measurement information to features
Tap Measure in the main menu
Select Manual measuring in the function palette
If applicable, tap Features preview in the Inspector
The features view is displayed in the workspace
Tap Edit annotations
Select one or more features in the feature list
The controls for adding annotations are now shown
Further information: "Editing annotations", Page 82
To add annotations to the selected features, tap the
corresponding controls
The annotations are now displayed in the workspace
To place an annotation in a different position, drag the it to
the desired location in the workspace
To leave the editing mode, tap Edit annotations again
If you select multiple features with different geometry types, then only
those operating elements are displayed that are available for all objects.
If an annotation has already been added to a portion of the selected
features, then the associated operating element is depicted in dashed
lines
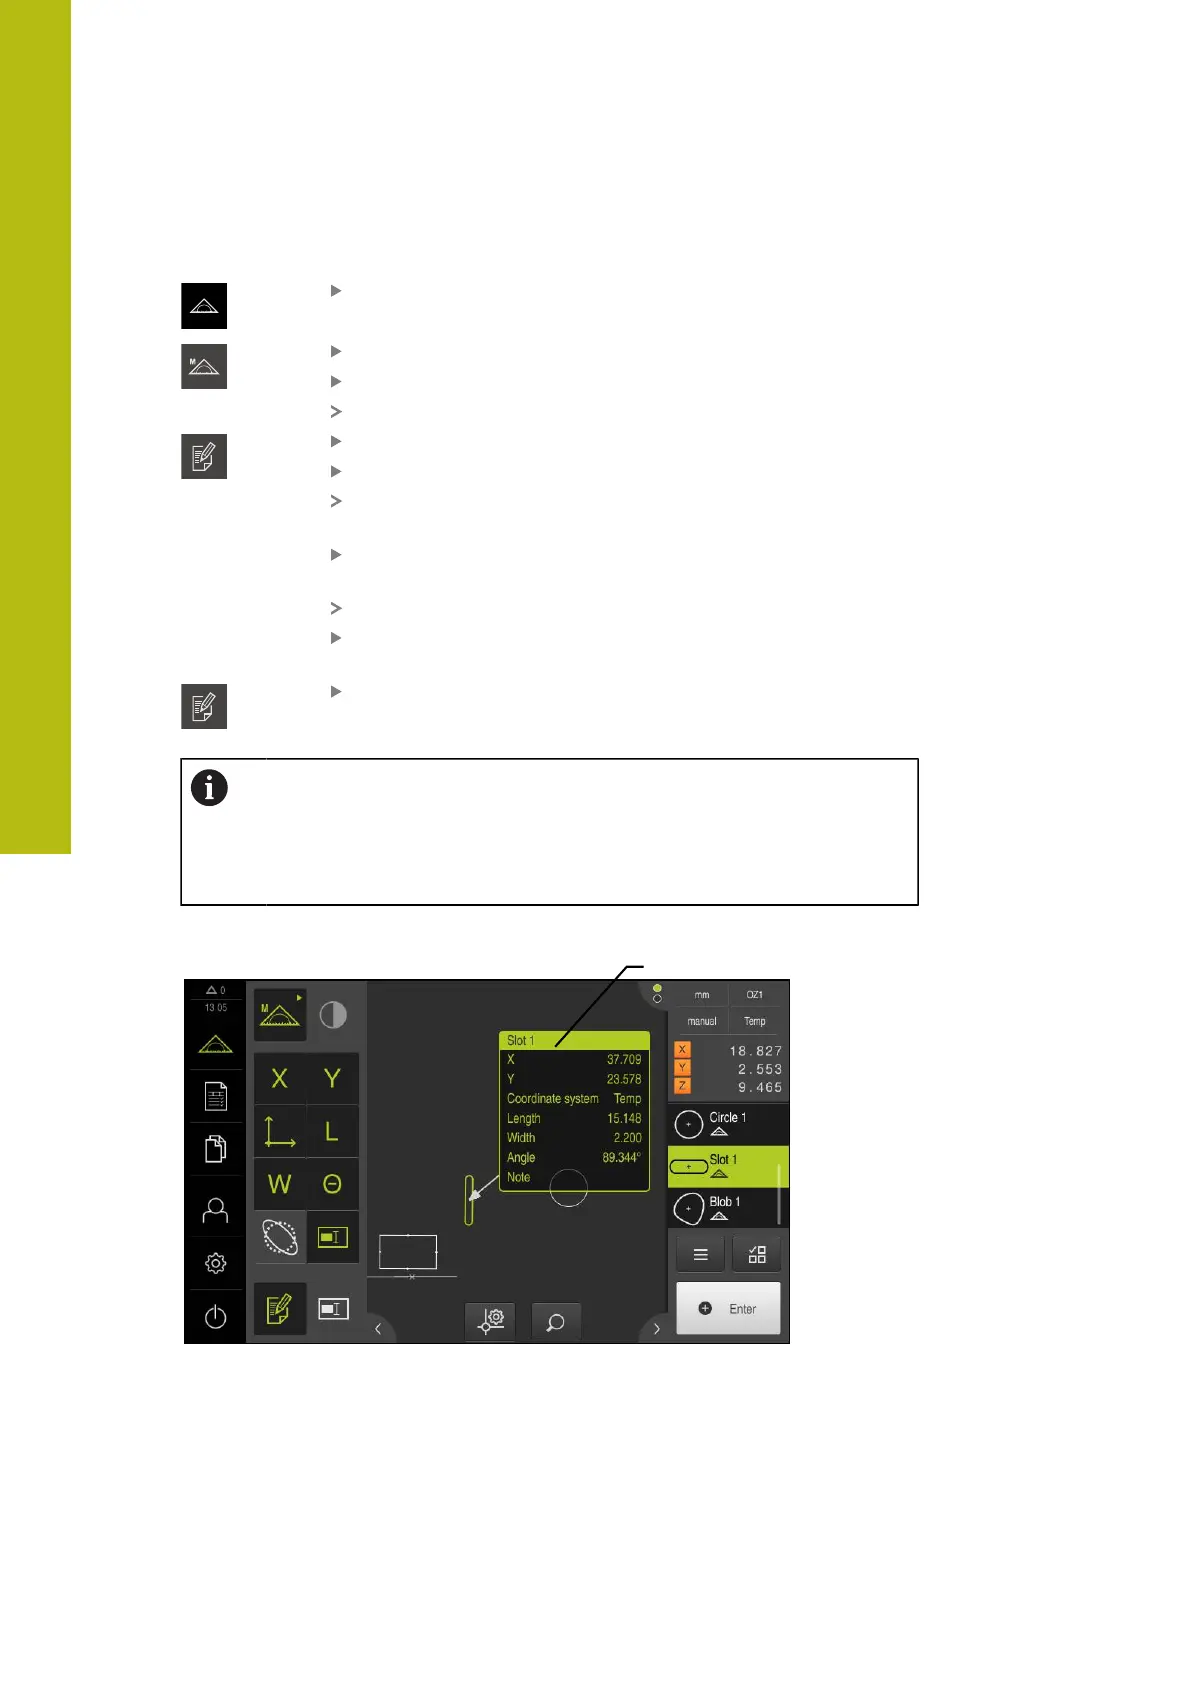
1
Figure 77: Features view with measurement information for a feature
1
Measurement information for a feature
302
HEIDENHAIN | QUADRA-CHEK 2000 | Operating Instructions | 07/2019

Table of Contents

Question and Answer IconNeed help?

Do you have a question about the HEIDENHAIN QUADRA-CHEK 2000 and is the answer not in the manual?

HEIDENHAIN QUADRA-CHEK 2000 Specifications

General IconGeneral
Resolution0.1 µm
Input Voltage100-240 V AC
DisplayColor touchscreen
Measurement Range200 mm
InterfacesUSB, Ethernet
Power Supply50 to 60 Hz
Weight6 kg

Summary

Safety

General safety precautions

General safety rules and precautions for operating electrical equipment.

Intended use

Defines the product's intended use in commercial and industrial metrology applications.

Basic operation

Commissioning

Steps for commissioning

Detailed breakdown of commissioning steps including basic settings and axis configuration.

Setup

Single steps for setup

Step-by-step guide for basic settings, sensor configuration, and application setup.

Quick Start

Measuring

Conducting a measurement

Step-by-step guide for measurements, including object alignment and feature acquisition.

Measurement evaluation

Defining tolerances

Describes available tolerances and how to configure and activate them for features.

Programming

Settings

Service and maintenance

Updating the firmware

Procedures for importing new versions of the product's operating system.

What to do if ...

System or power failure

Actions to take in case of system or power failures, including firmware restoration.

Troubleshooting

Guidance on handling faults not covered in the troubleshooting table.

Related product manuals