3
E
E
B
2
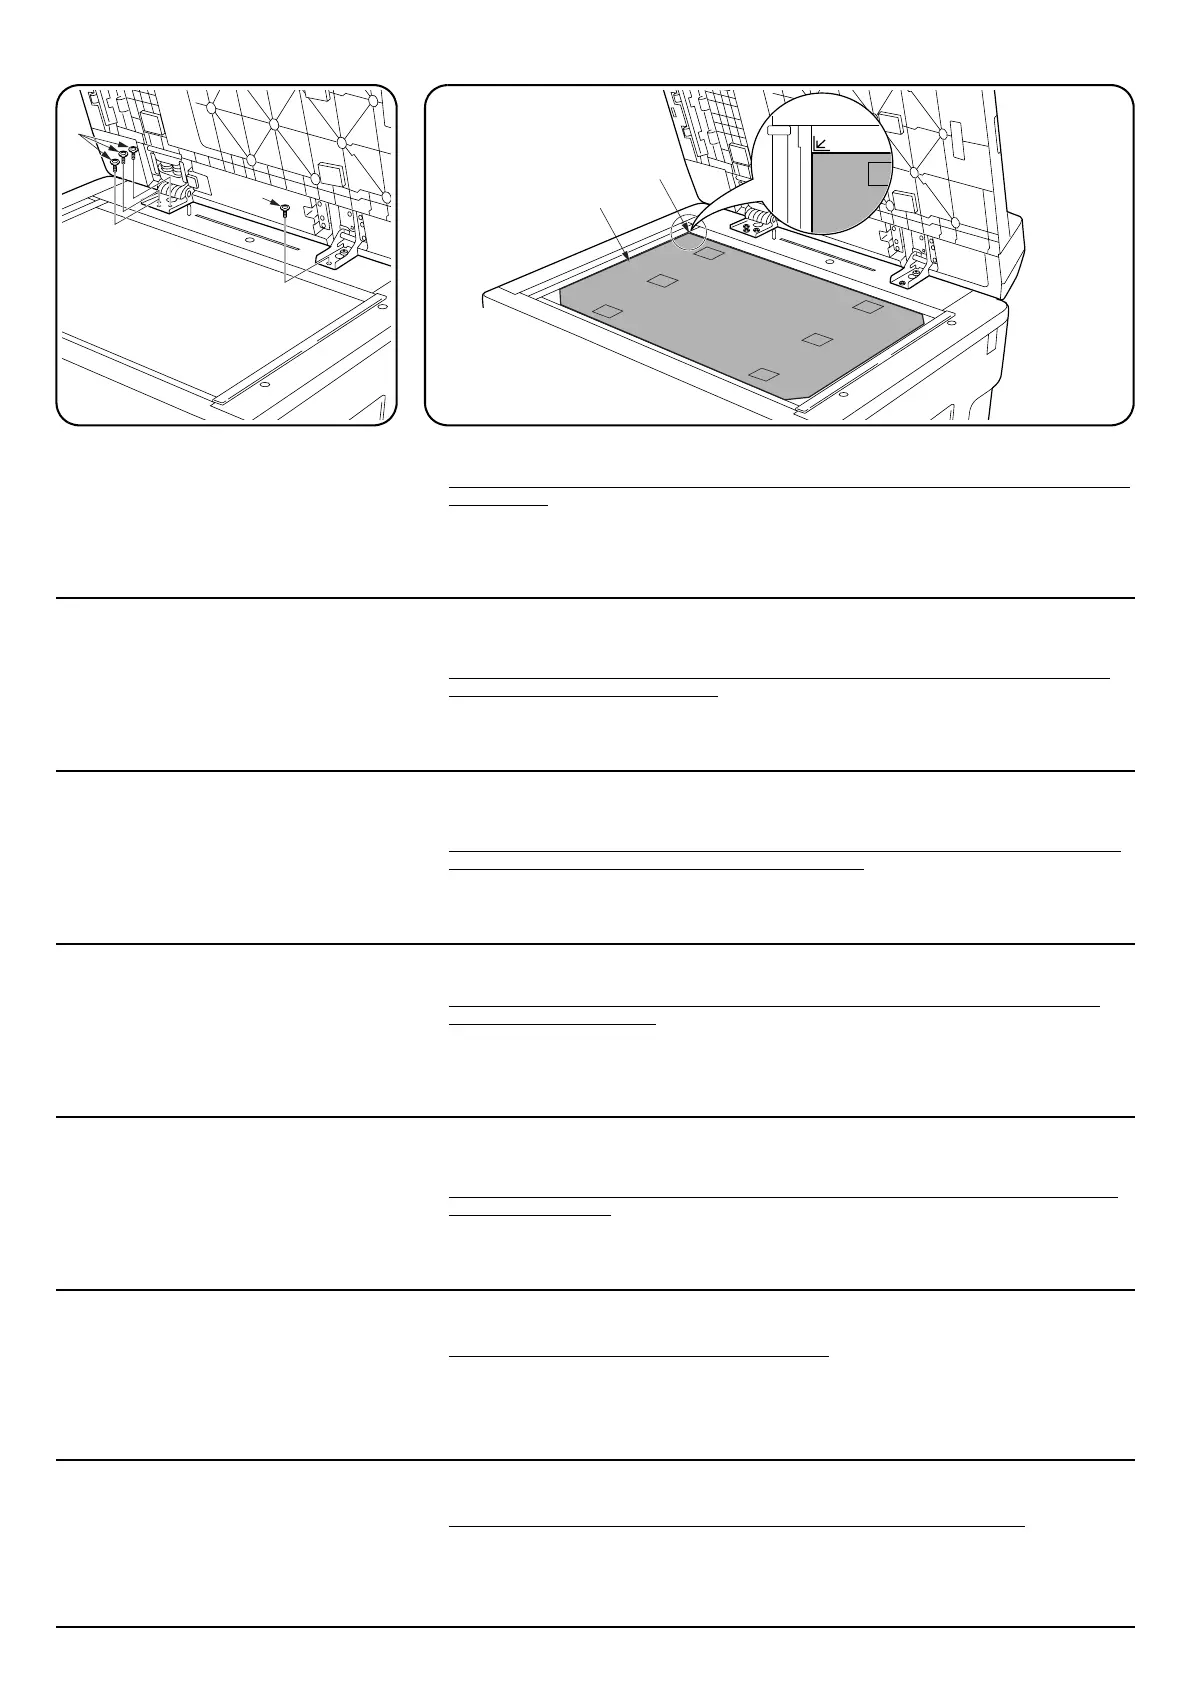
3. Fix the DP using four M4 × 14 screws (E).
Right: One
Left: Three
Attaching the original mat
4. Place the original mat (B) with its hook and loop fasteners up over the platen.
Align the original mat (B) corner that has not been surface cut with the rear left corner (2)
of the platen.
5. Close the DP slowly to attach the original mat (B) onto it with the hook and loop fasteners.
3. Fixez le DP à l’aide de quatre vis M4 × 14
(E).
Côté droit: Une
Côté gauche: Trois
Fixation du tapis d’original
4. Placez le tapis d’original (B) sur la glace d’exposition avec son crochet et ses attaches à boucle
orientées vers le haut.
Aligner le coin du tapis d’original (B) ne comportant pas de découpe sur le coin arrière
gauche (2) de la glace d’exposition.
5. Refermez progressivement le DP pour fixer le tapis d’original (B) sur celui-ci avec le crochet et les
attaches à boucle.
3. Fije el DP utilizando cuatro tornillos M4 × 14
(E).
Derecho: Uno
Izquierdo: Tres
Colocación de la plancha de originales
4. Coloque la plancha de originales (B) en su gancho y fijadores de bucle sobre el crystal de
exposición.
Alinee la esquina de la plancha de originales (B) que no tenga corte de superficie con la
esquina trasera izquierda (2) del crystal de exposición.
5. Cierre lentamente el DP para colocar la plancha de originales (B) con el gancho y fijadores de
bucle.
3. Den DP mit vier M4 × 14 Schrauben (E)
befestigen.
Rechts: Eine
Links: Drei
Anbringen der Originalmatte
4. Die Originalmatte (B) mit den Klettverschlüssen nach oben auf das Vorlagenglas legen.
Die nicht abgeschnittene Ecke der Originalmatte (B) auf die hintere linke Ecke (2) des
Vorlagenglases ausrichten.
5. Den DP langsam schließen, so dass die Originalmatte (B) mit den Klettverschlüssen an ihm
haftet.
3. Fissare il DP utilizzando quattro viti M4 × 14
(E).
Destra: Una
Sinistra: Tre
Montaggio del coprioriginale
4. Collocare il copioriginali (B) sulla lastra di esposizione con il lato provvisto di nastro velcro
autoadesivo rivolto verso l’alto.
Allineare l’angolo integro del coprioriginale (B) con l’angolo posteriore sinistro (2) della
lastra di esposizione.
5. Chiudere lentamente il DP in modo che il coprioriginale (B) vi si possa fissare mediante il nastro
velcro.
3. 用 4 个螺丝 M4 × 14(E) 固定 DP。
右侧 :1 个
左侧 :3 个
安装原稿垫
4. 将带有尼龙带的原稿垫 (B) 朝上,放在原稿玻璃板上。
将原稿垫 (B) 未缺角处对准原稿玻璃板的左角 (2) 上。
5. 轻轻地放下 DP,使原稿垫 (B) 粘在 DP 背面上。
3. ビス M4 × 14(E)4 本で DP を固定する。
右 側:1 本
左 側:3 本
原稿マットの取り付け
4. 原稿マット (B) をマジックテープが付いている面を上にして、原稿ガラス上に置く。
原稿マット
(B) は、面カットされていない角を原稿ガラスの左奥 (2) に合わせる。
5. DP をゆっくりと下ろし、DP 裏面に原稿マット (B) を取り付ける。

 Loading...