Photoconductor Unit (PCU)
D017/D018/D019/D020 3-24 SM
8. Cleaning roller [F]
Re-installation: Charge Roller
Put the end of the charge roller with the wide bevel [G] at the front of the PCU.
The ends of the cleaning roller [F] are the same (put either end at the front).
Make sure that the front stud of the roller assembly is put in the correct position.
Install the front stud before you tighten the rear shoulder screw. Make sure that the
head of the stud is put in the correct position.
3.5.5 CLEANING BLADE
1. Remove the PCU. (See ‘PCU Removal’.)
2. Remove the OPC drum. (See ‘OPC Drum’.)
3. Remove the charge roller and cleaning roller. (See ‘Charge Roller, Cleaning Roller’).
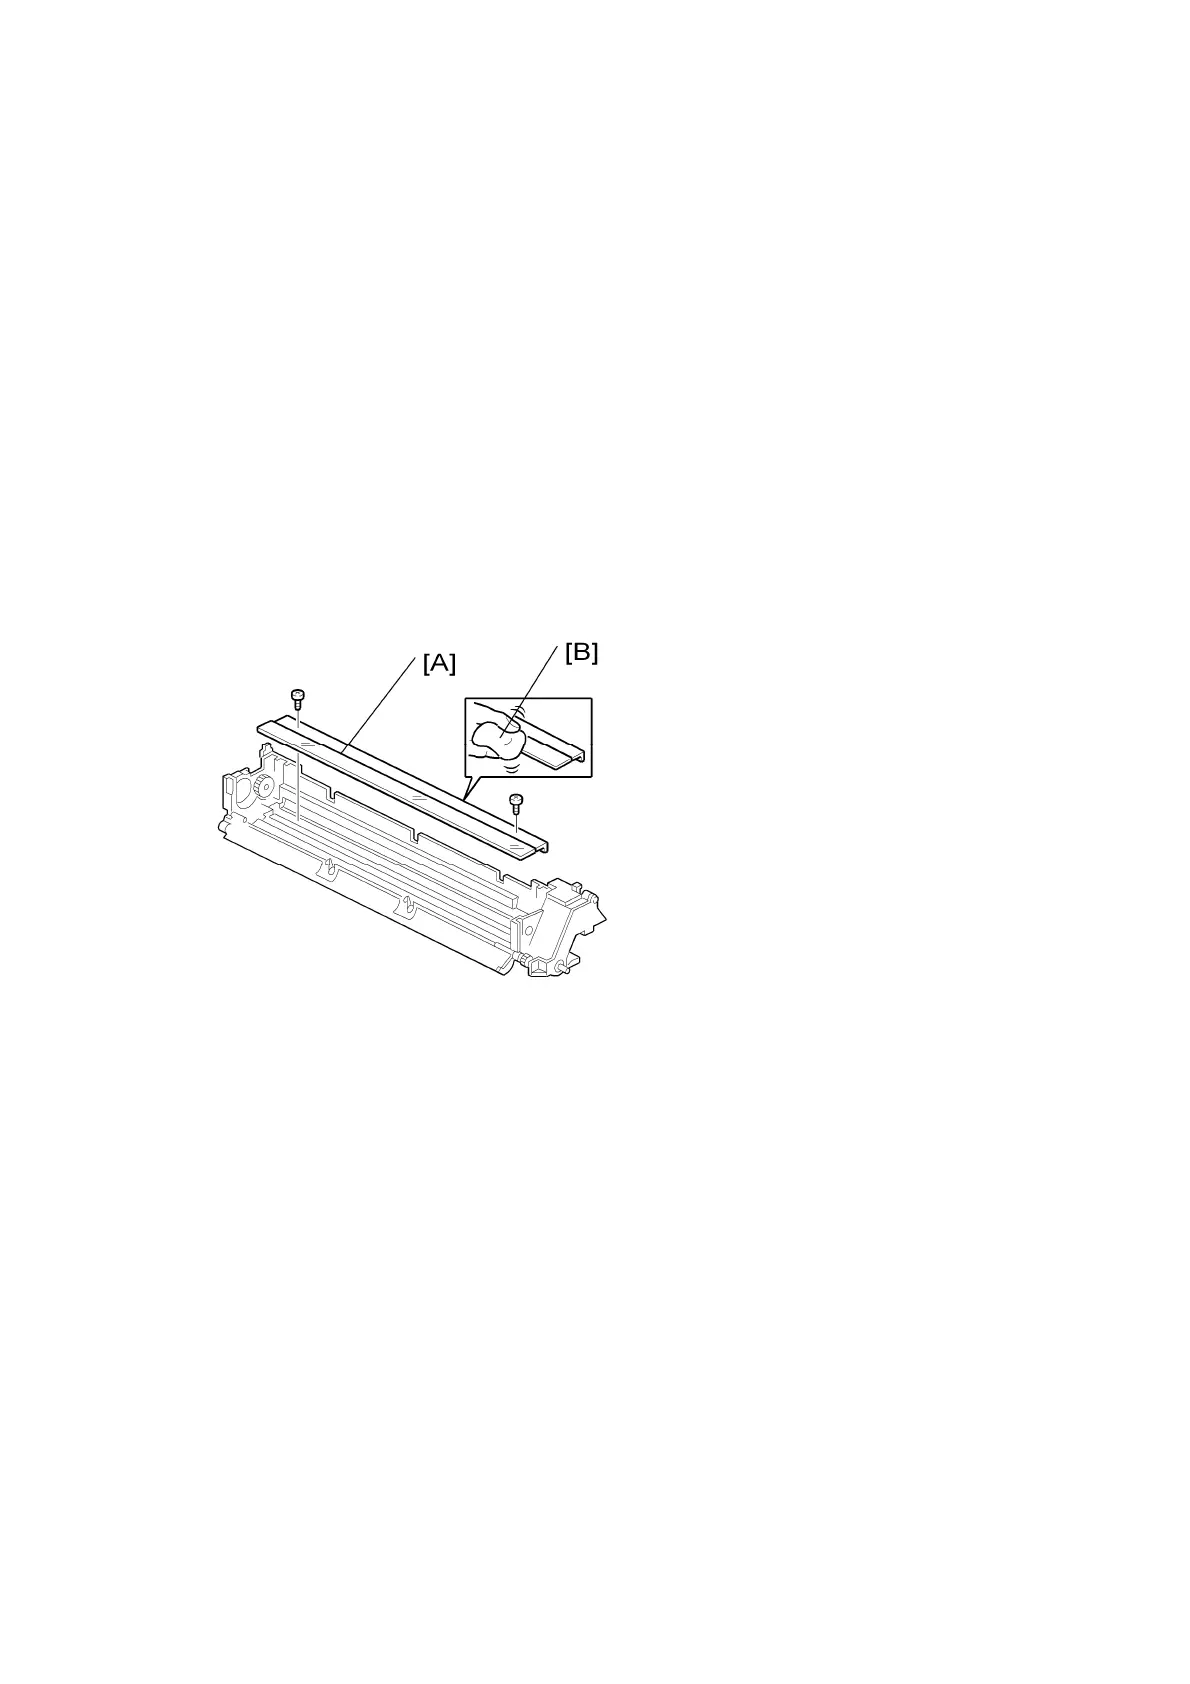
4. Cleaning blade [A] ( x2)
Reinstallation: Cleaning Blade
To prevent damage to the new cleaning blade and OPC drum, apply some toner to the
edge of the new blade [B].
Install the new blade. Remove some toner from the edge of the old blade with your
finger, and apply it evenly along the full length of the new blade.
3.5.6 DEVELOPER
1. Spread the vinyl sheet provided with the developer kit on a flat surface.
2. Separate the top and bottom parts of the PCU. (See ‘Charge Roller, Cleaning Roller’).
3. Set the bottom on the vinyl sheet.
 Loading...