Image Problems
SM 4-49 D017/D018/D019/D020
Trouble-
shooting
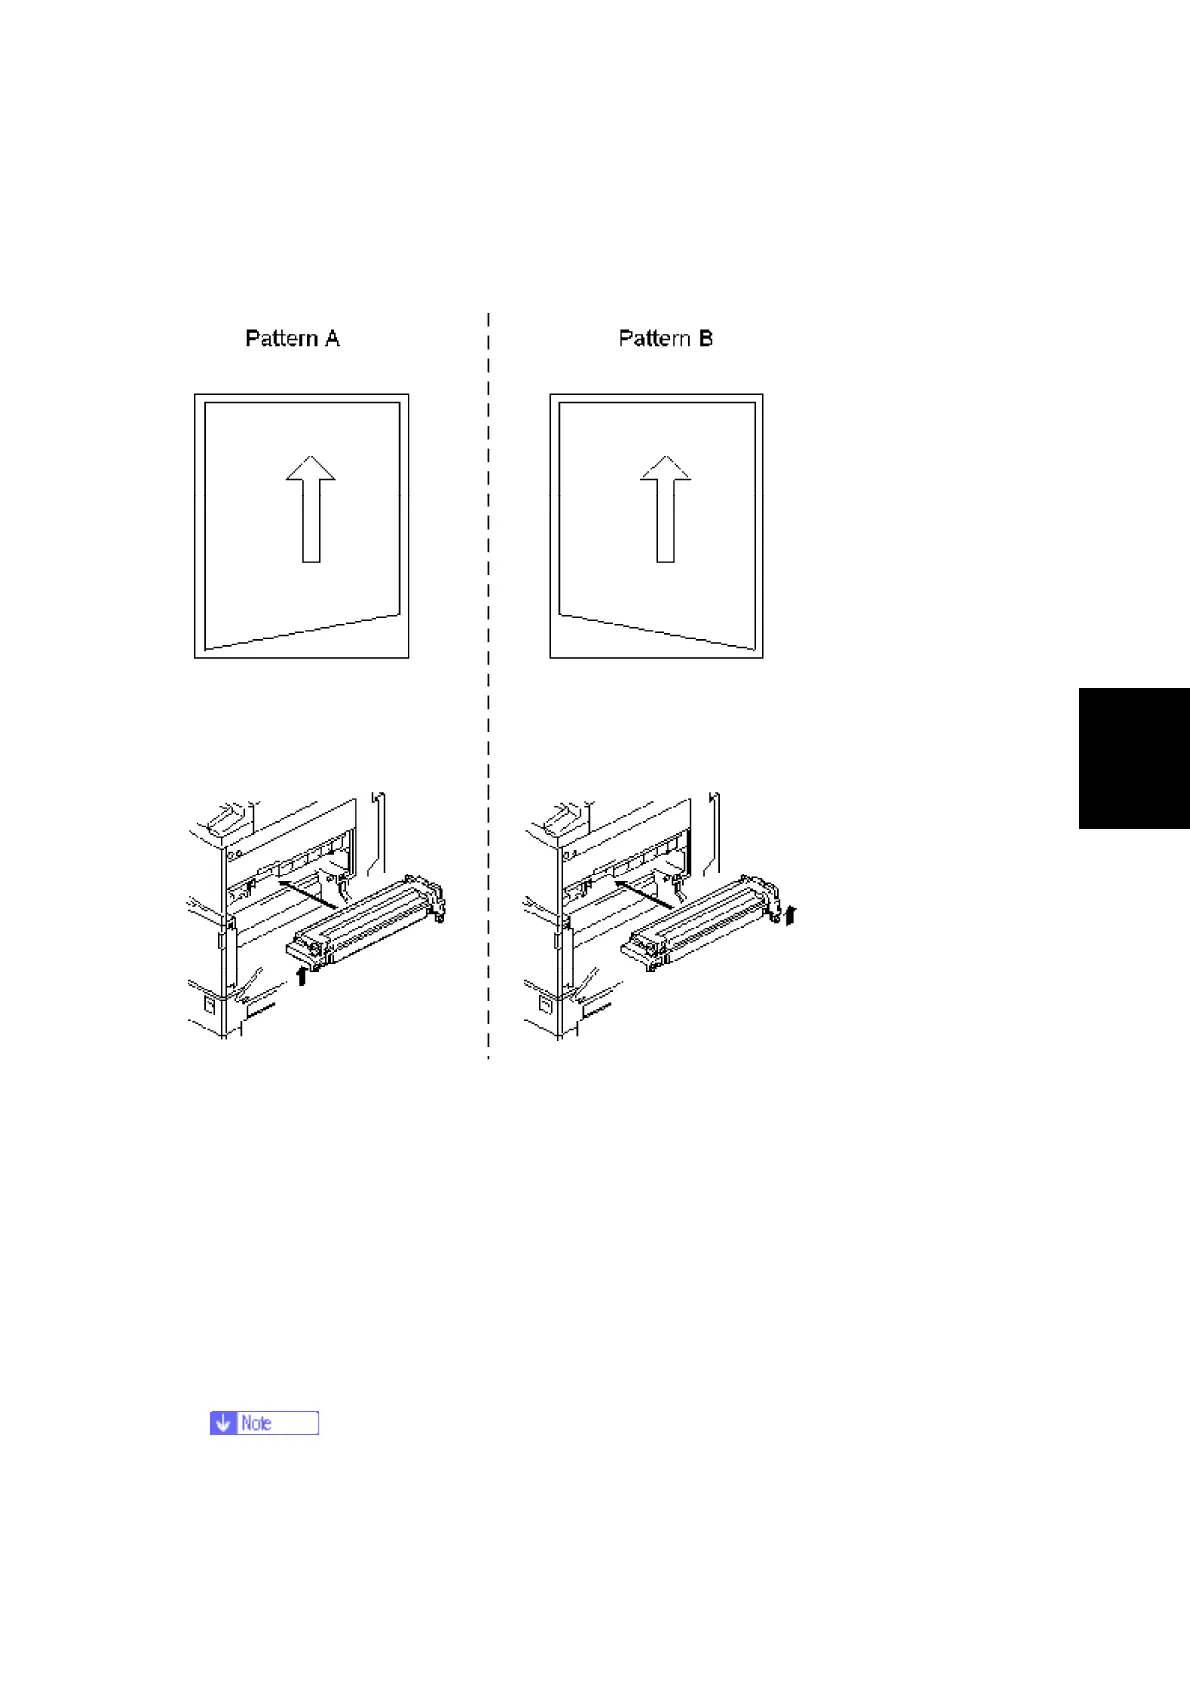
Correcting Trapezoid Images
Procedure 1: Minor Adjustment of the Fusing Unit Height (front-to-rear)
1. Print out the SP2-902 Trimming Pattern (value: 10).
2. If the image is a pattern A trapezoid:
a) Remove and reinstall the Fusing Unit.
b) Tighten the left fixing screw while you push up the unit’s left side (until it stops).
3. If the image is a pattern B trapezoid, do the same for the unit’s right side.
4. If the image is still printed out as a trapezoid, do Procedure 2 below.
Procedure 2: Minor Adjustment of the Fusing Unit Position (front-to-rear)
1. Remove the fusing unit, then add a washer (t = 0.5 to 1.6) to the front fixing screw.
This will increase the distance from the mainframe stay.
2. Check the image.
 Loading...