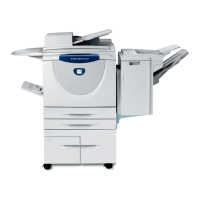
WorkCentre™ 5735/5740/5745/5755/5765/5775/5790
System Administrator Guide
224
• User must select template before pressing the Start button - with this option, no template
will be highlighted, the user must select a template before pressing the Start button.
• Automatically select the top position template - with this option, the top positioned
template will be highlighted automatically.
7. Click on the [Apply] button.
Set up Remote Template Pool Repository
The Template Pool Setup can be used to view and modify information about the remote pool.
At your Workstation:
Note: To configure this feature or these settings access the Properties tab as a System
Administrator. For details, refer to Access Internet Services as System Administrator on page 24.
1. From the Properties tab, click on the [Services] link.
2. Click on the [Workflow Scanning] link.
3. Click on the [Advanced] link.
4. Select [Template Pool Setup] in the directory tree. The Template Pool Setup page displays.
FTP Server
1. From the Temp late Pool Setup page, in the Settings area, select [FTP] from the Protocol drop-
down menu.
2. Select either the [IPv4 Address], [IPv6 Address] or [Host Name].
3. Enter FTP server details in the [IP Address: Port] or [Host Name: Port] field.
4. Type in the path to the location of the scan folder in [Document Path]. Enter the full path to the
directory, starting at the root of FTP services, for example: \(directory name)\(directory name).
5. For Login Credentials to Access the Destination, select [System] to have the system directly log
in to the file server.
6. Enter details in the [Login Name], [Password] and [Retype Password] field.
Note: A Login (account) Name and (server) Password is required for the system to access the
remote server. This is mandatory for use with a SMARTsend server. For information on creating
accounts on the SMARTsend server, refer to the FreeFlow SMARTsend Installation and
Administration Guide. Note that these accounts directly support the Login Source settings,
accessed by clicking General under Workflow Scanning in Internet Services.
7. Check the [Select to save new password] checkbox if you need to change the password for an
existing Login Name.
8. Click on the [Apply] button to accept the changes or [Undo] to return the settings to their
previous values.
9. Click on the [OK] button when you see the message “Properties have been successfully
modified”.

 Loading...


