Administrator’s Guide for SIP-T58V/T58A/T56A/CP960 IP Phones
392
Shared Contact File Customization
You can customize the shared contacts using local contact template. You can ask the distributor or Yealink FAE for
local contact template. You can also obtain the template online: http://sup-
port.yealink.com/documentFront/forwardToDocumentFrontDisplayPage.
Topics
Shared Contact File Elements and Attributes
Customizing Shared Contact File
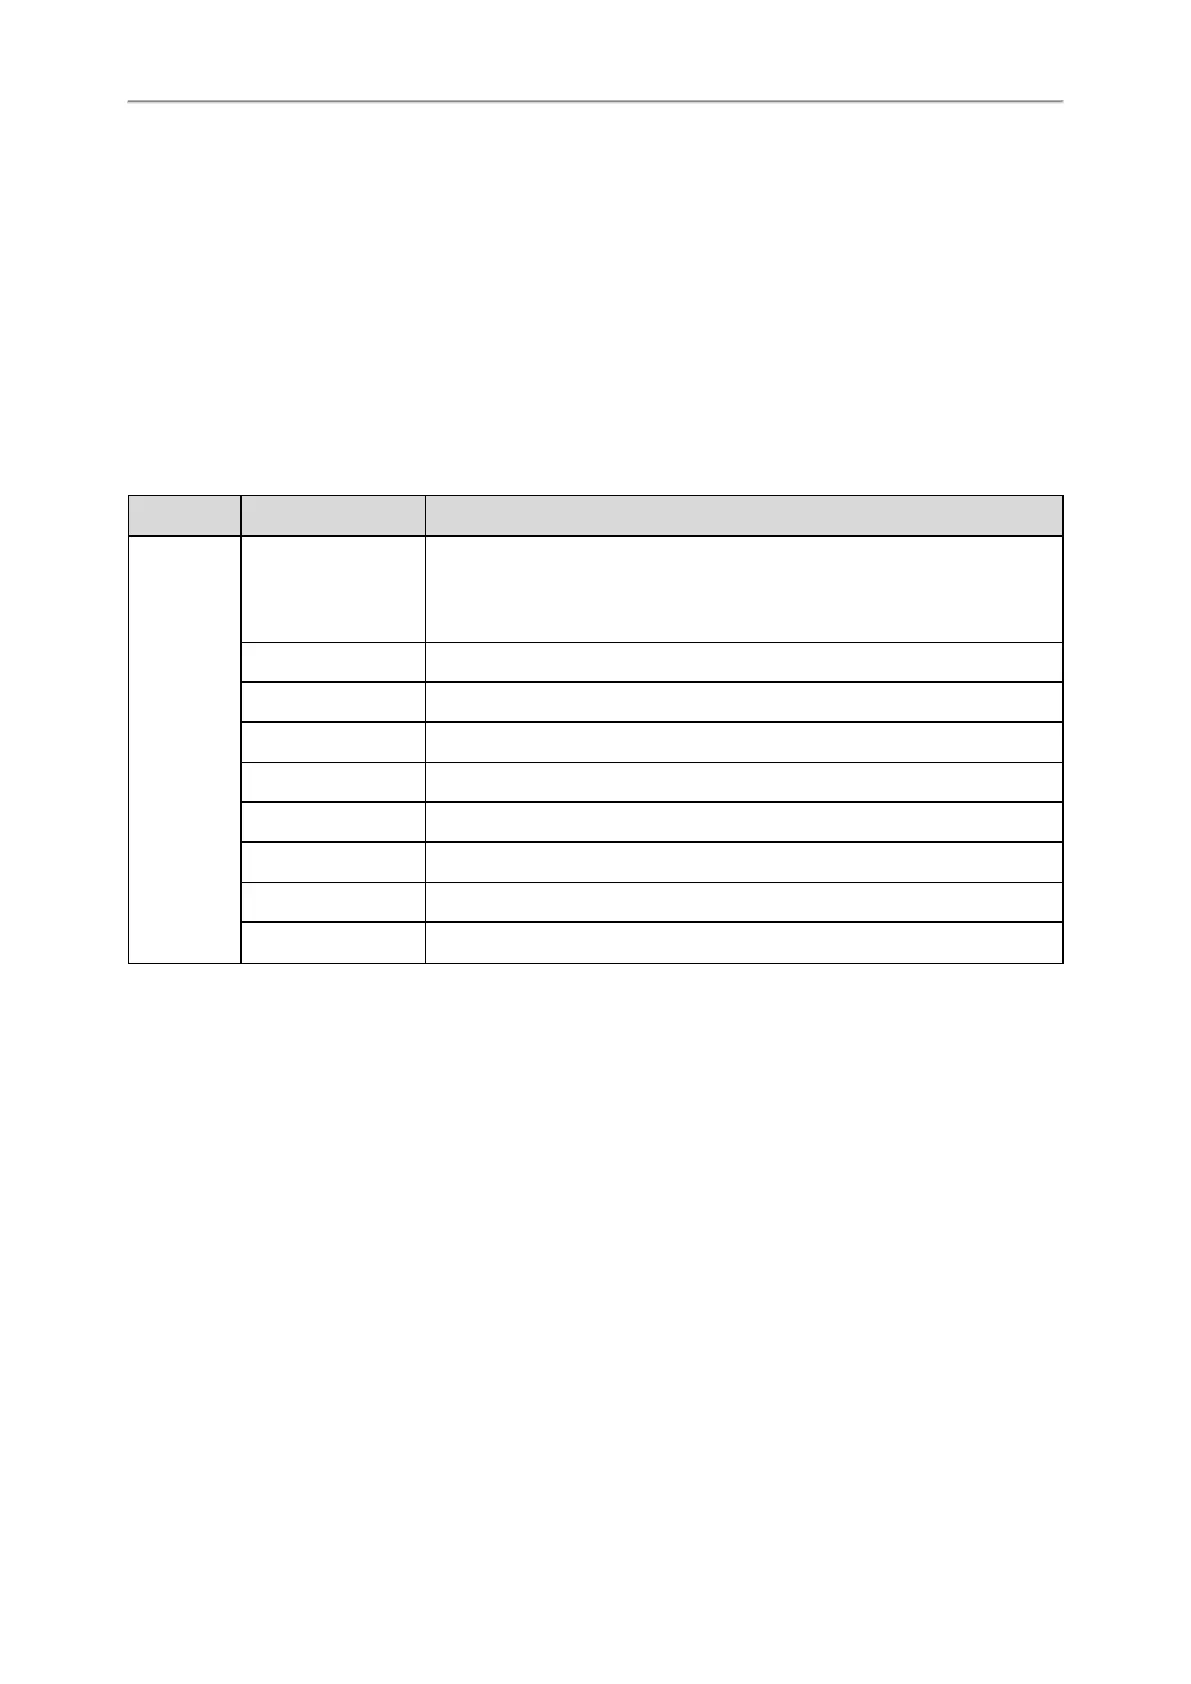
Shared Contact File Elements and Attributes
The following table lists the elements and attributes you can use to add contacts in the shared contact file. We recom-
mend you do not edit these elements and attributes.
Elements Attributes Description
Contact
display_name
Specify the contact name.
For example: Lily
Note: The contact name cannot be blank or duplicated.
office_number Specify the office number.
mobile_number Specify the mobile number.
other_number Specify the other number.
line Do not modify this attribute and value.
ring Do not modify this attribute and value.
default_photo Do not modify this attribute and value.
selected_photo Do not modify this attribute and value.
group_id_name Do not modify this attribute and value.
Customizing Shared Contact File
1. Open the shared contact file.
2. To add a contact, add <contact display_name="" office_number="" mobile_number="" other_number="" line="-1"
ring="Auto" default_photo="Default:default_contact_image.png" selected_photo="0" group_id_name="All
Contacts"/> to the file. Each starts on a new line.
3. Specify the values within double quotes.
For example:
<contact display_name="Lily"office_number="1020" mobile_number="1021" other_number="1112" line="-1" ring-
g="Auto" default_photo="Default:default_contact_image.png" selected_photo="0" group_id_name="All
Contacts"/>
<contact display_name="Tom" office_number="2020" mobile_number="2021" other_number="2112" line="-1"
ring="Auto" default_photo="Default:default_contact_image.png" selected_photo="0" group_id_name="All
Contacts"/>
4. Save the changes and place this file to the provisioning server.
 Loading...