13185L-002 Rev. A 1/24/06 110XiIIIPlus Maintenance Manual Page 4-83
Maintenance Section 4
Install the Sensor
1. Fasten the sensor in position with two screws.
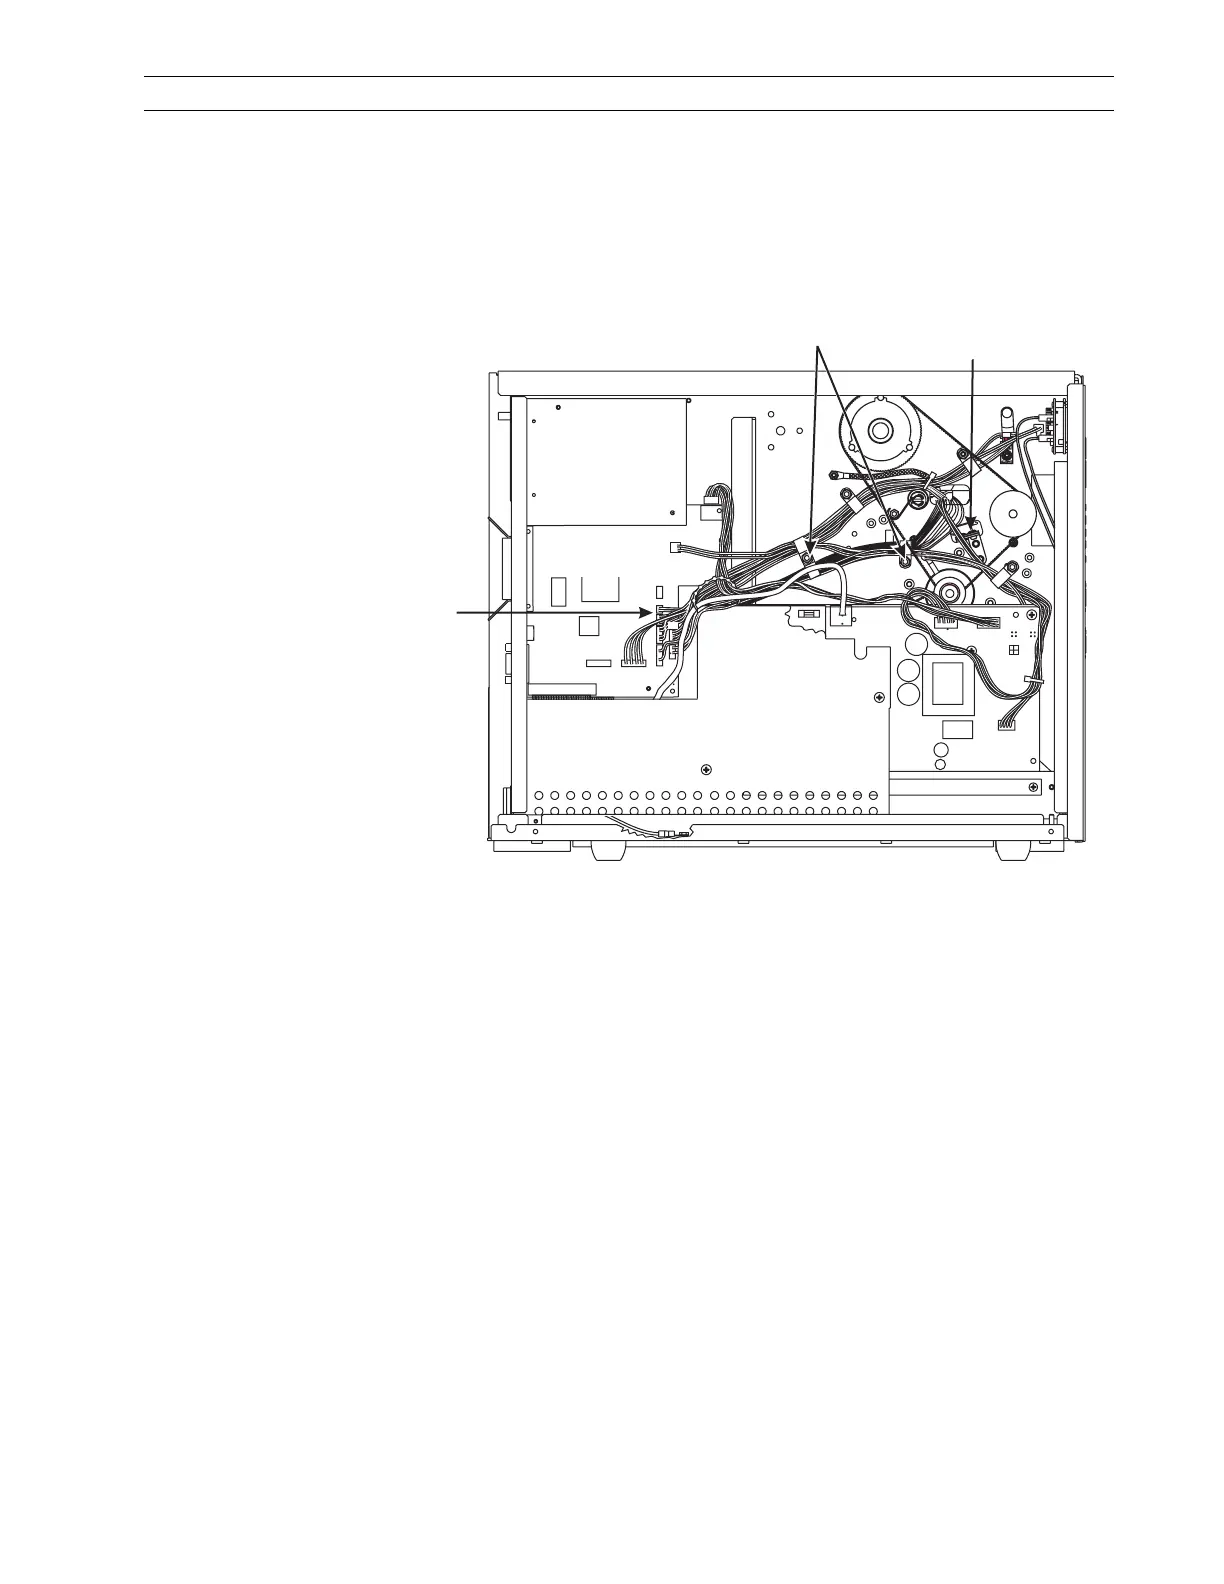
2. Refer to Figure 4-56. Route the sensor wires through the cable clamp to the main
logic board. Reinstall the nuts securing the cable clamps. Replace cable ties as
necessary.
Figure 4-56. Sensor Lead Routing and Connection
3. Reconnect sensor wires to connector P6 on the main logic board.
4. Reinstall the electronics cover.
5. Reinstall the media and ribbon.
6. Reconnect the data cables and the AC power cord.
7. Turn the printer On (l).
8. Enter Configuration Mode and select MARK for sensor type.
PCMCIA
Option Board
AC/DC
Power
PCB
P6
P25
P27
P8
P2
P1
P3
P32
P31
P19
P5
P10
Main Logic
PCB
Black Mark
Sensor
Nuts
Black Mark
Sensor
 Loading...