13185L-002 Rev. A 1/24/06 110XiIIIPlus Maintenance Manual Page 4-57
Maintenance Section 4
Remove and Install the Cutter PCB
1. Refer to RRP No. 1 on page 4-14. Turn the printer Off (O), remove the AC power
cord and data cables.
2. Refer to RRP No. 2 on page 4-16 and remove the electronics cover.
3. Refer to RRP No. 3 on page 4-17 and remove the power supply.
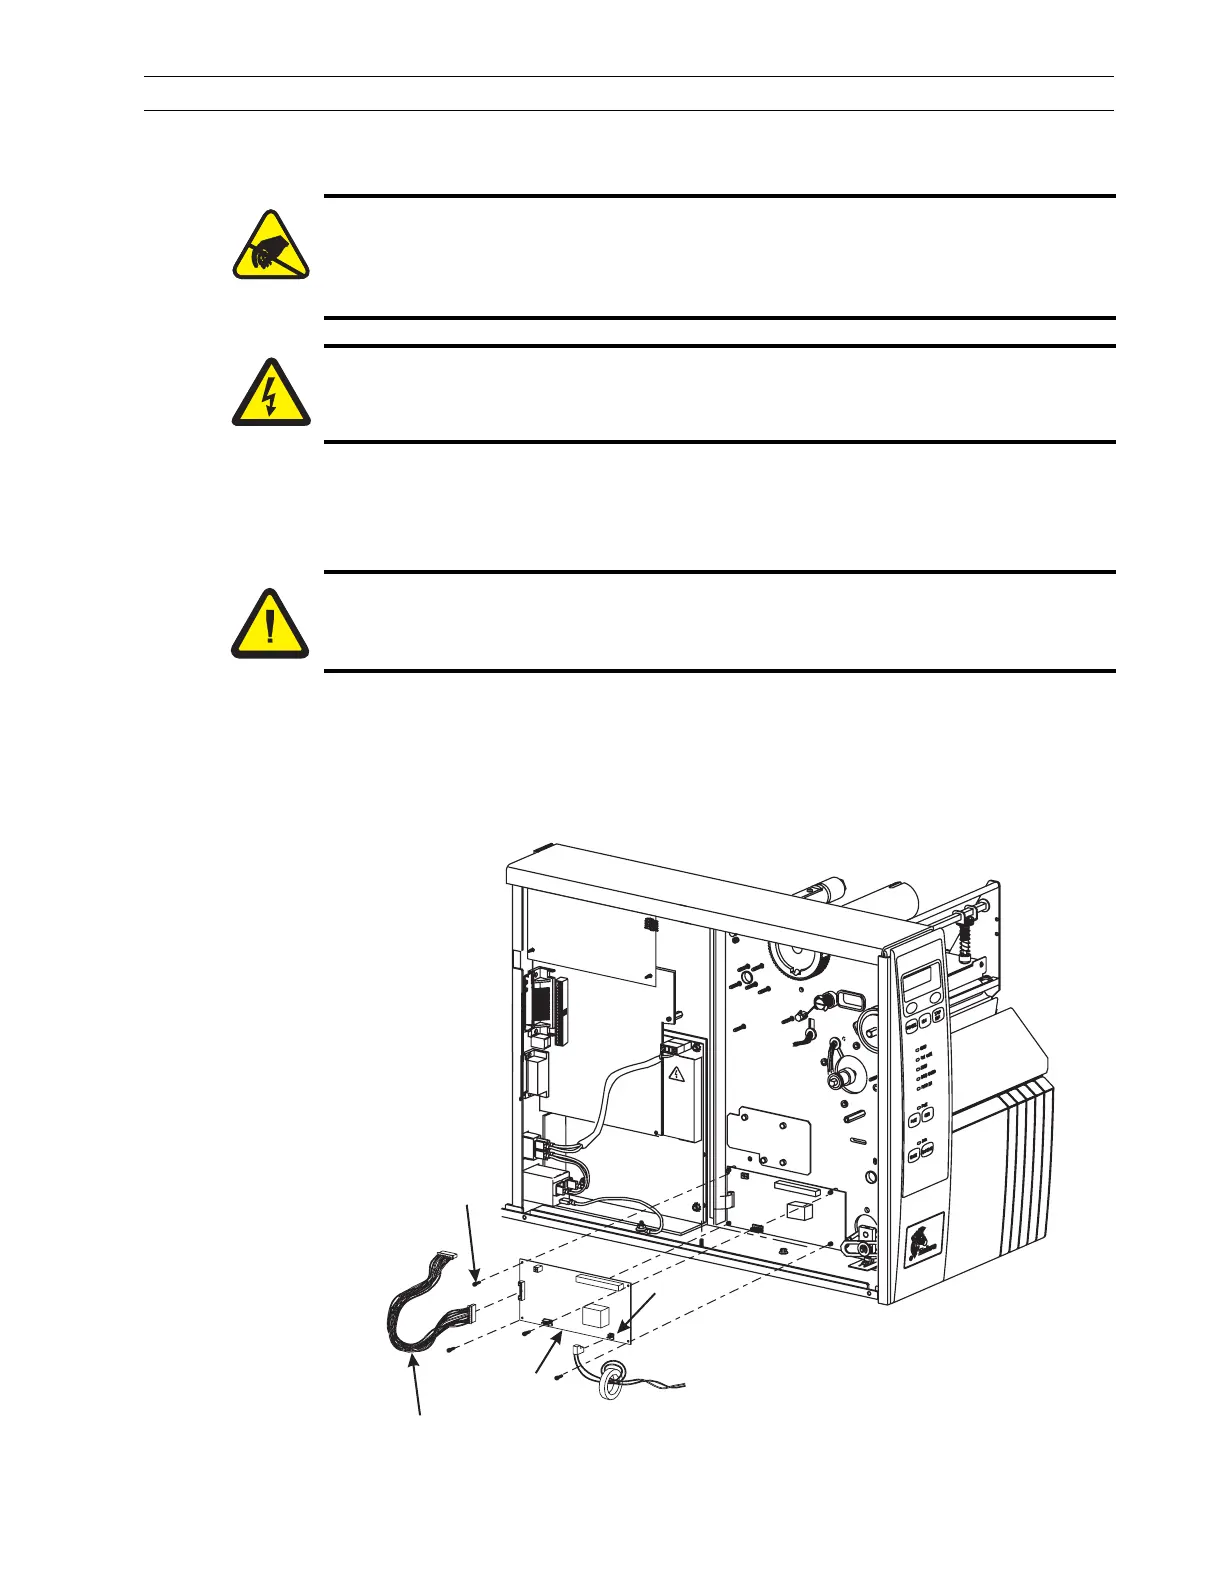
4. Refer to Figure 4-34 and disconnect all cables from the cutter PCB.
5. Refer to Figure 4-33. Remove the screws securing the cutter PCB.
6. Remove and discard the cutter PCB.
Figure 4-33. Remove and Install the Cutter PCB
Caution:
The printer electronics are susceptible to static discharge. Before proceeding, it
is highly recommended that the technician wear an antistatic wrist strap
connected to the printer chassis.
Caution:
Unless indicated otherwise, turn the printer Off (O) and disconnect the printer
from the power source before performing the following maintenance.
Caution:
This installation must be performed by a qualified service technician.
E
le
c
tric
a
l
D
a
n
g
e
r
Mounting
Screw
Cutter PCB
Ribbon Cable
J4
 Loading...