Page 4-34 110XiIIIPlus Maintenance Manual 13185L-002 Rev. A 1/24/06
Section 4 Maintenance
Printhead Position
Adjusting the printhead position moves the printhead with respect to the platen for
optimum print quality. If satisfactory print quality cannot be achieved or can be achieved
only with higher than normal darkness settings or higher than normal printhead pressure,
the printhead may not be in the proper position.
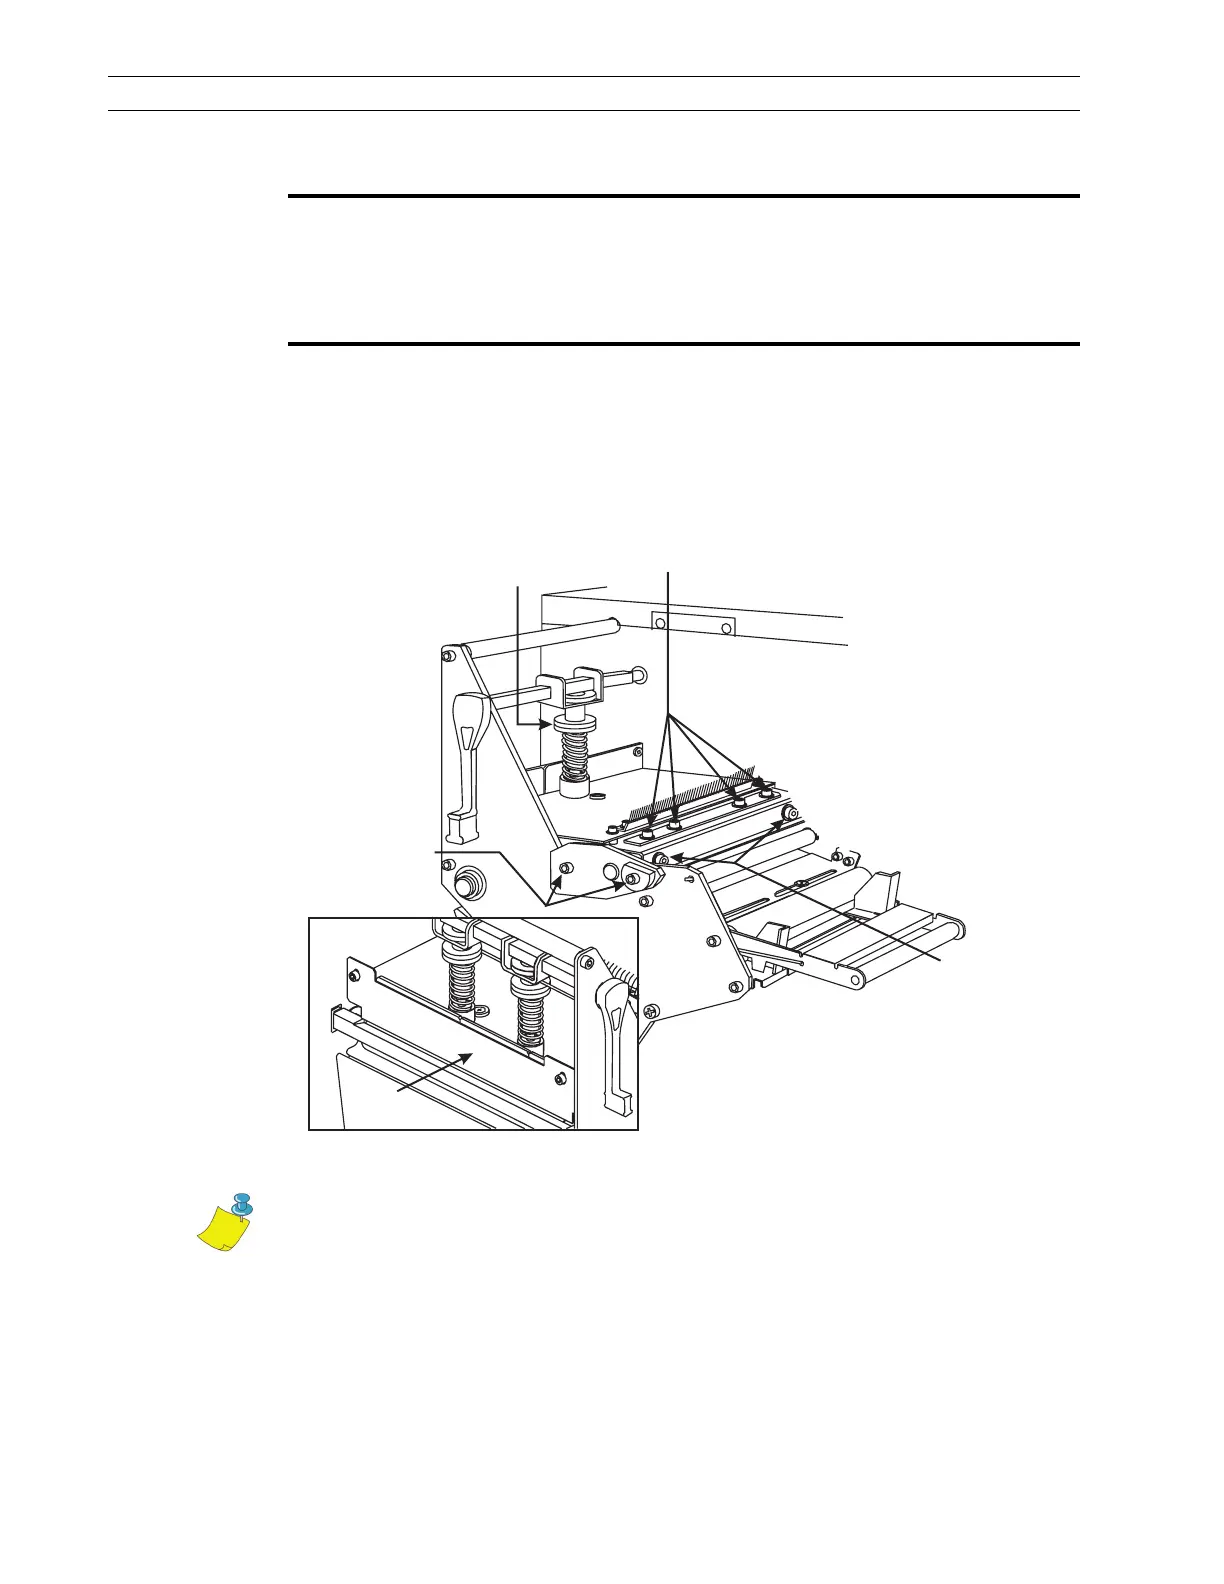
Refer to Figure 4-20 for location of adjustment screws.
Figure 4-20. Adjust the Printhead
1. Print test labels using the Pause Key Self Test.
2. Enter Configuration Mode and set the darkness to achieve as close to optimum print
quality as possible.
3. Refer to Figure 4-20. Loosen the four screws at the top rear of the print mechanism.
Caution:
Other than printhead pressure, printhead adjustments rarely need to be
performed, even after replacing the printhead. These adjustments should be
performed only by a qualified technician who has been specifically trained. Do
not perform these adjustments unless you have been trained to do so.
Note • The ribbon take-up spindle
is not shown in this illustration.
Note • Loosen four screws
before adjusting printhead.
Strip
Plate
Toggle Knurled
Adjusting Nut
Wear Plate
Adjustment
Screws
Parallelism
Adjustment
Screws
Note • The thermal elements of the printhead should be aligned just behind top
dead center of the platen roller.
 Loading...