13185L-002 Rev. A 1/24/06 110XiIIIPlus Maintenance Manual Page 4-51
Maintenance Section 4
Remove and Install the Lower Platen Pulley
1. Perform the procedures in Replace the Platen Pulley on page 4-50.
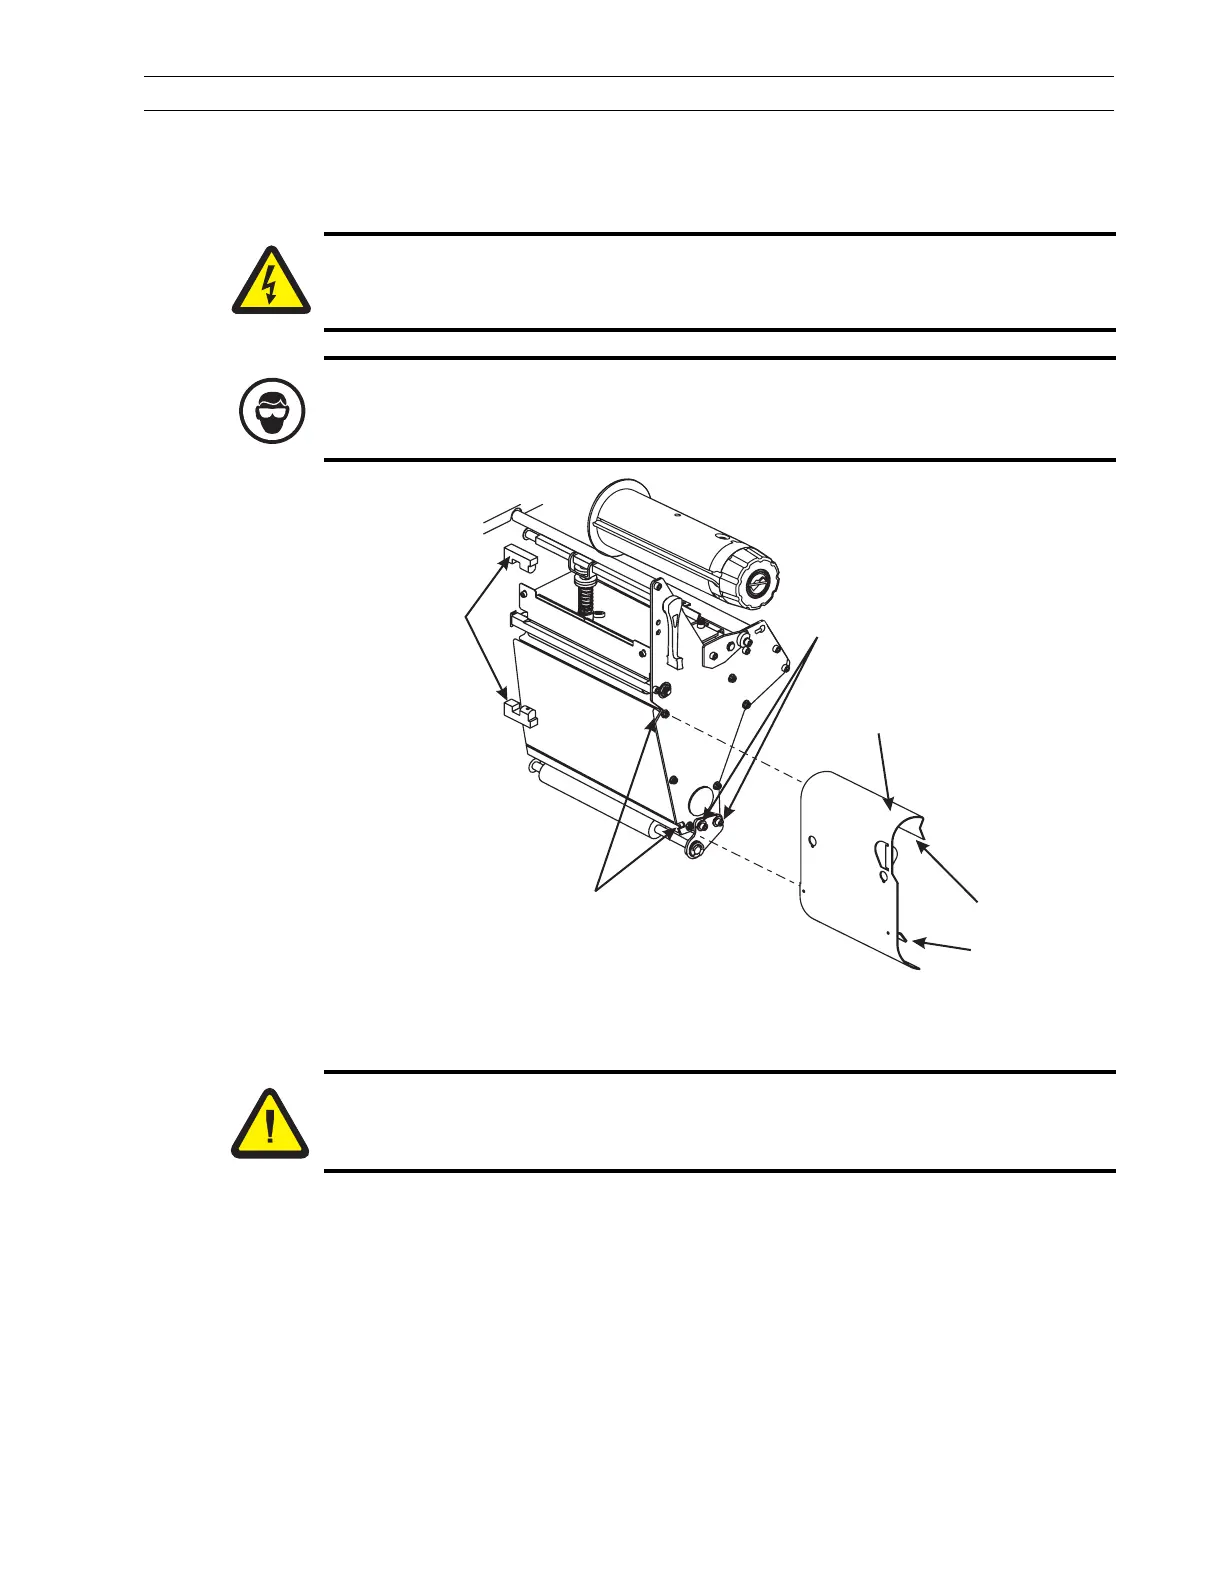
Figure 4-30. Remove and Install the Rewind Plate
2. Refer to RRP No. 2 on page 4-16 and remove the electronics cover.
3. Refer to RRP No. 3 on page 4-17 and remove the power supply.
4. Refer to RRP No. 8 on page 4-28 and remove the rewind drive belt.
5. Refer to Figure 4-30. Remove the rewind plate by sliding it off of the print
mechanism.
6. Loosen but do not remove the set crews in the rewind platen pulley.
7. Remove the rewind pulley.
8. Refer to Figure 4-31. Remove the screws securing the roller adjust plate to the print
mechanism.
Caution:
Unless indicated otherwise, turn the printer Off (O) and disconnect the printer
from the power source before performing the following maintenance.
Caution:
Wear protective eyewear when removing E-rings, C-clips, snap rings, and
springs. All of these are under tension and could fly off while being removed.
Rewind Plate
Lip
Adjustable
Hook Plate
Slot
Take-Label
Sensors
Lower Platen
Roller Adjustment
Screws
Caution:
This installation must be performed by a qualified service technician.
 Loading...