Page 4-28 110XiIIIPlus Maintenance Manual 13185L-002 Rev. A 1/24/06
Section 4 Maintenance
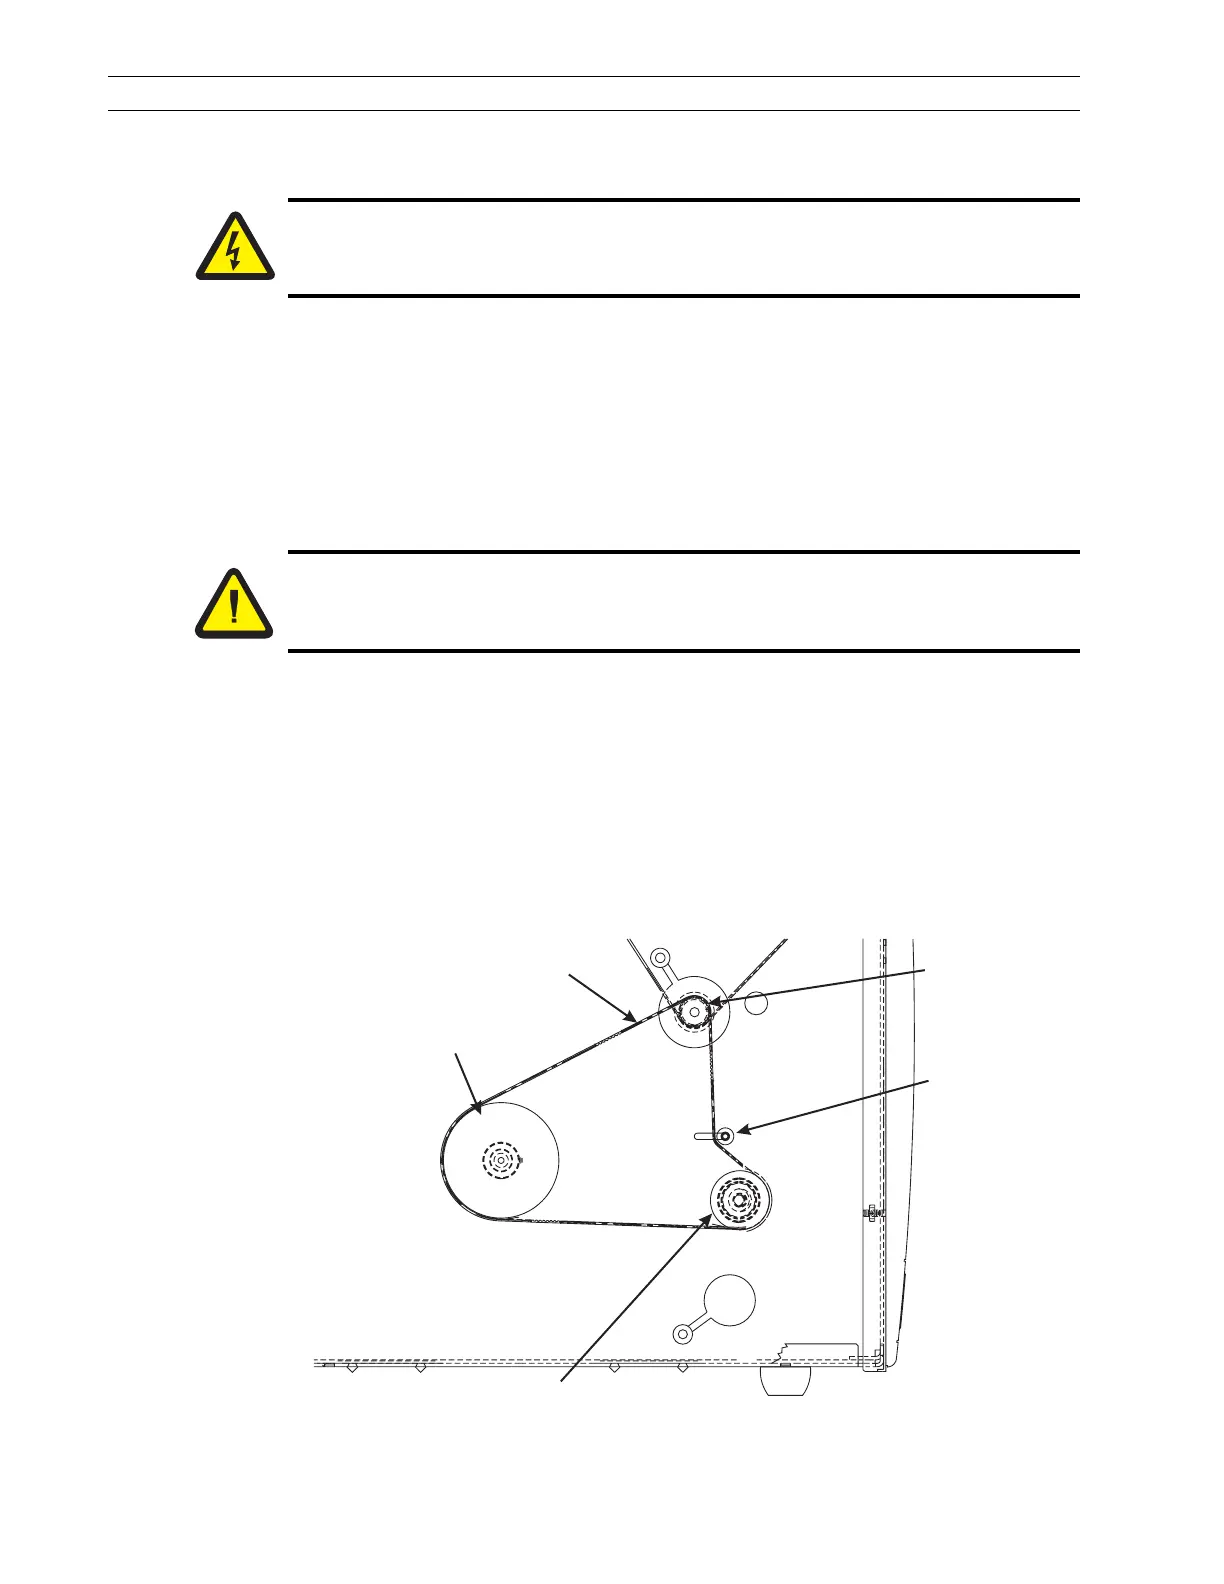
RRP No. 8: Remove and Install the Rewind Drive Belt
Remove the Rewind Drive Belt
1. Refer to RRP No. 1 on page 4-14. Turn the printer Off (O) and disconnect the AC
power cord and data cables.
2. Open the media cover.
3. Open the printhead and remove the media and ribbon. Close the printhead.
4. Refer to RRP No. 2 on page 4-16 and remove the electronics cover.
5. Refer to RRP No. 6 on page 4-25 and remove the main drive belt.
6. Refer to RRP No. 3 on page 4-17 and remove the power supply.
7. Refer to Figure 4-16 and locate the idler pulley. On the media side of the printer,
remove the plug from the lower access hole in the side plate. Loosen the idler pulley
mounting screw.
8. Slide the idler pulley assembly toward the front of the printer to relieve tension on
the rewind drive belt.
9. Remove the rewind drive belt.
Figure 4-16. Remove and Install the Rewind Drive Belt
Caution:
Unless indicated otherwise, turn the printer Off (O) and disconnect the printer
from the power source before performing the following maintenance.
Caution:
This installation must be performed by a qualified service technician.
Idler
Gear
Rewind Drive Belt
Rewind Platen Pulley
Media Take-Up
Pulley
Stepper Motor
Pulley
 Loading...