Page 4-100 110XiIIIPlus Maintenance Manual 13185L-002 Rev. A 1/24/06
Section 4 Maintenance
Install External PrintServer II
Hardware Description
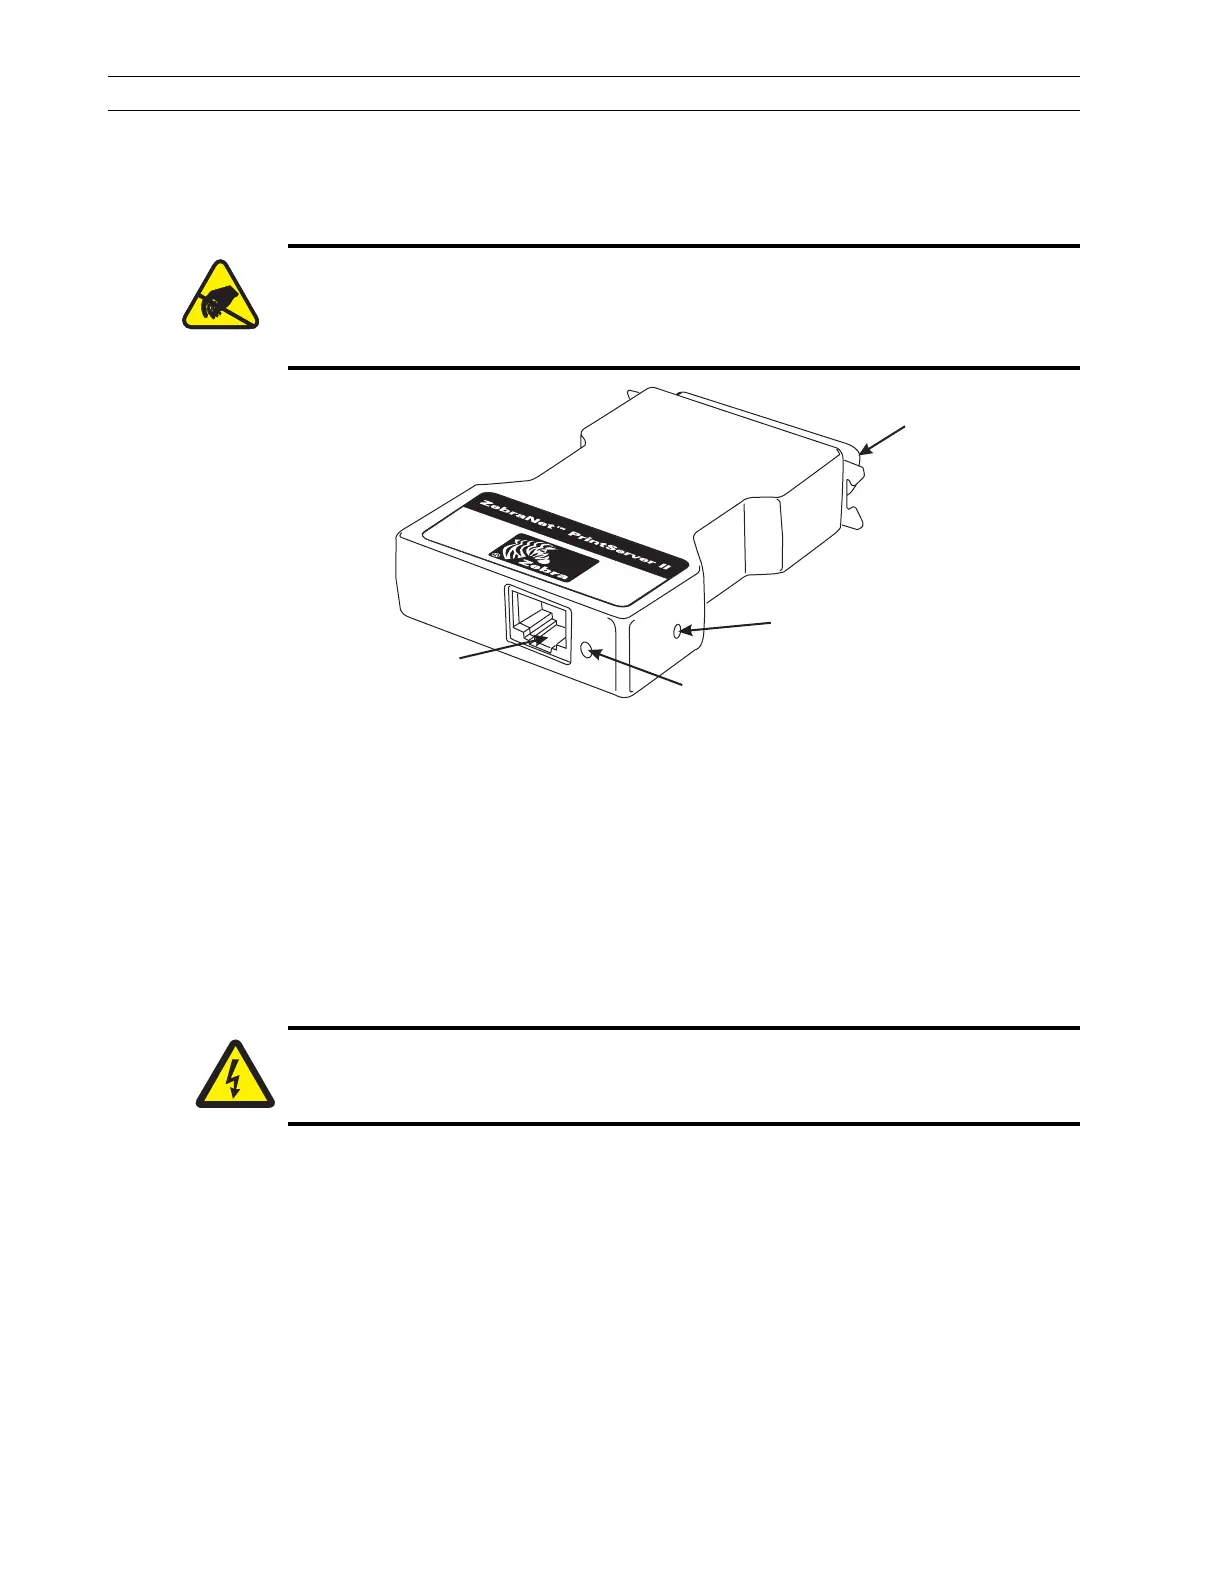
Figure 4-69. External PrintServer II
Test Button: This generates a detailed PrintServer II configuration label.
Status Indicator: A bicolored indicator displays the state of the PrintServer II.
Ethernet Connection: Connection for a 10Base-T cable. Connecting the PrintServer II
does not interrupt network operation.
Parallel Connector: The external PrintServer II is powered by the printer; no additional
power source is required.
Install the External ZebraNet PrintServer II
1. Turn the printer Off (O). Install the PrintServer II device directly into the parallel
port on the printer and secure with the wire locks.
2. Insert an active 10Base-T cable into the Ethernet connector on the back of the
PrintServer II device.
3. Turn the printer power On (l). The status indicator blinks orange during the
Power-On Self Test phase and changes to green when stabilized.
4. Press the test button on the back of the PrintServer II to print a PrintServer II
configuration label.
Caution:
The printer electronics are susceptible to static discharge. Before proceeding, it
is highly recommended the technician wear an antistatic wrist strap connected
to the printer chassis.
Parallel
Connector
Test
Button
Status
Indicator
Ethernet
Connector
Caution:
Unless indicated otherwise, turn the printer Off (O) and disconnect the printer
from the power source before performing the following maintenance.
 Loading...