Page 4-44 110XiIIIPlus Maintenance Manual 13185L-002 Rev. A 1/24/06
Section 4 Maintenance
Replace the Platen Roller
Remove the Upper Platen Roller
1. Refer to RRP No. 1 on page 4-14. Turn the printer Off (O), remove the AC power
cord and data cables.
2. Open the media cover and printhead; remove media and ribbon. Close the printhead.
3. Refer to RRP No. 2 on page 4-16 and remove the electronics cover.
4. Refer to RRP No. 6 on page 4-25 and remove the main drive belt.
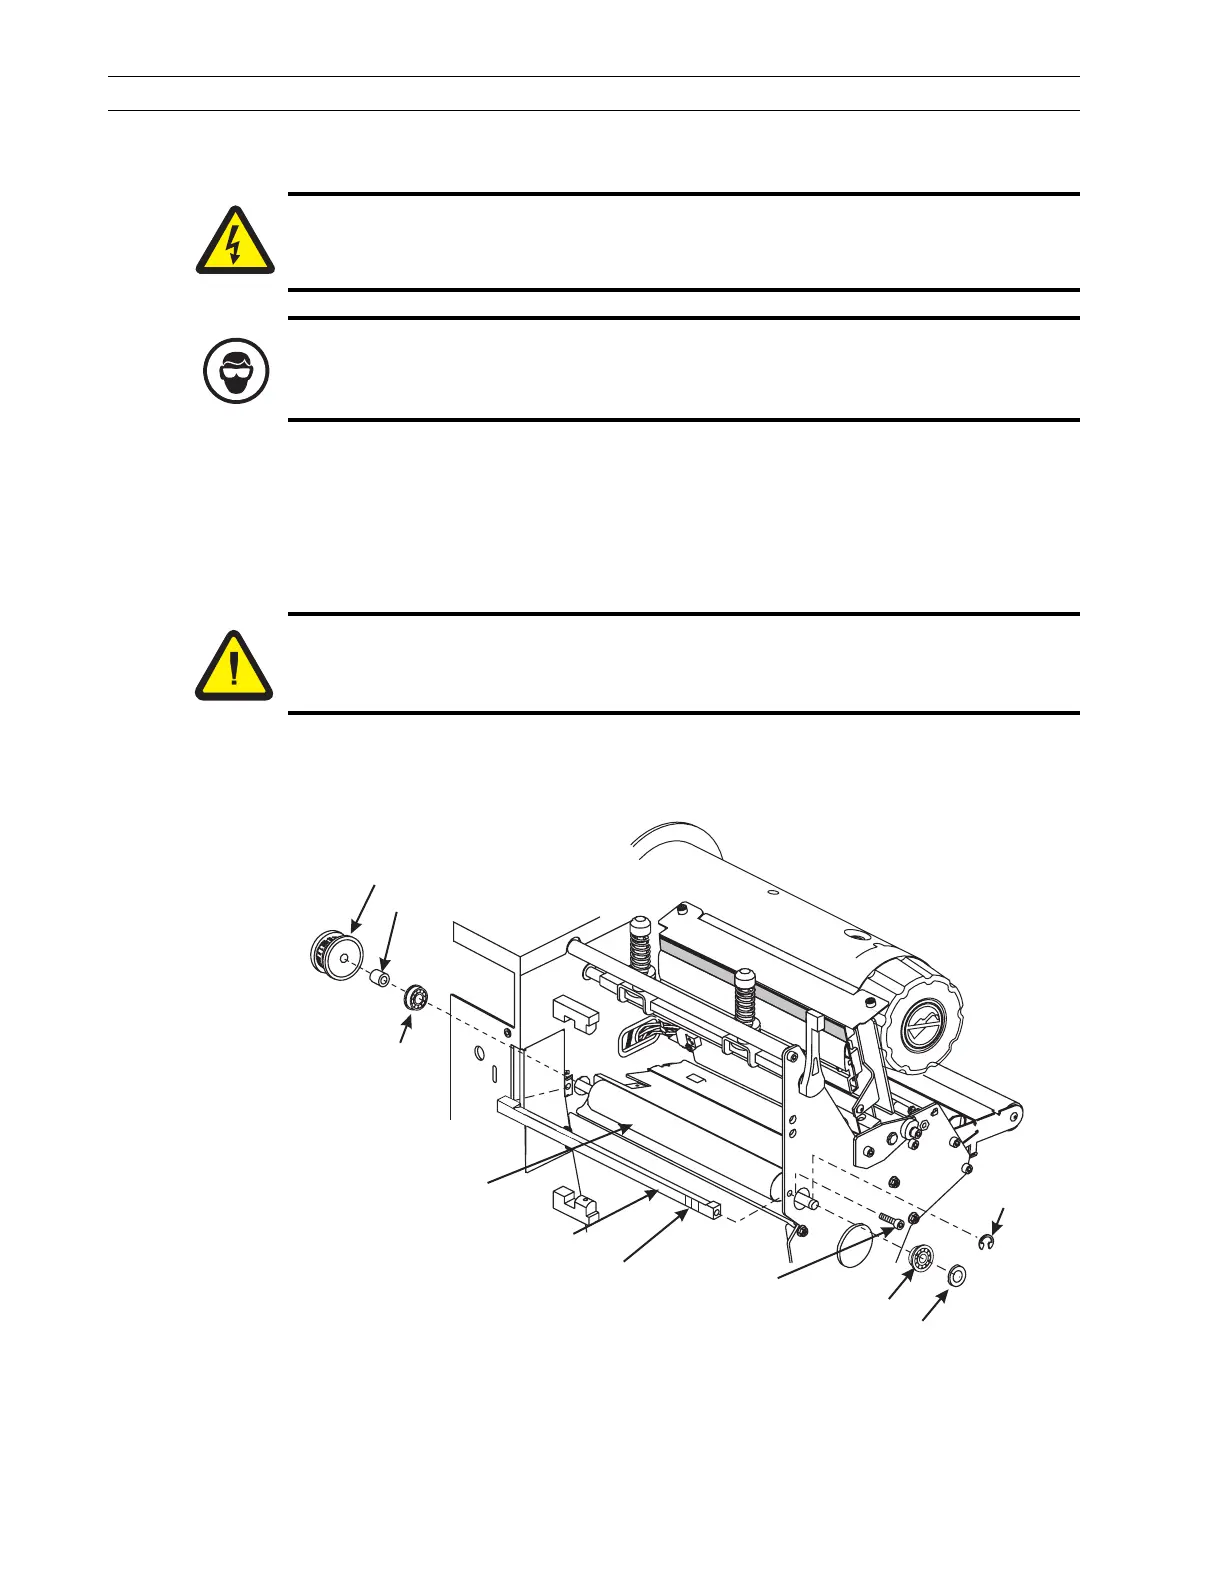
5. Refer to Figure 4-26 and loosen but do not remove the set screws in the platen
pulley.
Figure 4-26. Platen Roller Removal
6. Remove the platen pulley and spacer.
7. When facing the front of the printer, slide the platen roller to the right. Remove the
C-clips, washer, and right bearing from the platen roller.
Caution:
Unless indicated otherwise, turn the printer Off (O) and disconnect the printer
from the power source before performing the following maintenance.
Caution:
Wear protective eyewear when removing E-rings, C-clips, snap rings, and
springs. All of these are under tension and could fly off while being removed.
Caution:
This installation must be performed by a qualified service technician.
C-Clip
Peel/Tear-Off Bar
Peel/Tear-Off Bar
Mounting Screw
Platen Roller
Platen Pulley
Mark with label/tape
top and right side.
Bearing
Bearing
Washer
Large Spacer
 Loading...