EasyManua.ls Logo

Yamaha YZF-R1(B) 2012 User Manual

Yamaha YZF-R1(B) 2012
556 pages
To Next Page IconTo Next Page
To Previous Page IconTo Previous Page
Page #172 background imageLoading...
Page #172 background image
GENERAL CHASSIS
4-13
EAS14B1045
INSTALLING THE AIR CHAMBER COVERS
1. Install:
Air chamber cover “1”
TIP
Insert the air chamber cover tab “a” downward
into the hole “b” of the air chamber “2”.
EAS14B1046
REMOVING THE INTAKE AIR DUCT COV-
ERS
1. Remove:
Intake air duct cover “1”
TIP
Press the upper surface of the intake air duct
cover tab “a” to inside of the vehicle and
remove the intake air duct cover upward.
EAS14B1047
INSTALLING THE INTAKE AIR DUCT COV-
ERS
1. Install:
Intake air duct cover “1”
TIP
Align the intake air duct cover tabs “a” and the
tab “b” of the front cowling “2” as shown in the
illustration and install.
EAS14B1048
INSTALLING THE AIR INTAKE DUCTS
1. Install:
Rear air intake duct “1”
(to front air intake duct “2”)
TIP
Insert the rear air intake duct tabs “a” into the
front air intake duct grooves “b”.
EAS14B1013
INSTALLING THE REAR VIEW MIRRORS
1. Install:
Rear view mirror “1”
(along with the mirror base “2”)
TIP
Install the mirror base to the rear view mirror
first, then install the rear view mirror to the front
cowling.
Rear view mirror nut
7 Nm (0.7 m·kgf, 5.1 ft·lbf)

Table of Contents

Question and Answer IconNeed help?

Do you have a question about the Yamaha YZF-R1(B) 2012 and is the answer not in the manual?

Yamaha YZF-R1(B) 2012 Specifications

General IconGeneral
BrandYamaha
ModelYZF-R1(B) 2012
CategoryMotorcycle
LanguageEnglish

Summary

How to Use This Manual

Symbols

General Information

Identification

Vehicle Identification Number (VIN) and Model Label locations.

Features

Outlines FI system, YCC-T, YCC-I, and TCS features.

YCC-T and YCC-I Systems

Explains Yamaha Chip Controlled Throttle and Intake systems.

TCS (Traction Control System) Outline

Details the Traction Control System (TCS) functionality and layout.

Important Information

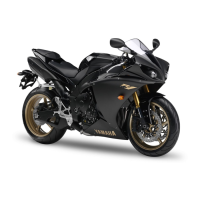
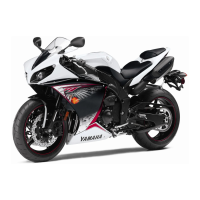
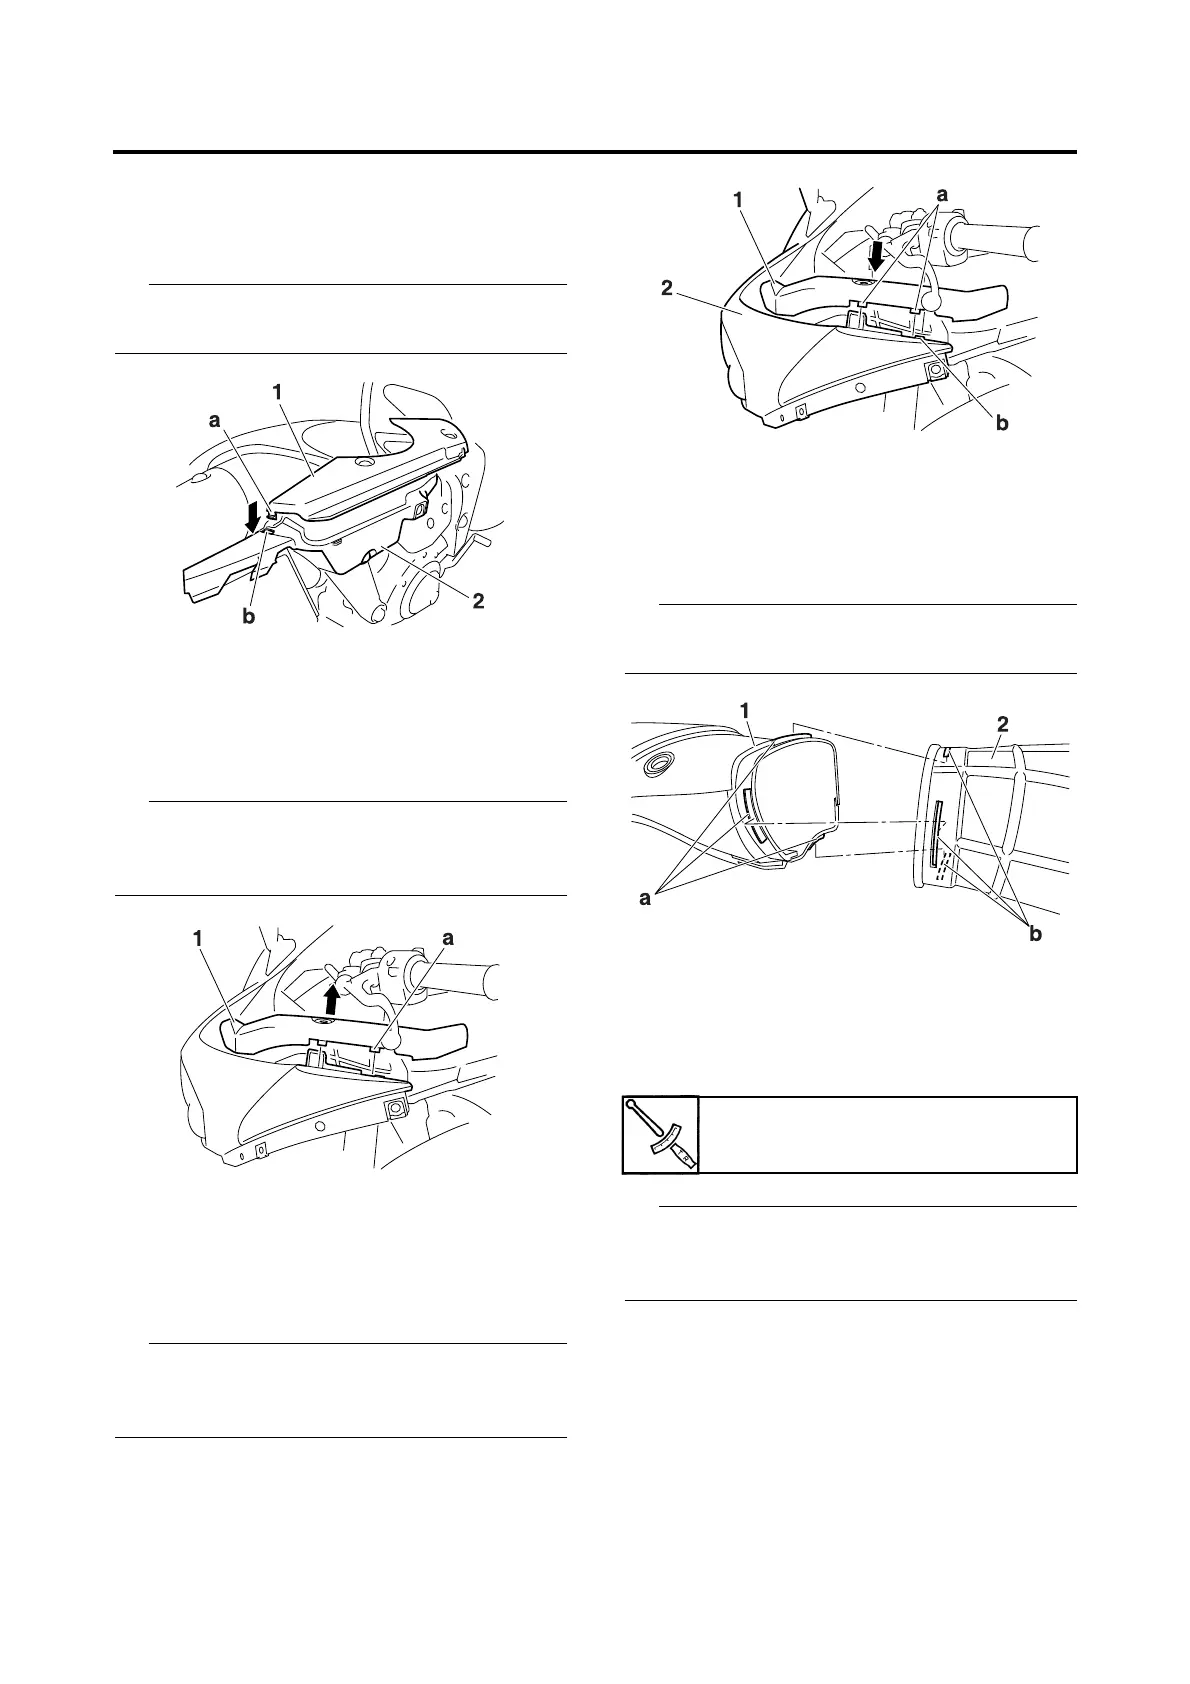
Covers preparation for disassembly, replacement parts, and specific component handling.

Handling the Electronic Parts

Precautions for handling electronic parts to avoid damage from static electricity or impact.

Special Tools

Lists specific tools, part numbers, and reference pages for tune-up and assembly.

Related product manuals