CRANKCASE
5-72
EAS25550
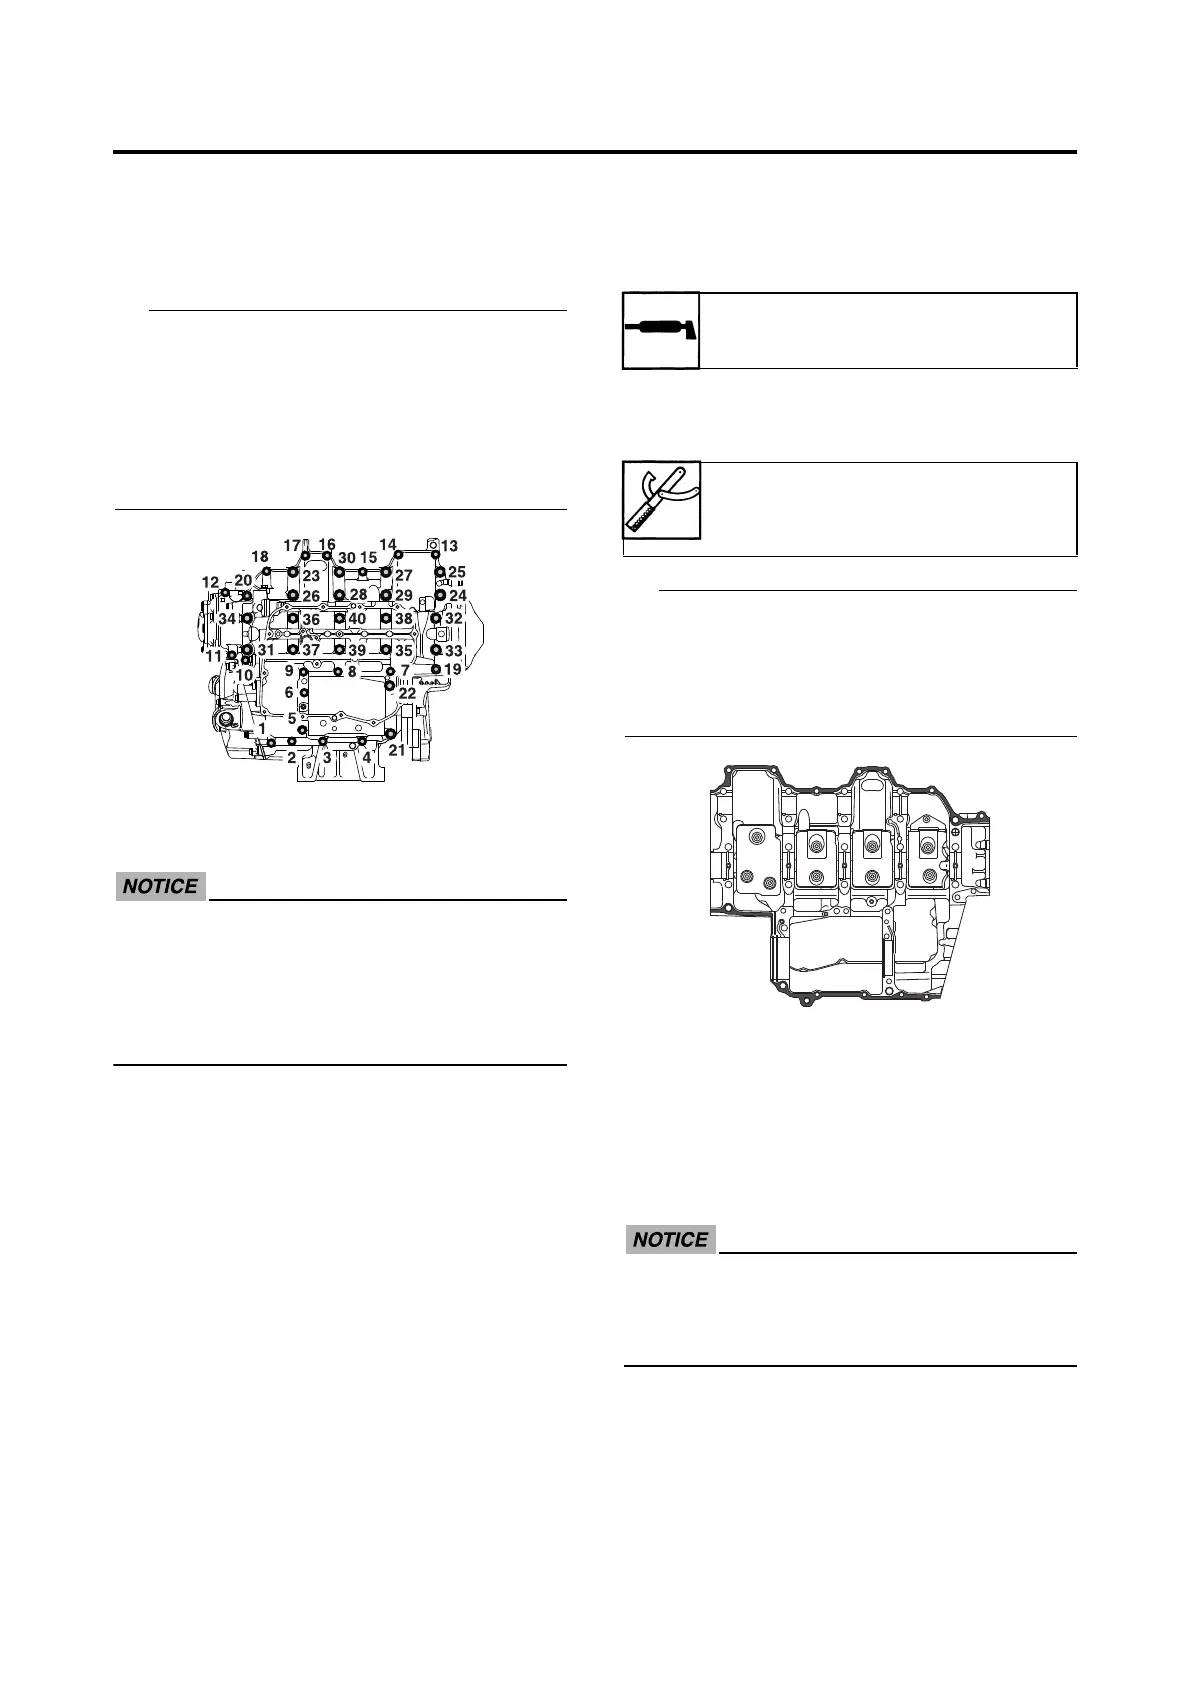
DISASSEMBLING THE CRANKCASE
1. Place the engine upside down.
2. Remove:
• Crankcase bolts
• Loosen each bolt 1/4 of a turn at a time, in
stages and in a crisscross pattern. After all of
the bolts are fully loosened, remove them.
• Loosen the bolts in increasing numerical
order (refer to the numbers in the illustration).
• The numbers embossed on the crankcase
indicate the crankcase tightening sequence.
3. Remove:
• Lower crankcase
ECA13900
Tap on one side of the crankcase with a
soft-face hammer. Tap only on reinforced
portions of the crankcase, not on the
crankcase mating surfaces. Work slowly
and carefully and make sure the crankcase
halves separate evenly.
4. Remove:
• Dowel pins
EAS25580
CHECKING THE CRANKCASE
1. Thoroughly wash the crankcase halves in a
mild solvent.
2. Thoroughly clean all the gasket surfaces
and crankcase mating surfaces.
3. Check:
•Crankcase
Cracks/damage → Replace.
• Oil delivery passages
Obstruction → Blow out with compressed
air.
EAS25650
ASSEMBLING THE CRANKCASE
1. Lubricate:
• Crankshaft journal bearings
(with the recommended lubricant)
2. Apply:
• Sealant
(onto the crankcase mating surfaces)
Do not allow any sealant to come into contact
with the oil gallery or crankshaft journal bear-
ings. Do not apply sealant to within 2–3 mm
(0.08–0.12 in) of the crankshaft journal bear-
ings.
3. Install:
• Dowel pins
4. Set the shift drum assembly and transmis-
sion gears in the neutral position.
5. Install:
• Lower crankcase “1”
(onto the upper crankcase “2”)
ECA13980
Before tightening the crankcase bolts,
make sure the transmission gears shift cor-
rectly when the shift drum assembly is
turned by hand.
Recommended lubricant
Engine oil
Yamaha bond No.1215
(Three Bond No.1215®)
90890-85505

 Loading...