FRONT FORK
4-66
EAS23010
CHECKING THE FRONT FORK LEGS
The following procedure applies to both of the
front fork legs.
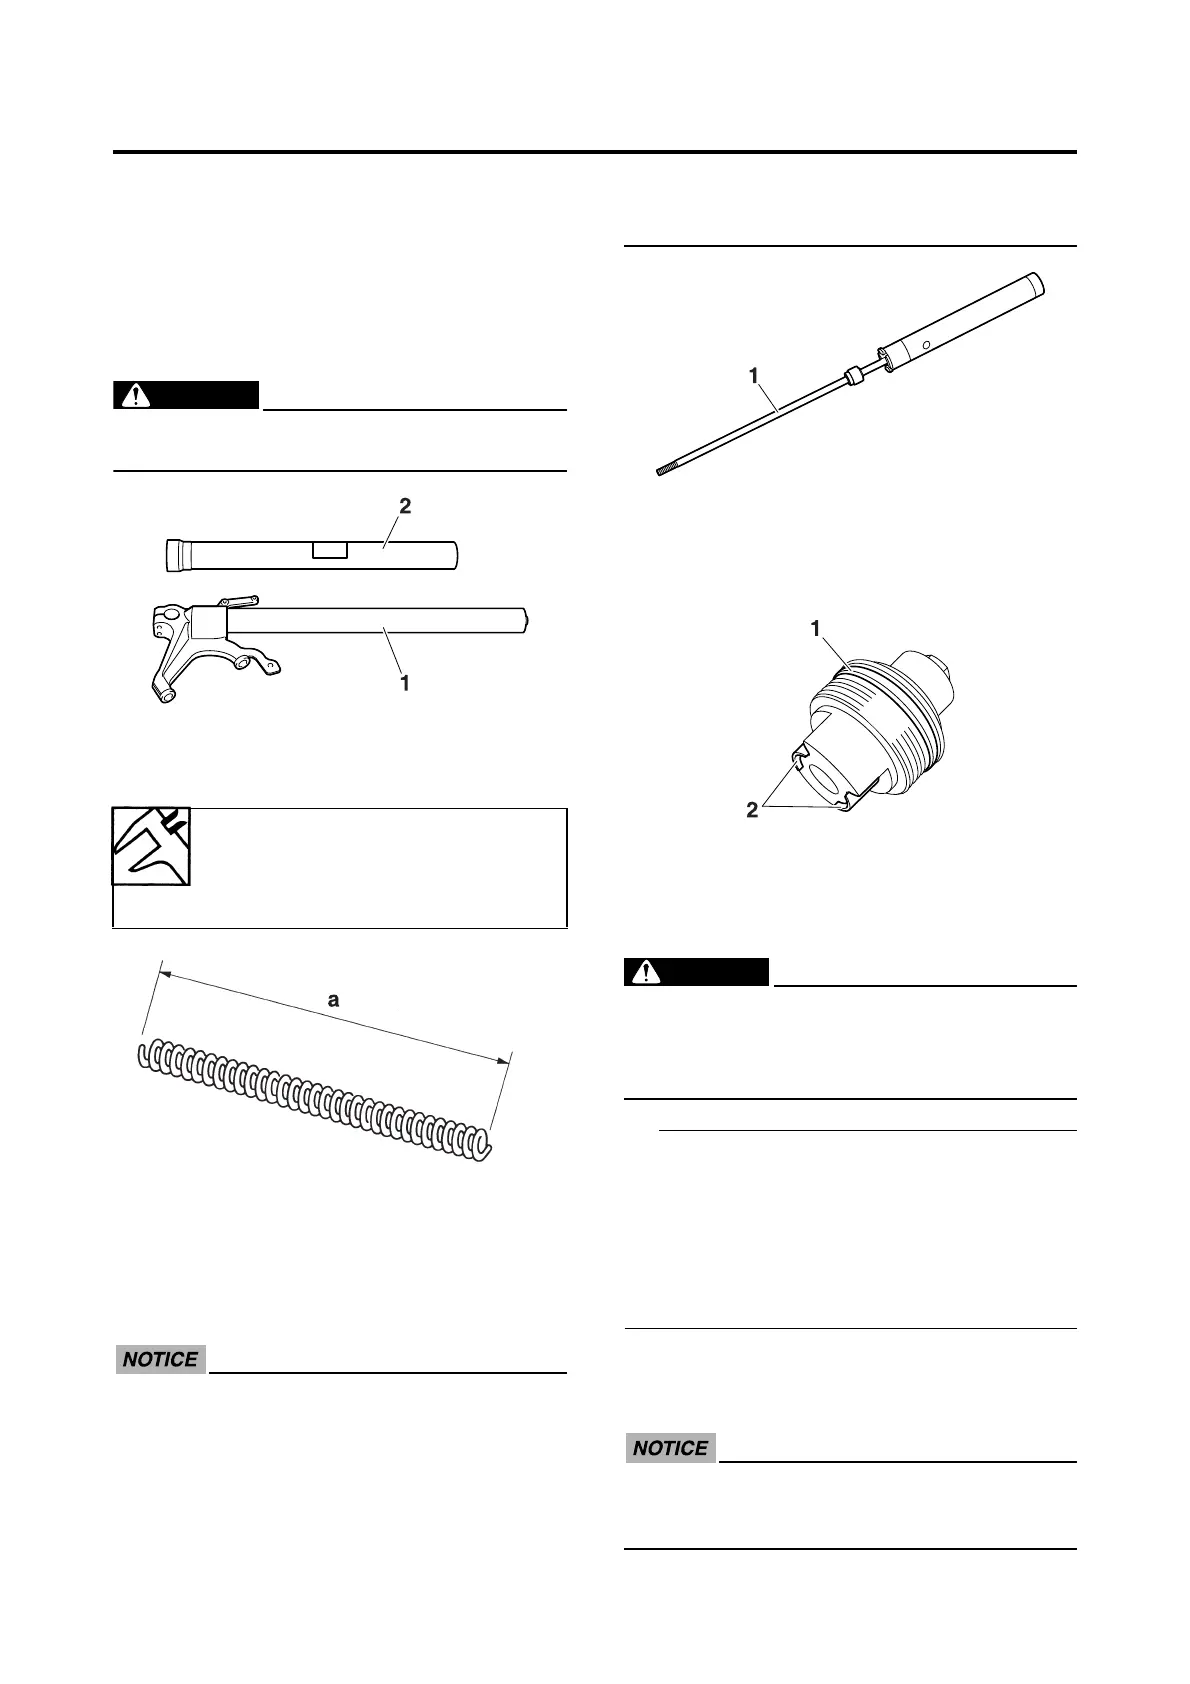
1. Check:
• Inner tube “1”
• Outer tube “2”
Bends/damage/scratches → Replace.
EWA13650
Do not attempt to straighten a bent inner
tube as this may dangerously weaken it.
2. Measure:
• Spring free length “a”
Out of specification → Replace.
3. Check:
• Damper rod “1”
Damage/wear → Replace.
Obstruction → Blow out all of the oil pas-
sages with compressed air.
ECA14200
• The front fork leg has a built-in damper
adjusting rod and a very sophisticated
internal construction, which are particu-
larly sensitive to foreign material.
• When disassembling and assembling the
front fork leg, do not allow any foreign
material to enter the front fork.
4. Check:
• Cap bolt “1”
• Cap bolt collar projections “2”
Cracks/damage → Replace.
EAS14B1008
ASSEMBLING THE FRONT FORK LEGS
The following procedure applies to both of the
front fork legs.
EWA14B1010
• Make sure the oil levels in both front fork
legs are equal.
• Uneven oil levels can result in poor han-
dling and a loss of stability.
• When assembling the front fork leg, be sure
to replace the following parts:
- Oil seal
- Dust seal
-O-ring
• Before assembling the front fork leg, make
sure all of the components are clean.
1. Install:
• Damper rod assembly “1”
• Inner tube “2”
ECA14B1006
Allow the damper rod assembly to slide
slowly down the inner tube “2”. Be careful
not to damage the inner tube.
Fork spring free length
271.5 mm (10.69 in)
Limit
266.1 mm (10.48 in)

 Loading...