P1086708-001 ZXP Series 9 Card Printer Service Manual 11
Setup
Loading Cards
Loading Cards
Caution • DO NOT bend cards or touch print surfaces as this can reduce print quality. The
surface of the cards must remain clean and dust free. Always store cards in an enclosed
container. Ideally, use cards as soon as possible.
Step 1. Remove the wrapping from the card deck.
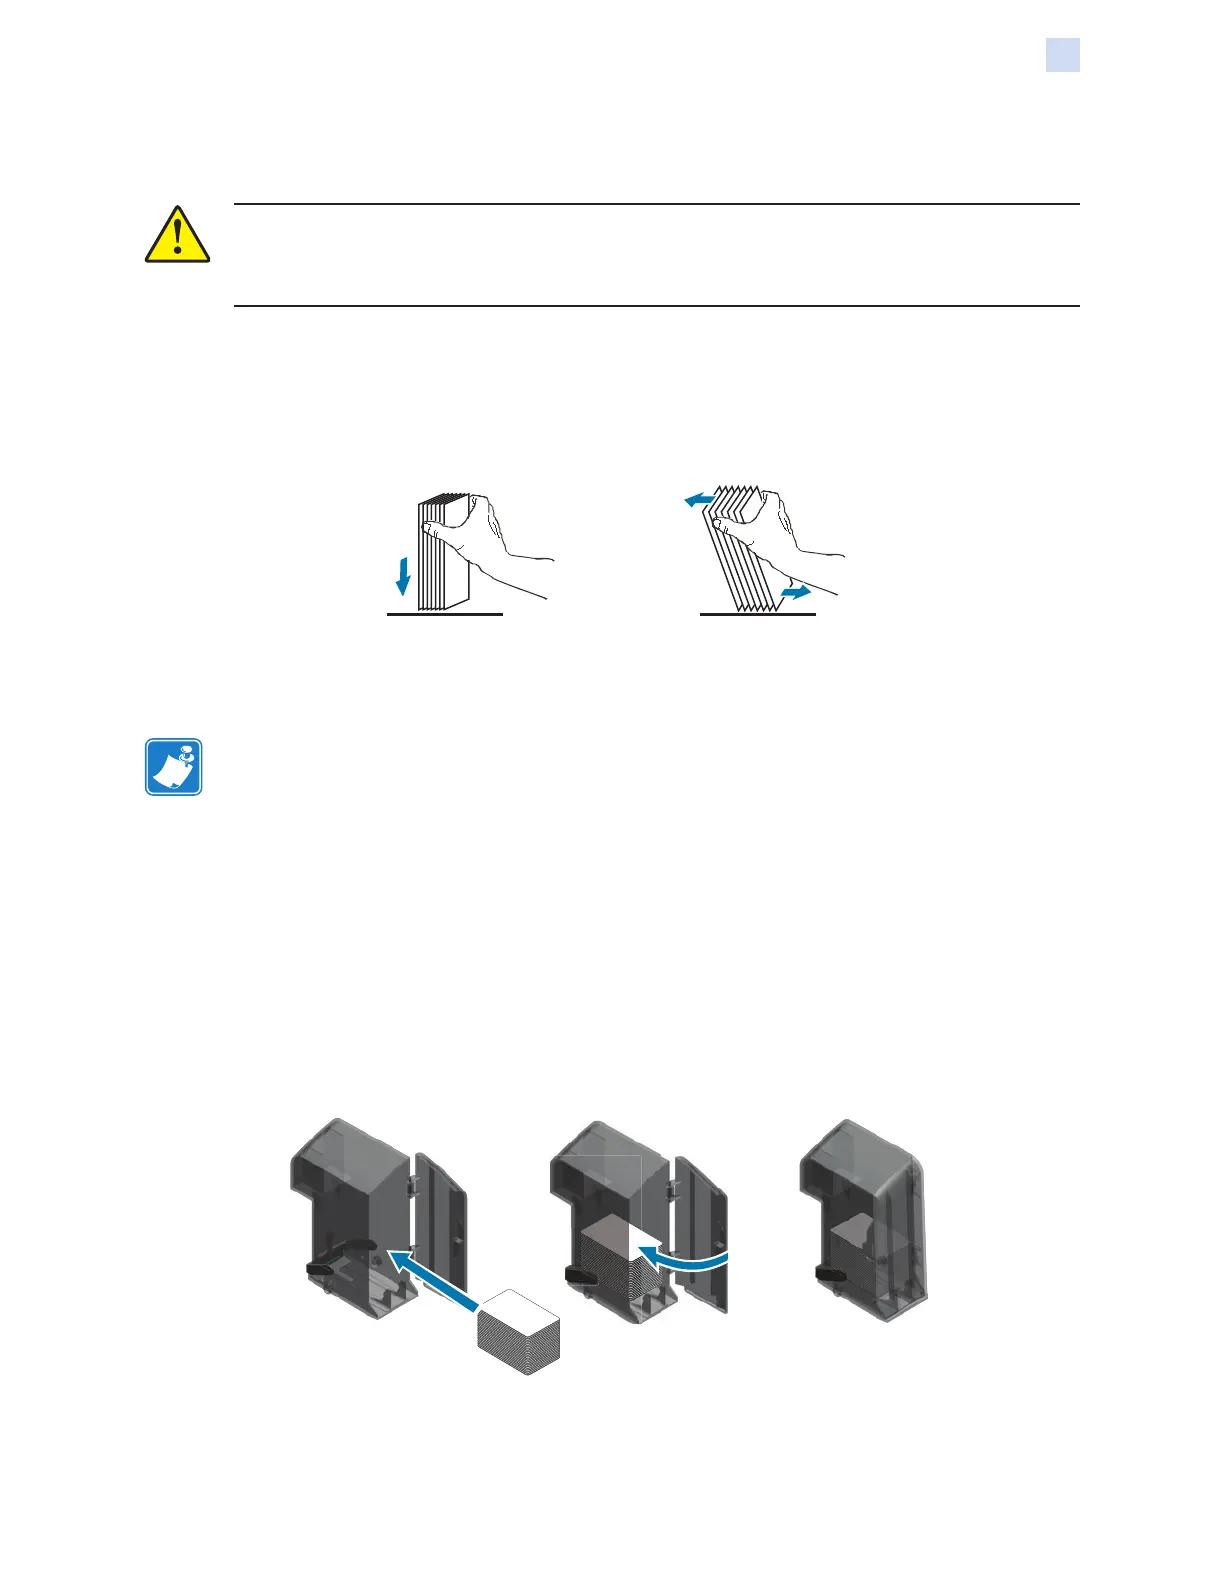
Step 2. Holding the card deck by the sides (do not touch the print surfaces), hold it vertically
against a at surface such as a desktop. If the deck is too thick for your hand to hold
it comfortably, use about half a deck at a time.
Step 3. Push the stack back and forth to an angle of about 45° from vertical, so as to
separate all of the cards.
Note • Static charges and edge burrs from the card die-cutting process can render
individual cards stuck together with signicant adhesion force. These cards must be
physically separated from each other before inserting into the feeder; if not separated,
feeding or printing problems may occur.
Step 4. Restore the card stack to its original squared-off condition.
Step 5. Open the input hopper door—cards can be loaded into the hopper while it is attached
to the printer.
Step 6. Place the cards in the input hopper in the orientation shown: smart card contacts (if
present) up and toward the body of the printer; mag stripe (if present) down and to
the rear). Ensure that the cards are seated at on the bottom of the hopper.
Step 7. Close the input hopper door.
 Loading...