312 ZXP Series 9 Card Printer Service Manual P1086708-001
Replacement Procedures for the Printer
Procedures: Main PCBA
Removal
This procedure requires the PCBA Removal Tool 105936-056 (also part of the ZXP9 Repair Kit
105936-058). Contact Zebra Customer Service at +01 877-275-9327 for ordering information.
Step 1. Disconnect power plug P31.
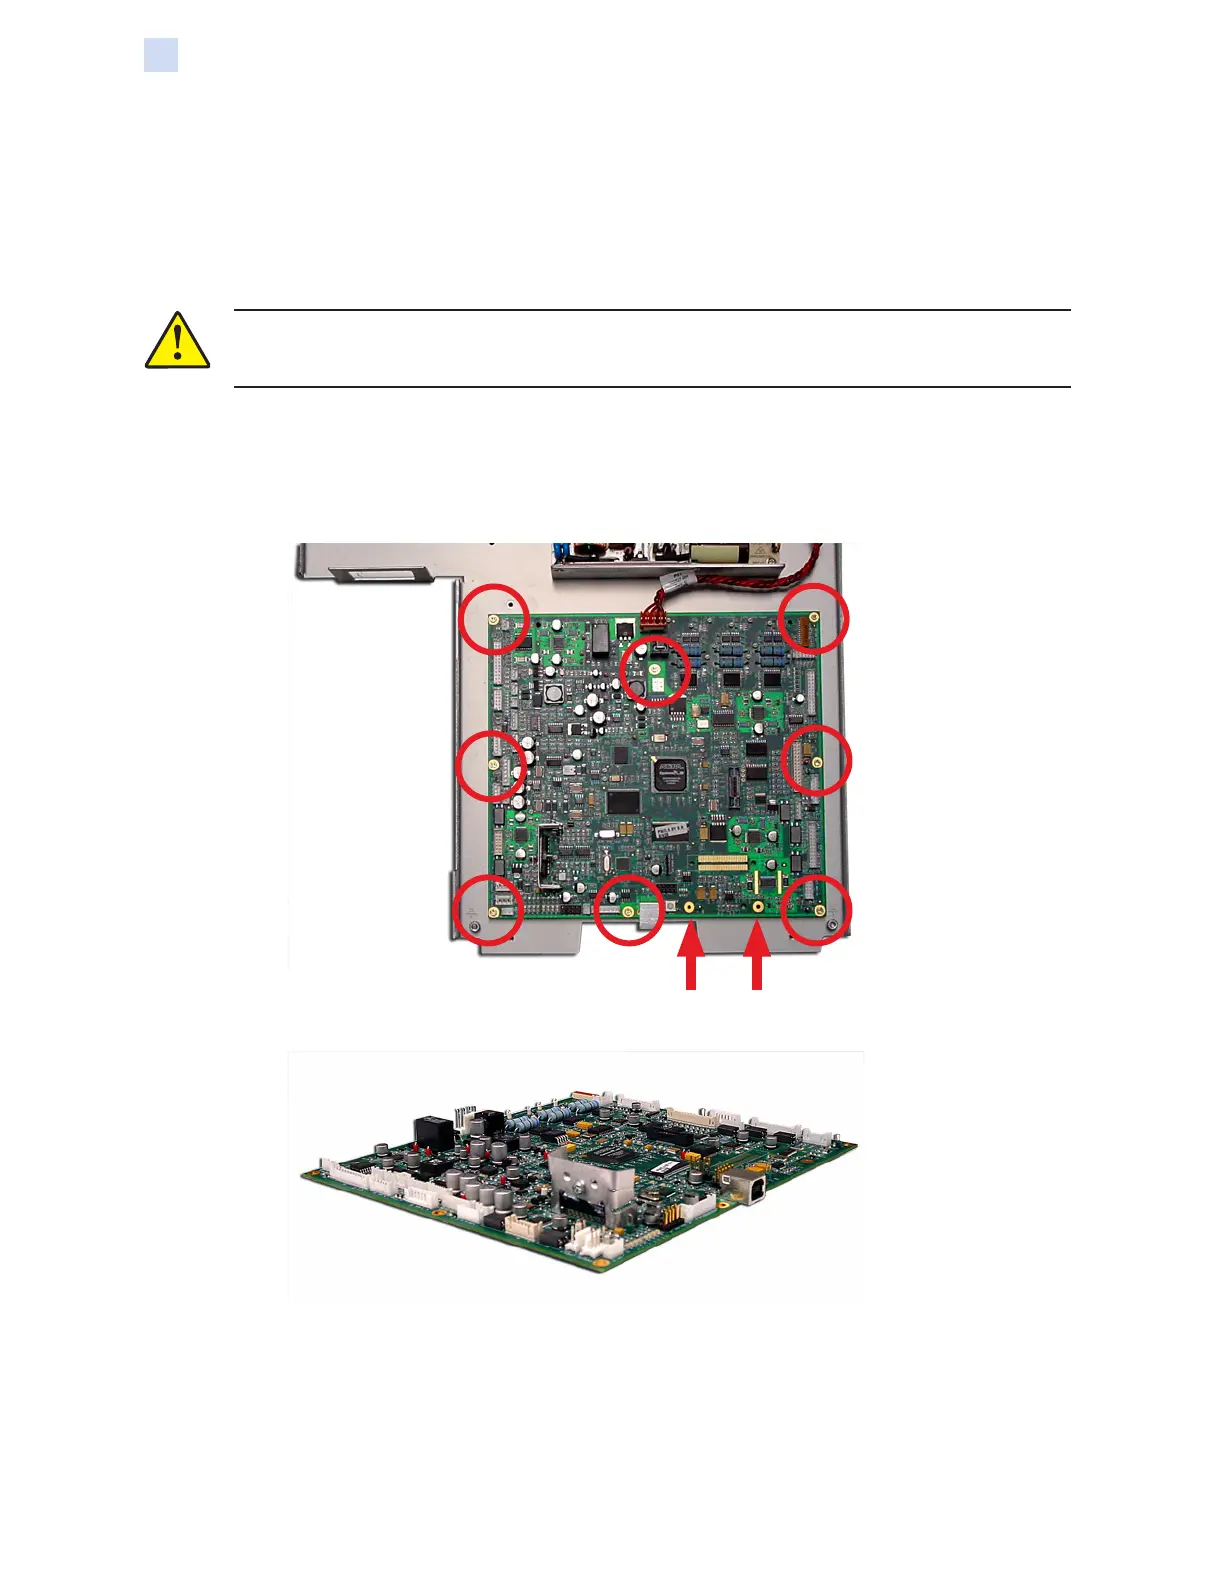
Caution • When releasing the eight pressure snaps, be careful not to bend the main
PCBA.
Step 2. With the PCBA removal tool, release the eight pressure snaps (circled below) holding
the main PCBA in place.
Step 3. With a TORX T6 driver, remove the two screws (arrows below) holding the PCBA to
the base plate.
Step 4. Remove the main PCBA.
 Loading...