406 ZXP Series 9 Card Printer Service Manual P1086708-001
Replacement Procedures for the Laminator
Procedures: Laminator Beam
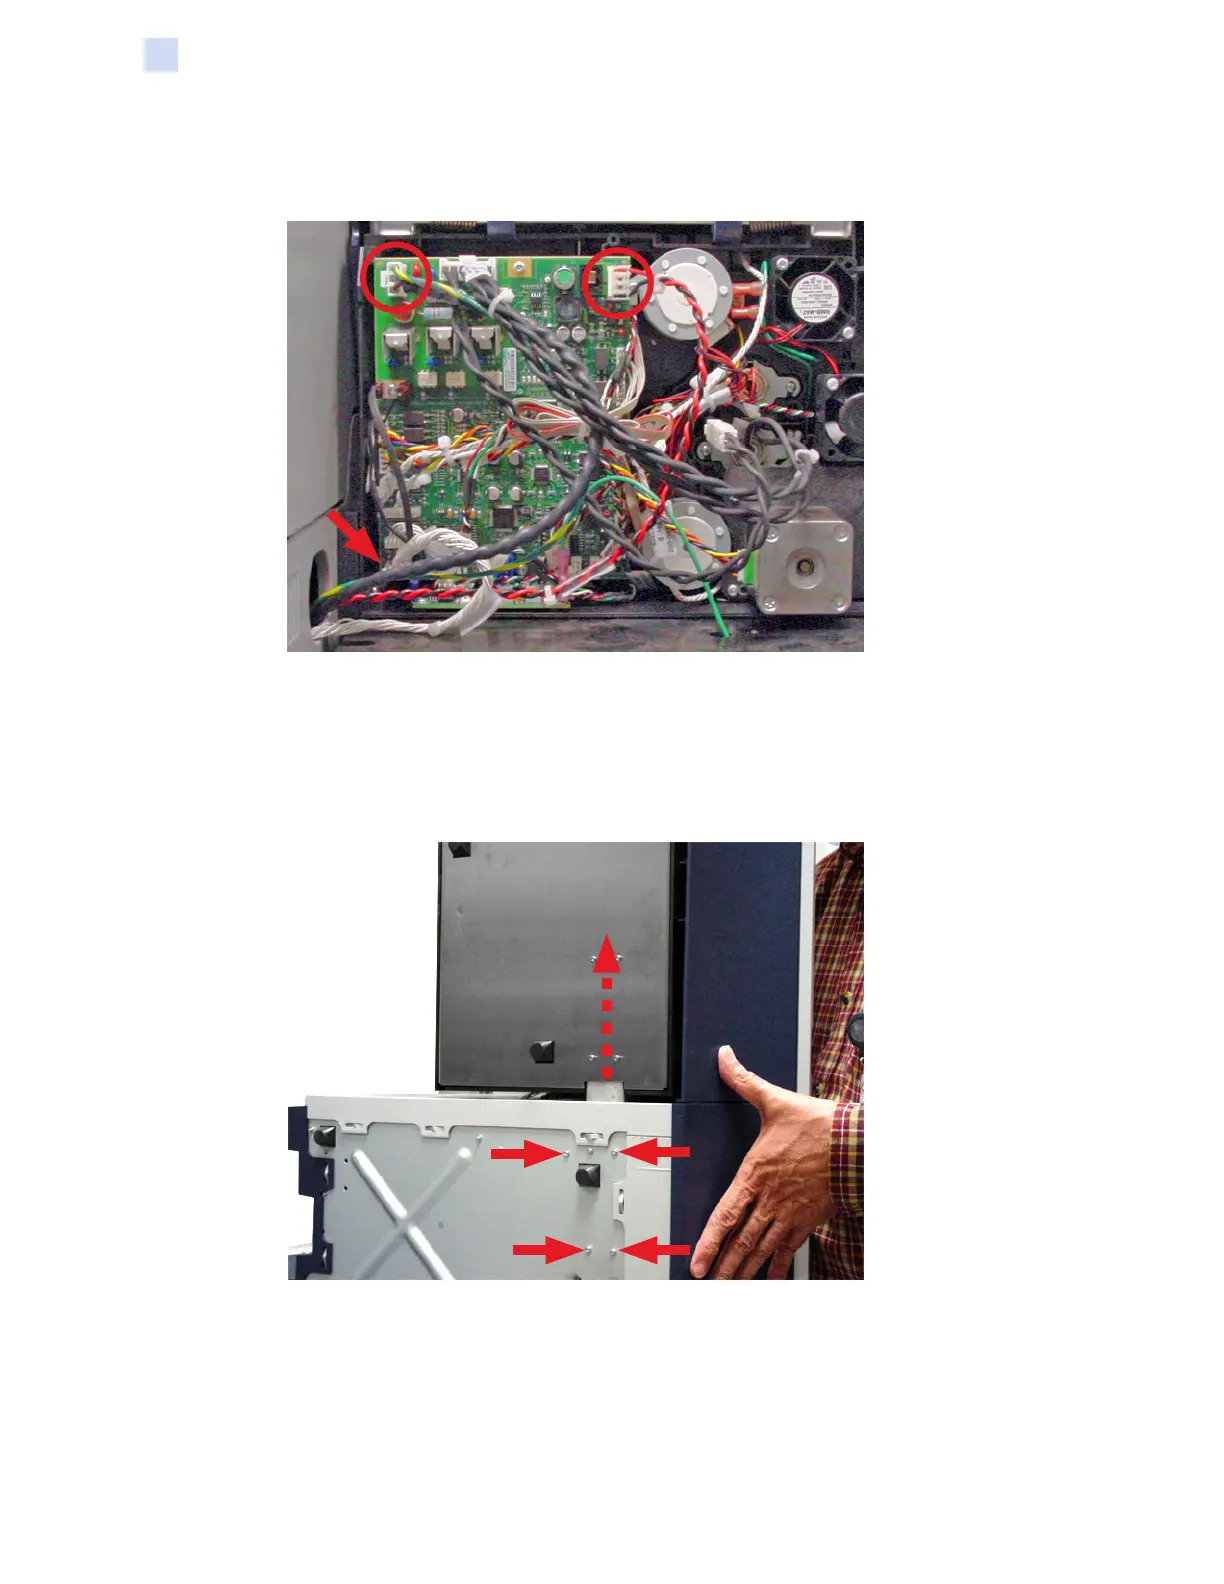
Step 4. Disconnect the cables from the printer to the laminator main PCBA.
a. Unplug the AC power cable from J8, EXTERNAL PWR.
b. Unplug the DC power cable from J15, DC PWR INPUT.
c. Unplug the logic interface cable from J14 (arrow above).
Step 5. Detach the laminator from the printer:
a. Set the printer on its right side.
b. Remove the four machine screws (arrows above) that attach the laminator (via
the support attachment beam) to the printer.
c. While supporting the printer, slide the support attachment beam and laminator
out of the slot (dashed arrow above) on the left side of the printer.
 Loading...