2 - 11
Installation
Changing the Paper Roll
Change the paper roll following the
instructions on the previous page,
when the paper supply is low, so that
you do not lose a printed record of
messages sent to a full printer buffer.
The paper roll is P/N TSP-40-PP.
Press CLEAR to resume printing after
changing the paper roll or wait about 5
minutes for the printer to resume
printing automatically.
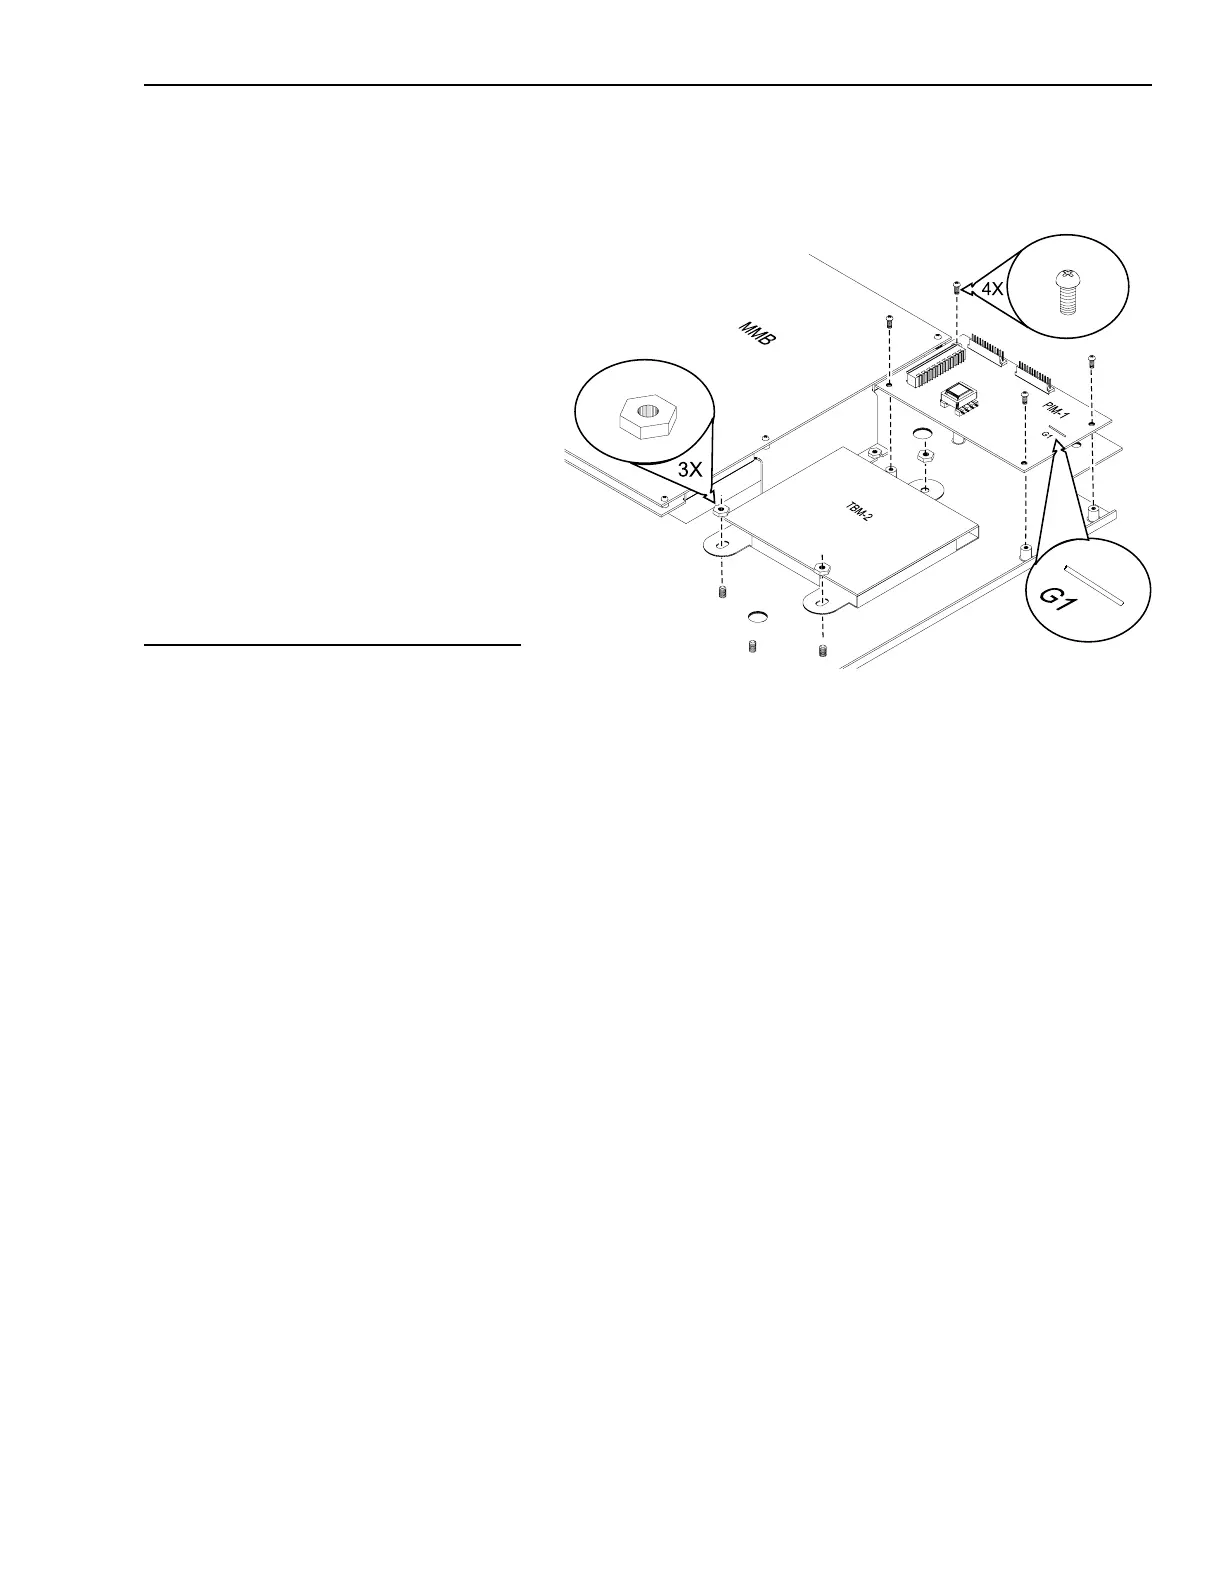
Installing the PIM-1
The PIM-1 has one factory installed
jumper. Set it according to the instruc-
tions below before installing the PIM-1
on the MBR-MP.
Jumper G1
This jumper disconnects the output of
the remote printer from PIM-1.
For supervised printers:
Leave jumper G1 in place.
For non-supervised printers:
Cut G1 to stop any input to the PIM-1.
For an MXL System without the Voice
Option
With an MKB-2: Use the cable
(P/N 555-192242) supplied with the
PIM-1 to connect P2 on the PIM-1
to P8 on the MMB-1/-2.
Use the cable supplied with the
MKB-2 to connect P1 of the PIM-1
to P1 of the ANN-1.
Refer to the PIM-1 Installation Instruc-
tions (P/N 315-091462).
For an MXLV System with the Voice Option
Use the cable (P/N 555-192242)
supplied with the PIM to connect
P2 on the PIM with P8 on the
MMB-1/-2.
Use the cable supplied with the
MKB-2 to connect P1 on the PIM-1
to P5 on the ACM-1. (P4 on the
ACM-1 then connects to P1 on the
ANN-1 in this configuration.)
Refer to the PIM-1 Installation Instruc-
tions (P/N 315-091462).
Installing the PIM-1 in Other Enclosures
The PIM-1 can also be installed in the
RCC-1/-1F box or the MSE-2 enclosure.
For information on those configurations,
refer to the RCC-1/-1F Installation
Instructions (P/N 315-095364) or to the
MSE-2 Installation Instructions (P/N 315-
092403) as appropriate.
Installing the PIM-1 and TBM-2
Technical Manuals Online! - http://www.tech-man.com

 Loading...