2 - 37
Installation
Setting the Address on the DMC-1
Before installing the DMC-1 in the
OMM, set the address on S1 and the
recording mode on S2. Use S1, DIP
switches SW1-SW8 to set the network
address. Refer to the CSG-M configu-
ration printout for the address of the
module. Use the Network Address
Programming Table at the end of this
chapter to set the address for this
switch.
Set the switches of DIP switch S2 to
the OPEN or OFF position. Refer to
the DMC-1 Installation Instructions,
P/N 315-092692.
Setting Jumper E1
Place jumper E1 in position 1-2.
Mounting the BTC-1
Install the standoffs and comb
connector in the component side of
the OCC-1.
Installing the DMC-1
The DMC-1 plugs into a half-width slot
on the OMM and comes with an
installation kit that consists of the
following:
One user key
WARNING: The DMC-1 Digital Mes-
sage Card has a 3V lithium battery
installed for battery backup of static
RAM memory (U5). This results in the
DMC-1 Card being partially powered
all the time. The DMC-1 must be
handled with caution when it is re-
moved from the protective package.
Do not place the DMC-1 on conduc-
tive surfaces (metal, aluminum foil,
etc.).
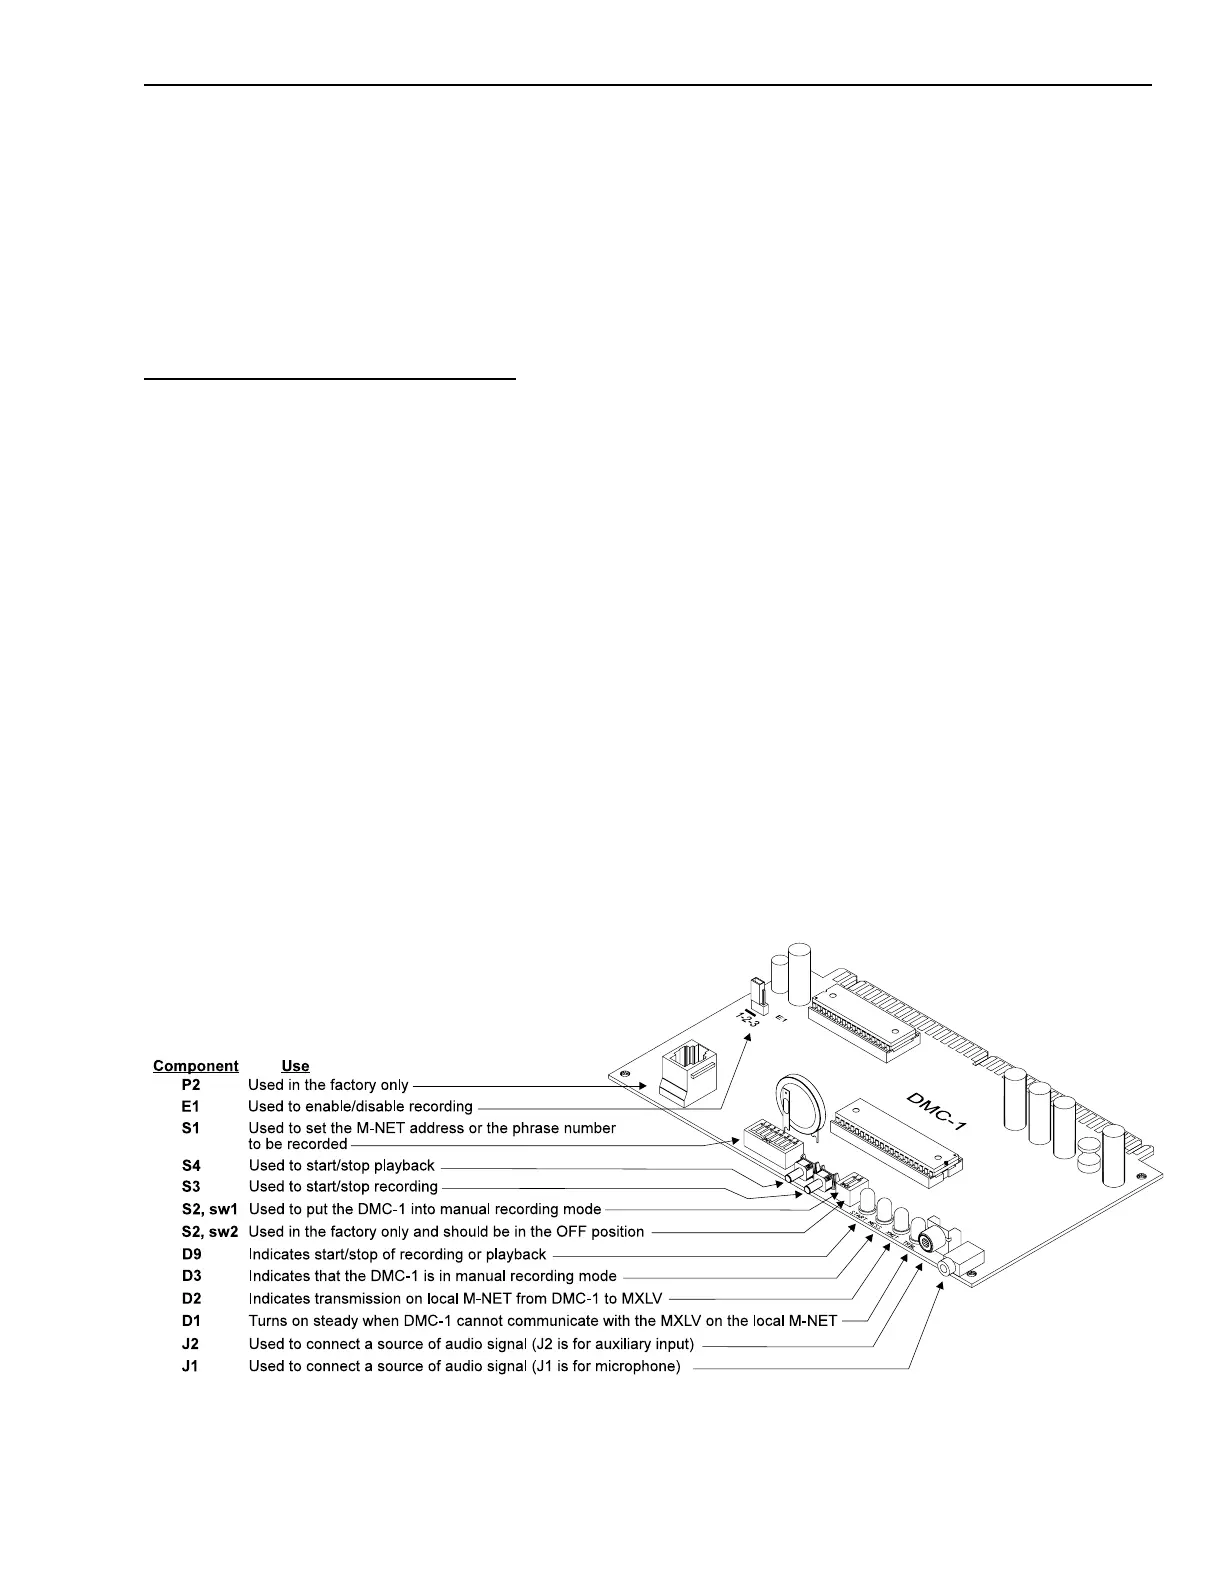
Components on the DMC-1
Technical Manuals Online! - http://www.tech-man.com

 Loading...