2 - 36
Installation
Installing the BTC-1 on the OCC-1
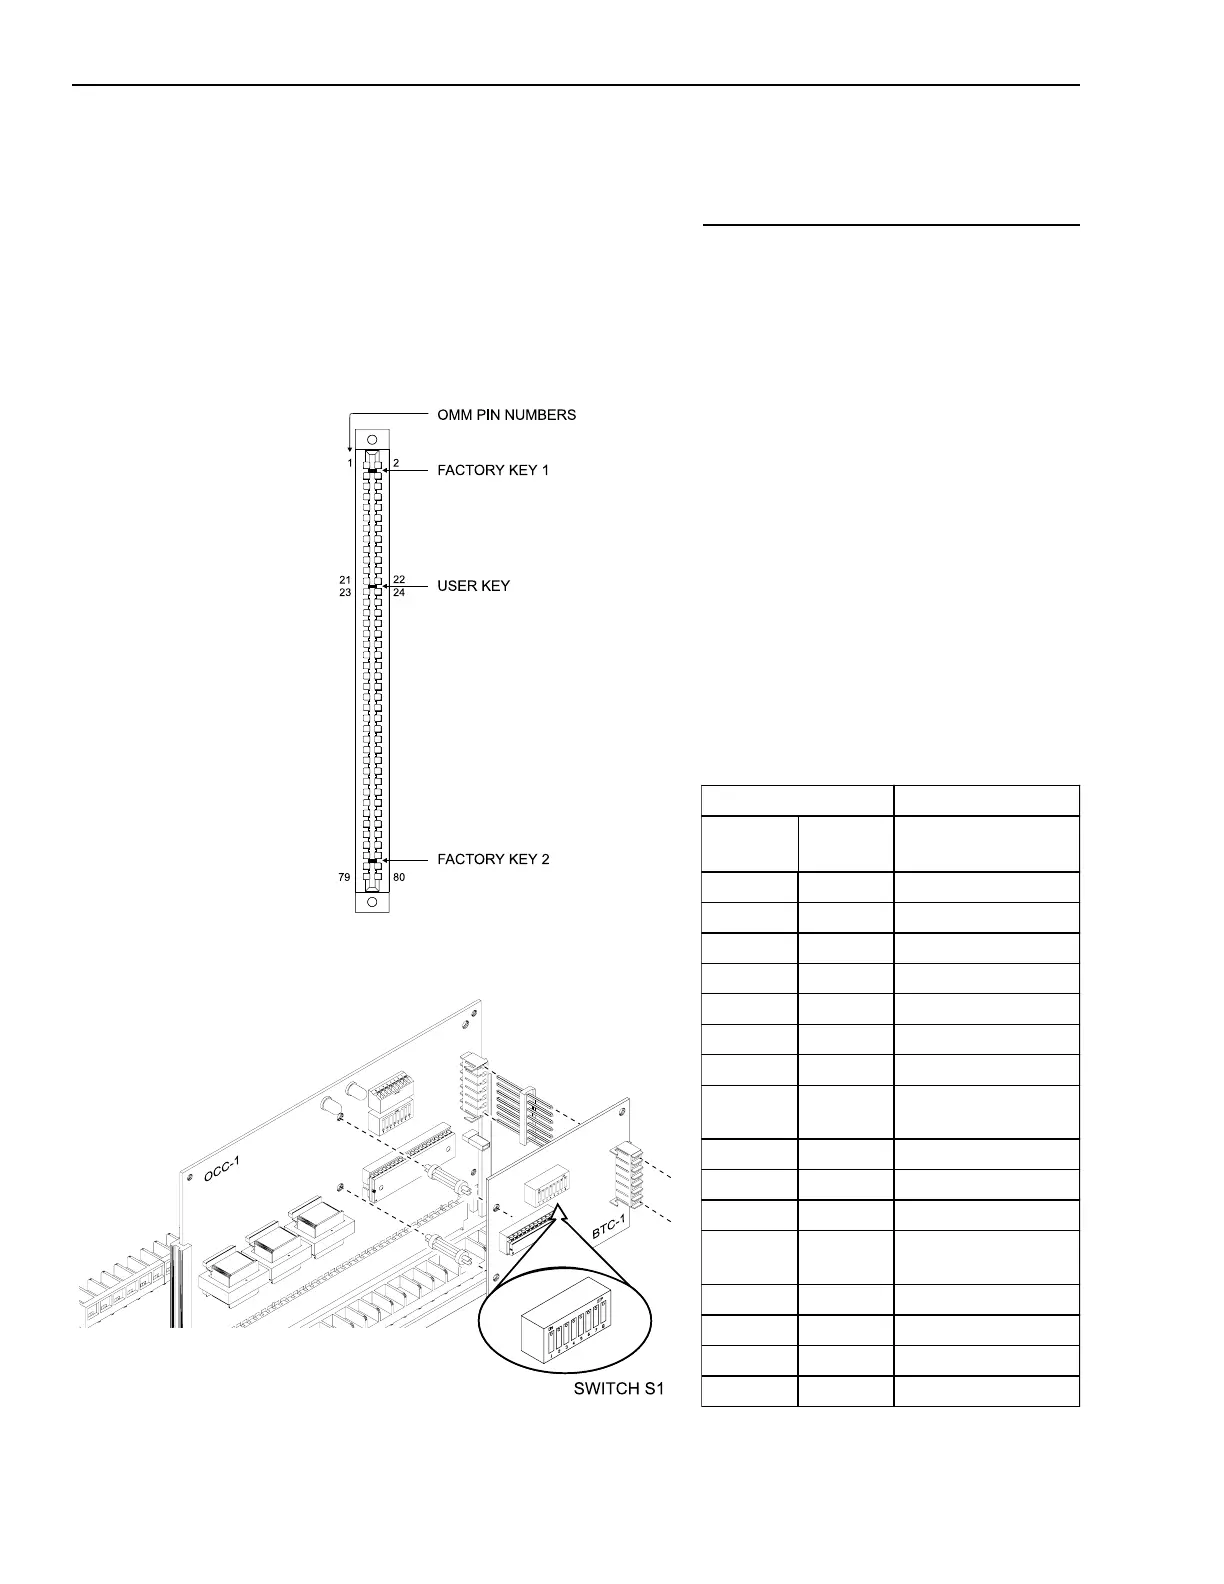
Location of the User Key for the OCC-1
Installing the BTC-1 on the OCC-1
The BTC-1 mounts on either the OCC-1
on P2 (to provide a default tone in
degrade mode) or the ACM-1 on P6 (to
provide backup of the two primary
tones) with two snap-in type standoffs
and a comb-like connector.
Setting the Tones
Before installing the BTC-1 on the
OCC-1, set the desired tones on switch
S1 using DIP switches SW1-SW4 for the
first tone selection and DIP switches
SW5-SW8 for the second tone selection.
Refer to the function section of the
CSG-M configuration printout for the
tones to be configured.
BTC-1 TONE SWITCH SETTINGS
Setting Tone
ALERT
8 7 6 5
EVAC
4 3 2 1
O O O O O O O O DO NOT USE
O O O X O O O X Chime
O O X O O O X O 2000 Hz
O O X X O O X X Slow Whoop
O X O O O X O O Yelp
O X O X O X O X Wail
O X X O O X X O California Code
O X X X O X X X
900 Hz Pulsed at 120
Pulses Per Minute
X O O O X O O O DO NOT USE
X O O X X O O X Horn
X O X O X O X O Temporal Code 3
X O X X X O X X
900 Hz Pulsed at 30
Pulses Per Minute
X X O O X X O O Yeow
X X O X X X O X High/Low
X X X O X X X O DO NOT USE
X X X X X X X X 900 Hz Tone
X=Closed or ON O=Open or OFF
After the addresses and jumpers are
set, install the OCC-1 in the OMM,
being sure that the module is riding in
the card guides and is firmly seated in
the card edge connector.
Technical Manuals Online! - http://www.tech-man.com

 Loading...