03/2003
4-126
8850/ 510DP
REP 10.5, REP 10.6
Repairs and Adjustments
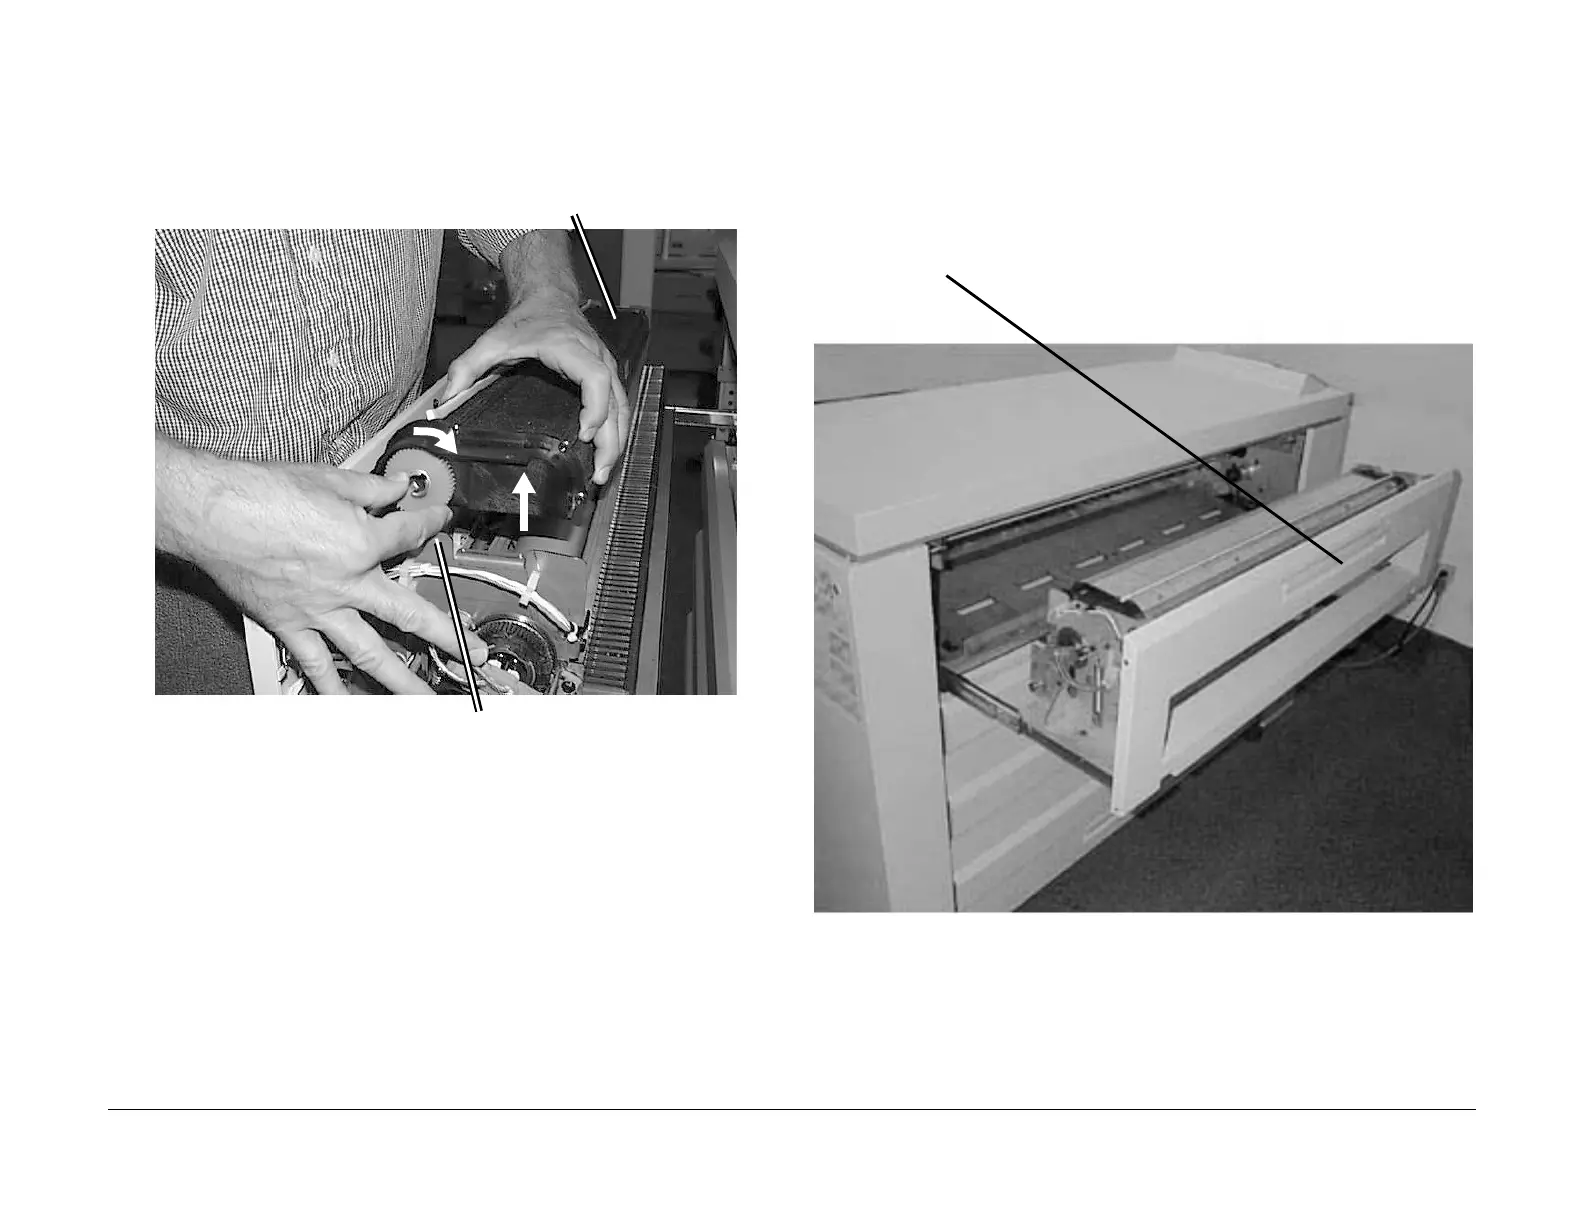
3. (Figure 6): Reinstall the Web Oiler Assembly on the Printer.
Figure 6 Reinstalling the Web Oiler Assembly
4. Return the Printer to normal operating condition.
5. Enter the Printer diagnostics and perform the following:
a. 10-30 Web Oiler Parameters Reset - to reset the meter if a new Web Oiler is
installed.
b. 10-31 Partial Web Oiler Parameters Reset - to reset the parameters for a partially
used Web. Measure the diameter of the remaining web on the Supply Roll in millime-
ters and enter this value.
REP 10.6 Thermal Fuse (F1)
Parts List on PL 10.2
Removal
1. (Figure 1): Access the Fuser Module.
Figure 1 Accessing the Fuser Module
2. Remove the Fuser Heat Roll (REP 10.2).
1
Position the Web Oiler Assembly so
that the drive side is on the right side of
the Fuser Drawer
2
Slide the two prongs on the left
side of the Web Oiler Assembly
into the slots on left side of the
Fuser Drawer
3
Lift the right side of the Web Oiler
Assembly slightly and turn the
Takeup Roll clockwise to remove
any remaining slack in that roll
4
Set the Web Oiler back down on
the Fuser Assembly and tighten
down the two mount screws
1
Pull up on the handle and pull open the
Fuser Module Drawer.
 Loading...


