03/2003
6-10
8850/ 510DP
GP 1
General Procedures
GP 1 Xerographic HVPS Checkout
The purpose of this checkout procedure is to verify correct operation of the Xerographic High
Voltage Power Supply.
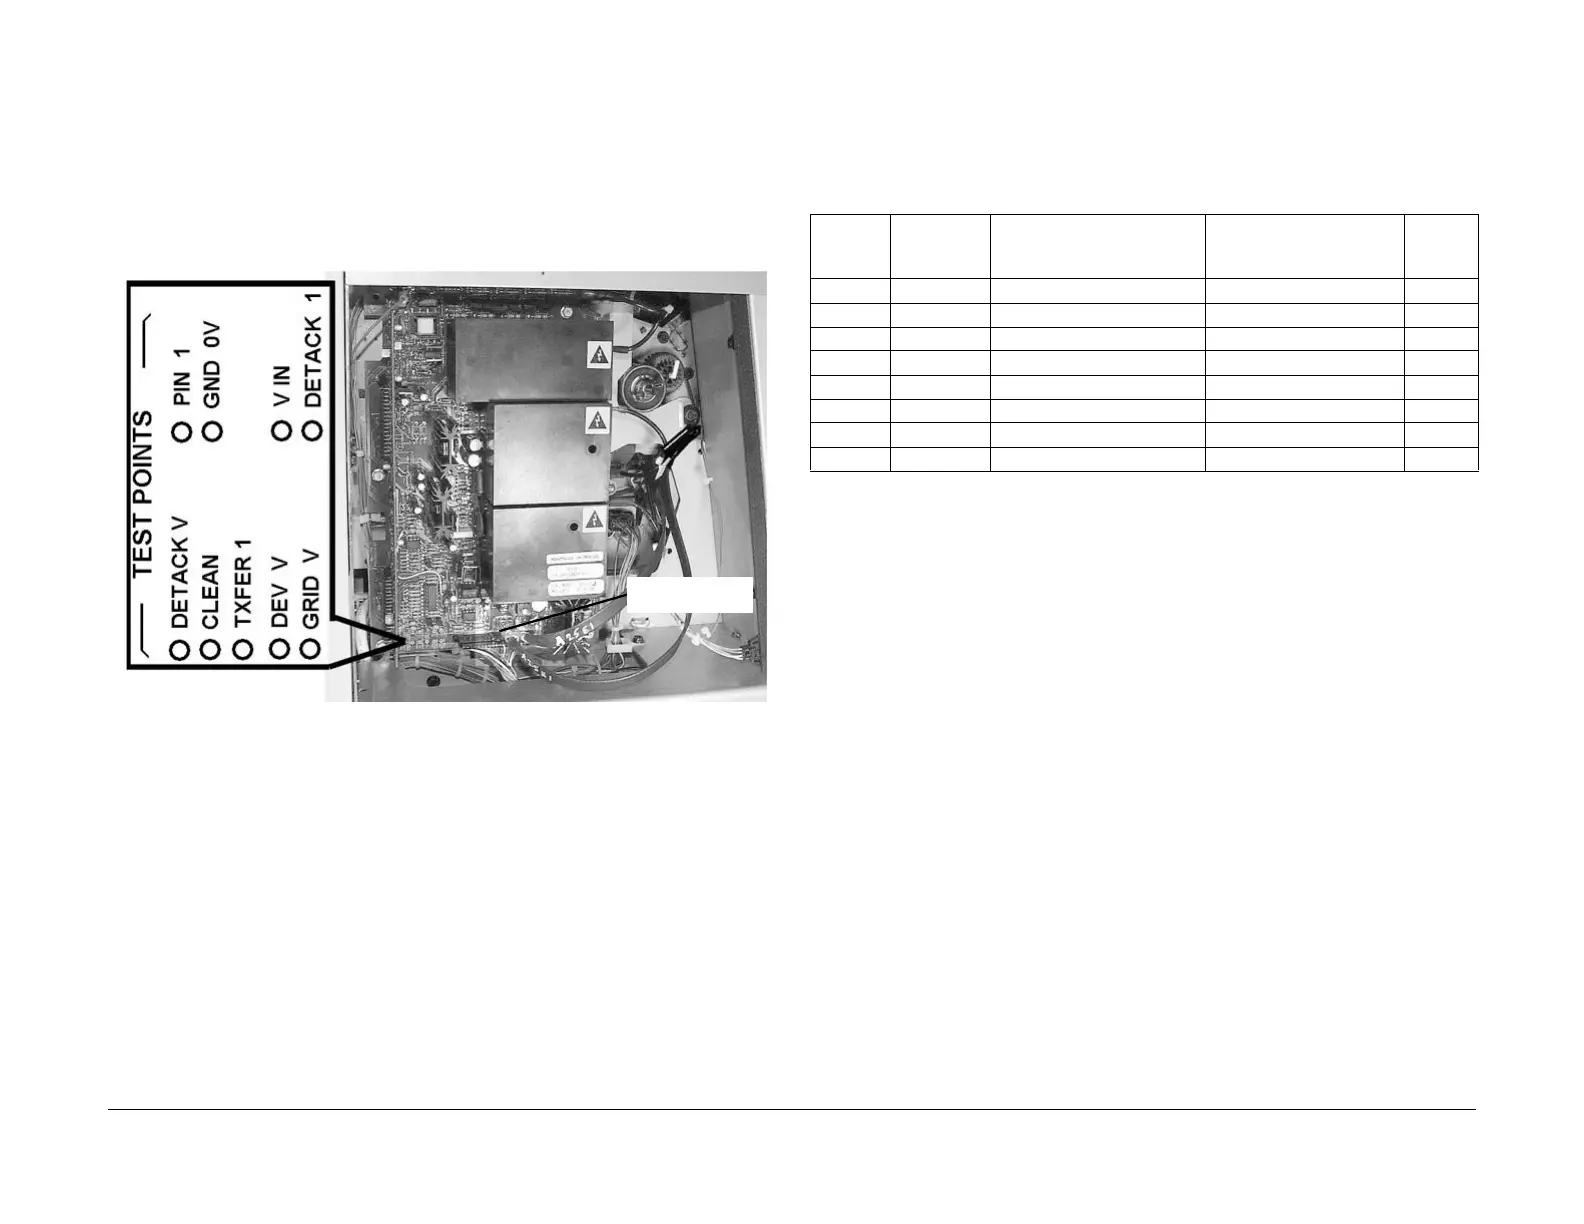
(Figure 1): The location of the Xerographic HVPS Test Points is shown in the drawing.
NOTE: Connect the Black (-) lead to the 24V RET lead connector (J7) when measuring all
voltages. Failure to use this test point can cause incorrect readings.
Figure 1 Location of Xerographic High Voltage Power Supply Test Points
1. Check that the Tag 6 HVPS is installed. If not, install the Tag 6 HVPS.
2. Reference Table 1 and check that Vin is in specification. If okay continue. If not, check the
wiring between A25P/J1 of the HVPS and A3P/J605. If the wiring is good, go to the DC
Power RAP in Section 2.
3. Enter the [0921] code indicated for the voltage to be checked as shown in TABLE 1. If a
voltage is present (even if voltage is fluctuating,) continue with Step 4.
If a voltage is not present (steady at less than 0.1VDC), as shown in the Printing column,
check for an open in the wiring for the component being checked. If there is no open,
replace the HVPS (PL 1.3).
4. Check the fault monitor line for the output being checked: Development, A25P/J1-15;
Charge/Grid, A25P/J1-16; and Detack/Clean, A25P/J25-20. If the voltage is less than 1.6
VDC, check the wiring to the respective xerographic component for an open or a short. If
the wiring is okay, replace the HVPS (PL 1.3).
5. If the problem persists refer to the respective RAP:
• LL-21 Charge/Grid Fault RAP
• LL-22 Detack Fault RAP
• LL-24 Developer Fault RAP
• LL-25 Charge Voltage V HIGH
NOTE: If you were referred here from one of the above RAPS, the HVPS is okay,
and the problem persists, escalate the call.
24V RET (J7)
Table 1 Xerographic High Voltage Power Supply Voltage Checks
COM
Meter
Lead
V-Ohms
Meter
Lead
Standby
Measured Voltage
Printing
Measured Voltage
Diag-
nostic
Code
24V RET Vin 24.0 +/- 1.2 VDC 24.0 VDC [0921-1]
24V RET PIN I Less than 0.05 VDC 2.3 ± 0.2 VDC [0921-2]
24V RET GRID V Less than 0.05 VDC 4.0 ± 0.7 VDC [0921-2]
24V RET DEV V Less than 0.05 VDC -2.50 ± 0.5 VDC [0921-2]
24V RET TXFER1 Less than 0.05 VDC 0.61 ± 0.05 VDC [0921-1]
24V RET DETACK1 Less than 0.05 VAC 0.80 ± 0.1 VAC [0921-1]
24V RET CLEAN Less than 0.05 VDC 1.85 ± 0.1 VDC [0921-2]
24V RET DETACKV Less than 0.05 VDC -3.4 ± 0.4 VDC [0921-1]
 Loading...


