03/2003
4-7
8850/ 510DP
REP 3.2, REP 3.3
Repairs and Adjustments
Replacement
1. Replacement is the reverse of the Removal procedure.
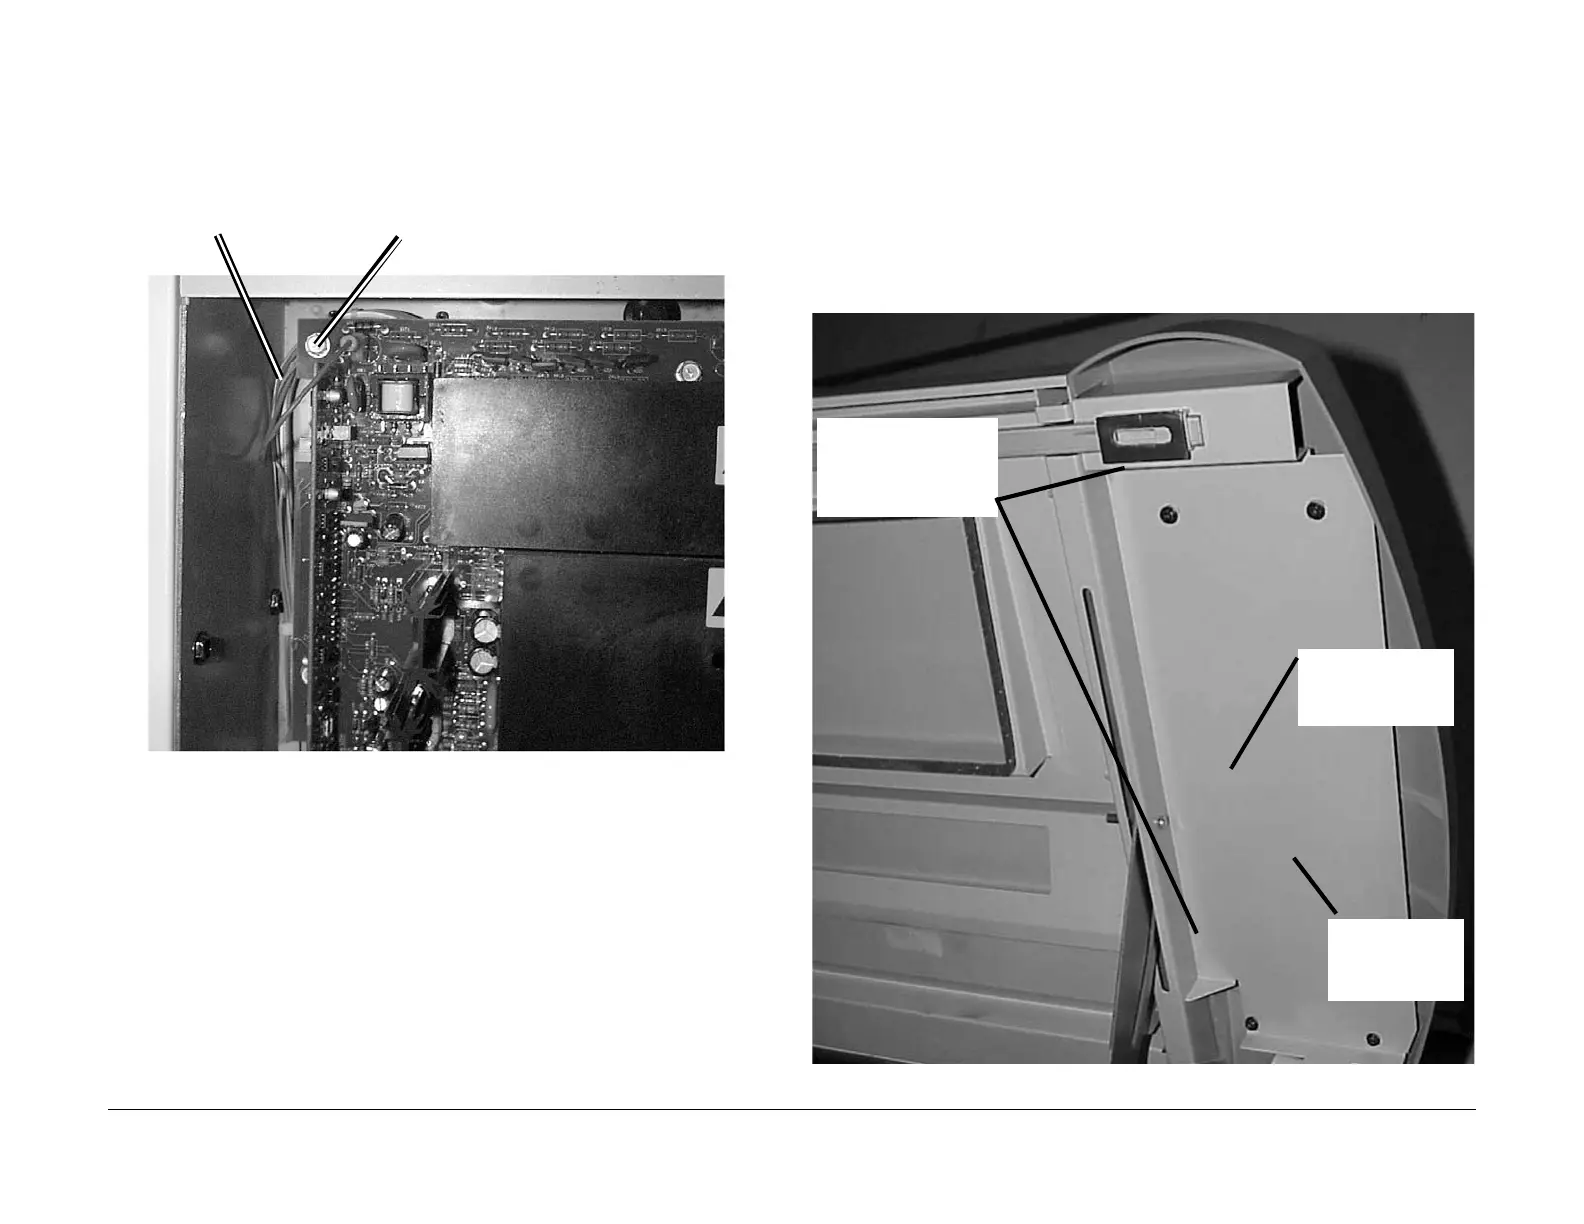
NOTE: (FIgure 1): Ensure that the Developer Harness, located at the upper left corner of
the Xerographic HVPS, is not pinched by the mount screw upon reinstalling the HVPS.
Figure 2 Reinstalling the Xerographic HVPS
2. If a new Xerographic High Voltage Power Supply is being installed, perform the Electro-
static Series ADJ 9.2.
REP 3.3 SPS 510dp Control Panel
Parts List on PL 1.4
Removal
WARNING
Switch off the Main Power Switch. Disconnect the Power Cord.
1. Raise the Top Cover.
2. (Figure 1) : Remove the Control Panel
NOTE: Hold on to the Control Panel before removing the last screw.
Figure 1 Preparing to Remove the Control Panel Panel
Developer Harness
Mount Screw / Standoff
3
Remove the four screws,
two top and bottom and
remove the Control Panel
1
Remove the Harness
from the Harness
Clamp
2
Disconnect the
Connector
 Loading...


