03/2003
6-14
8850/ 510DP
GP 7
General Procedures
GP 7 NVM Dump of Adjustable Settings
The purpose of this procedure is to enable the service representative to access a listing of cur-
rent NVM (Non-Volatile Memory) settings resident in the 8850/510dp Printer. If desired, this
information may be saved to a laptop. This information can be of great value in recreating the
customer’s Printer settings in the event of a component failure. Information can also be
recorded in the Service Log.
NOTE: Ensure that the Printer and Controller are powered off prior to beginning this proce-
dure.
1. Remove the two screws at either side of the Printer Lower Right Side Cover. Tilt the cover
(with Controller attached) backward and gently set the Controller on the floor.
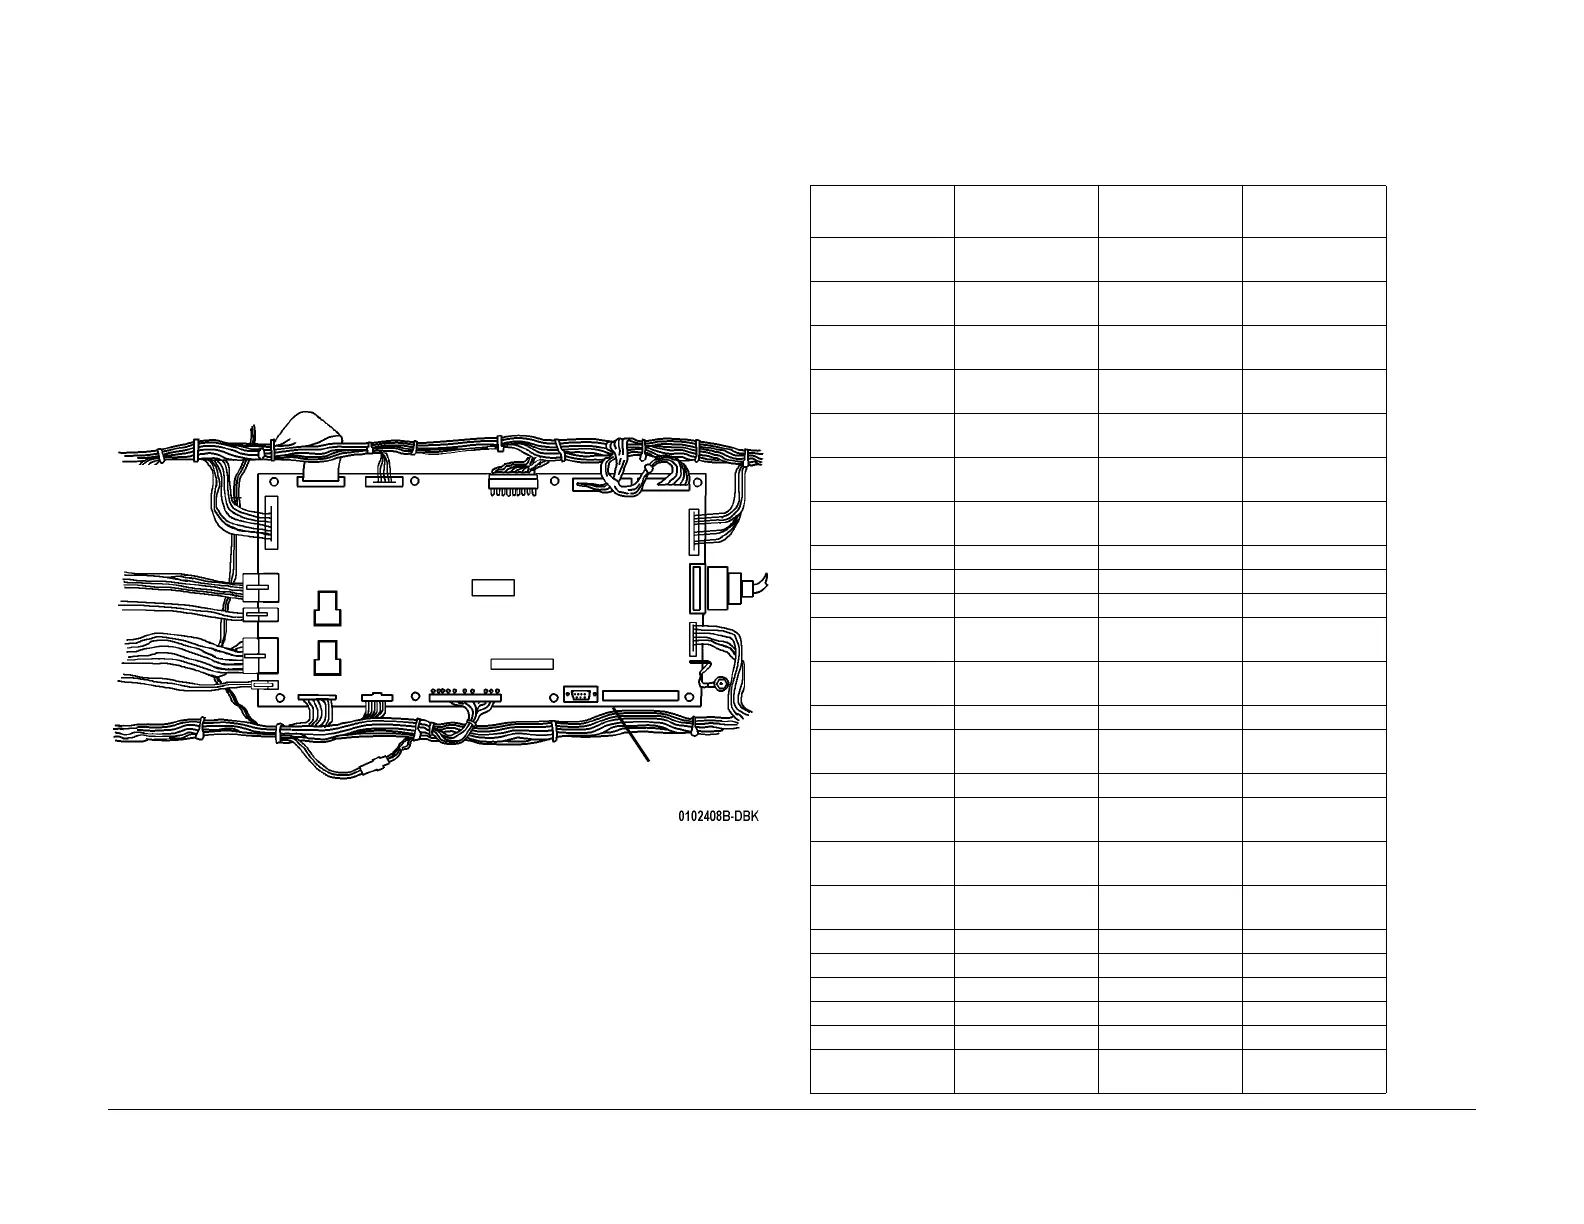
2. (Figure 1): Connect a null-modem cable between the Serial Port of the laptop and either
the Diagnostic Remote Port of the Printer (if installed) or J611 on the Printer Main PWB.
Figure 1 Serial Port Connection - Printer Main PWB
3. Access the terminal emulator software on the laptop.
4. Using the terminal emulator software on the laptop, set the serial port for the following
configuration:
• Baud rate: 19,200
• 1 Stop Bit
• No parity
• Data bits: 8
5. Hold down the zero button on the 8850/510dp/510dp Printer Control Panel, and turn on
the Controller and the Printer.
6. Set the terminal emulation program on the laptop for capturing text.
7. Enter the diagnostic code [0366] and hit the Enter key.
8. The NVM settings are received by the laptop. Stop the text capture on the laptop. The
NVM settings can be saved to a file on the laptop and used in the future.
J611
Table 1 NVM Values Printed by GP 7
Diagnostic
Code Default Value Description Range of Values
2-63 0 BILLING TYPE 0-Feet
1-Meters
3-60-2 0 AREA IN <FEET>
SQUARED
3-60-2 0 LENGTH IN
<FEET>
3-62 05 DIAGNOSTICS
TIMEOUT
0-50 Minutes
6-2-1 20 BOND SCALE
ADJUST
0-40
6-2-2 20 VELLUM SCALE
ADJUST
0-40
6-2-3 20 FILM SCALE
AJUST
0-40
7-16-1 1493 ROLL BOND
7-16-2 1493 ROLL VELLUM
7-16-3 1493 ROLL FILM
7-60 00 FILM STACKING
DELAY TIME
0-30 Seconds
8-9 001 001 STACKER FULL
DETECTION
1 is ENABLED
8-60-1 10 BOND REG TIME RANGE 0-40
8-60-2 12 VELLUM REG
TIME
RANGE 0-40
8-60-3 13 FILM REG TIME RANGE 0-40
9-3 0.85 LED BAR POWER
RATING
0.2-1.50 uW
9-17-1 1807 REG ROLLS
BOND
9-17-2 1807 REG ROLLS VEL-
LUM
9-17-3 1807 REG ROLLS FILM
9-20 0 RUN TIME Hours
9-21-2 107 V(HIGH)
9-21-3 20 V(LOW)
9-21-4 5.6 CP VOLTS. VOLTS
9-21-6 0.0 BIAS OFFSET
VOLTAGE
VOLTS
 Loading...


