GE MEDICAL SYSTEMS
2127661
LOGIQ 400 SERVICE MANUAL
TM
8–26 OPTIONS
REV 5
8–3–5 Functional Check–out
READ and UNDERSTAND these instructions thoroughly before proceeding with the installation. Perform each step in
sequence and check it off when completed. If a problem occurs after completion, go back through the procedure and
check for implementation errors before contacting your Ultrasound Region Engineer.
CAUTION
Possible operational damage. Failure to strictly follow ESD (Electrostatic Discharge) precau-
tions during this upgrade may cause constant or intermittent operational abnormalities.
Strictly follow all precautions.
Check each step as it is completed.
Perform functional checks to verify that the system is functioning properly. Refer to Chapter 4, Functional Checks.
8–3–6 Installing Color Video Printer on Console
1. Turn the system power OFF and unplug the unit. Follow the OSHA Lockout/Tagout Requirements (29 CFR
1910.147 Direction 46–015902).
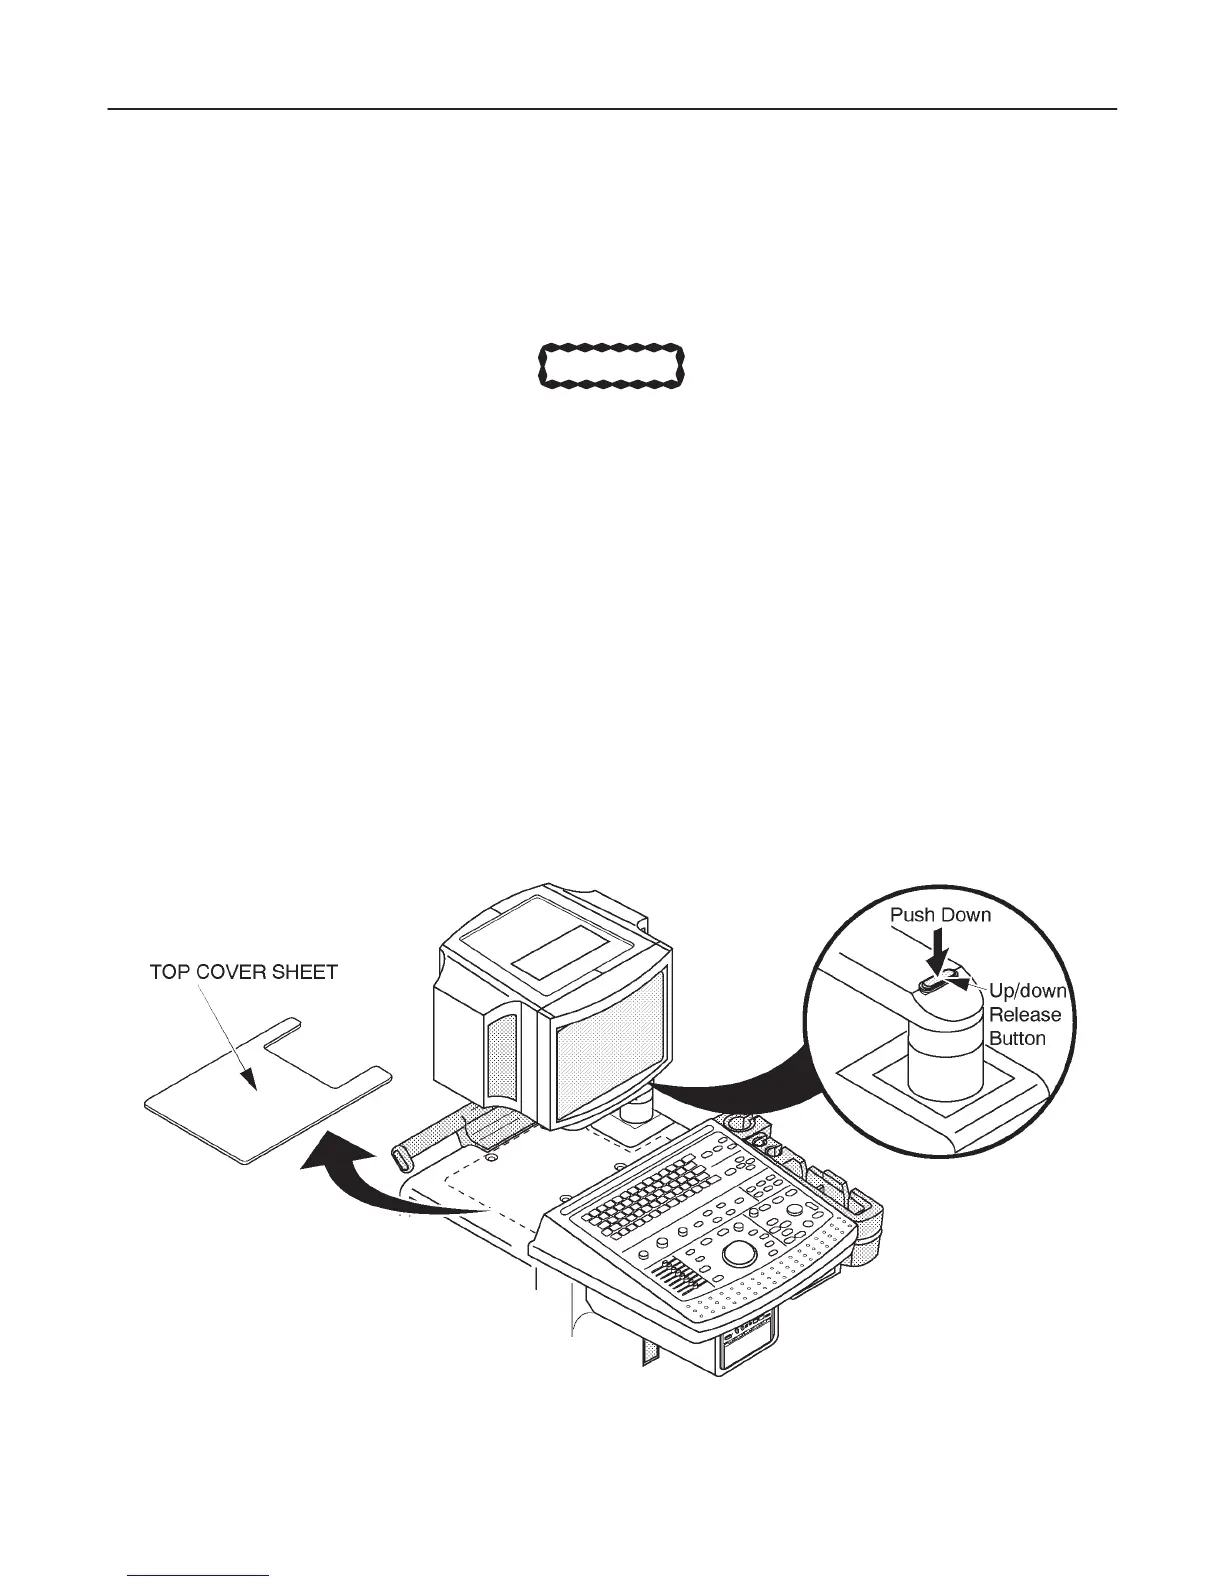
2. Remove the Top Cover Sheet out of the system. Refer to ILLUSTRATION 8–21.
3. Raise the monitor up by pushing down the Up/down Release Button located on the Monitor Arm. Refer to
ILLUSTRATION 8–21.
CONSOLE
ILLUSTRATION 8–21

 Loading...