Service Parts Disassembly 8-13
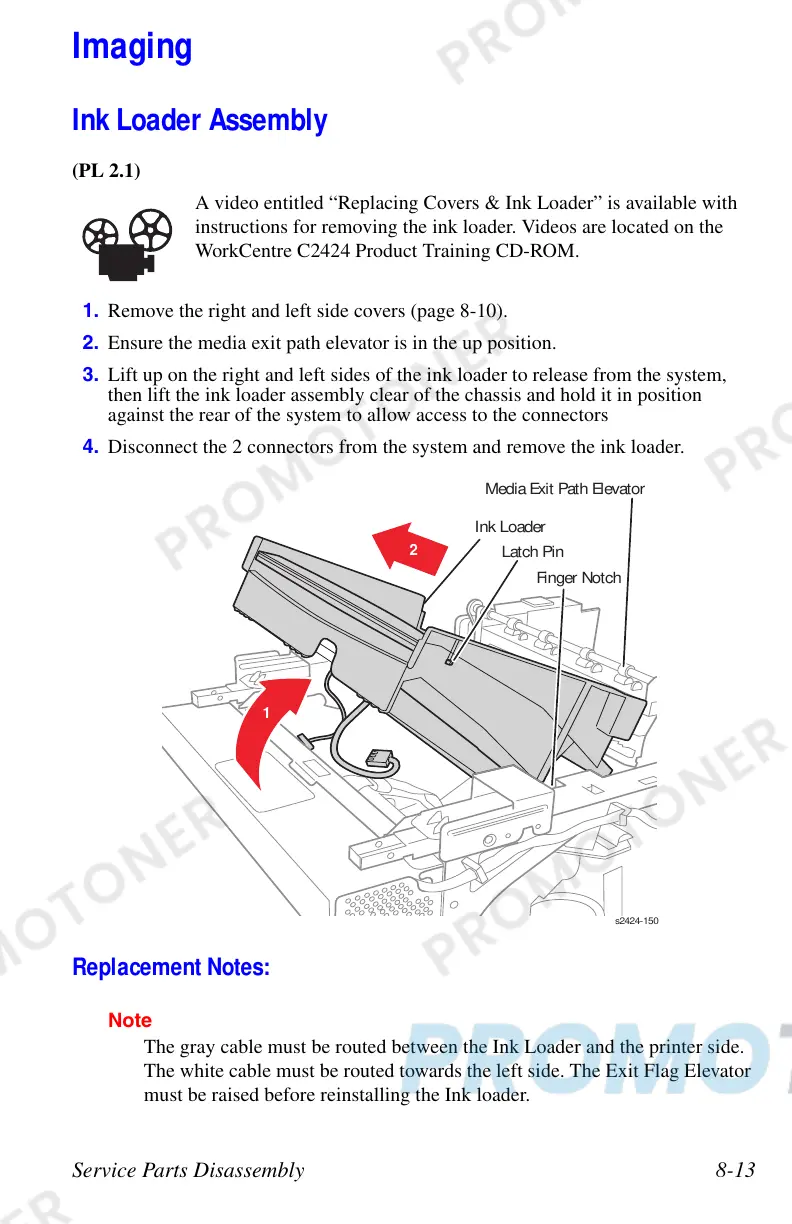
Imaging
Ink Loader Assembly
(PL 2.1)
A video entitled “Replacing Covers & Ink Loader” is available with
instructions for removing the ink loader. Videos are located on the
WorkCentre C2424 Product Training CD-ROM.
1. Remove the right and left side covers (page 8-10).
2. Ensure the media exit path elevator is in the up position.
3. Lift up on the right and left sides of the ink loader to release from the system,
then lift the ink loader assembly clear of the chassis and hold it in position
against the rear of the system to allow access to the connectors
4. Disconnect the 2 connectors from the system and remove the ink loader.
Replacement Notes:
Note
The gray cable must be routed between the Ink Loader and the printer side.
The white cable must be routed towards the left side. The Exit Flag Elevator
must be raised before reinstalling the Ink loader.
s2424-1
1
2
Ink Loader
Latch Pin
Finger Notch
 Loading...