Image-Quality Troubleshooting 5-19
Scratches or Marks Parallel to the Long Axis of Printing,
Particularly with Transparencies
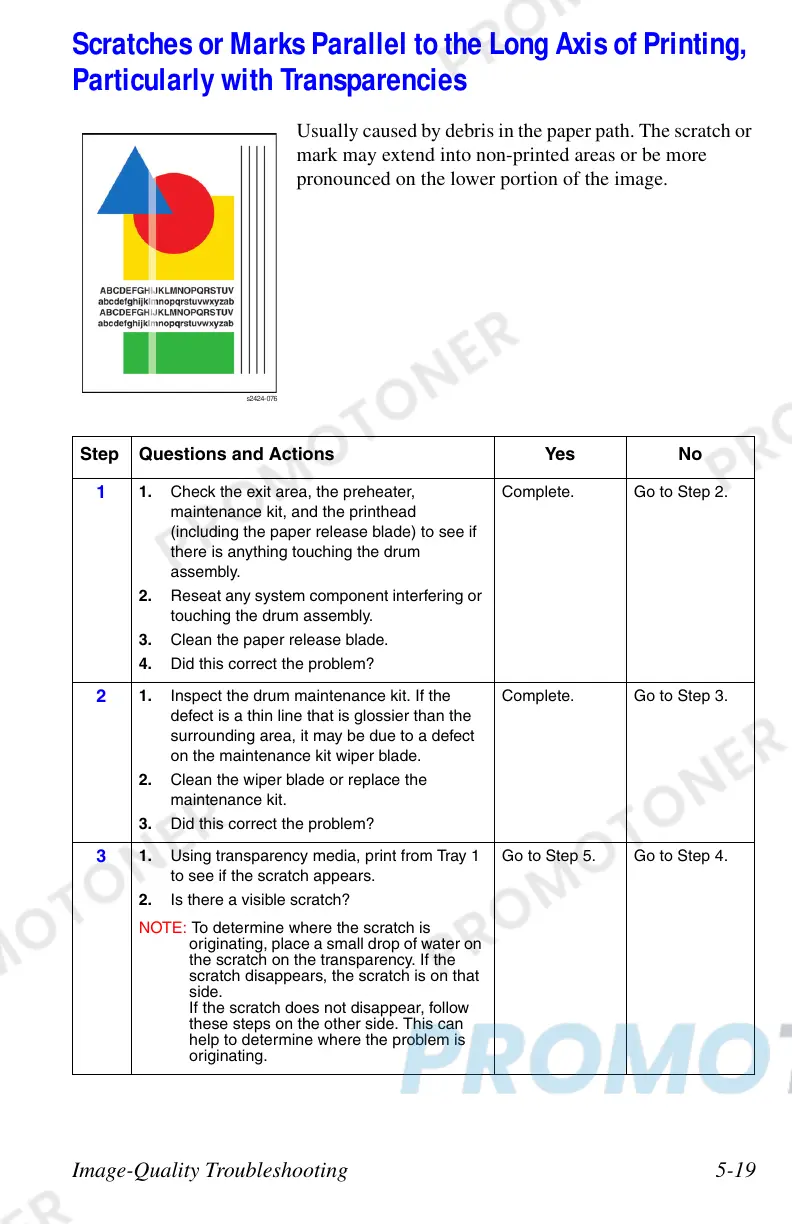
Usually caused by debris in the paper path. The scratch or
mark may extend into non-printed areas or be more
pronounced on the lower portion of the image.
Step Questions and Actions Yes No
1
1. Check the exit area, the preheater,
maintenance kit, and the printhead
(including the paper release blade) to see if
there is anything touching the drum
assembly.
2. Reseat any system component interfering or
touching the drum assembly.
3. Clean the paper release blade.
4. Did this correct the problem?
Complete. Go to Step 2.
2
1. Inspect the drum maintenance kit. If the
defect is a thin line that is glossier than the
surrounding area, it may be due to a defect
on the maintenance kit wiper blade.
2. Clean the wiper blade or replace the
maintenance kit.
3. Did this correct the problem?
Complete. Go to Step 3.
3
1. Using transparency media, print from Tray 1
to see if the scratch appears.
2. Is there a visible scratch?
NOTE: To determine where the scratch is
originating, place a small drop of water on
the scratch on the transparency. If the
scratch disappears, the scratch is on that
side.
If the scratch does not disappear, follow
these steps on the other side. This can
help to determine where the problem is
originating.
Go to Step 5. Go to Step 4.
s2424-0
 Loading...