Service Parts Disassembly 8-55
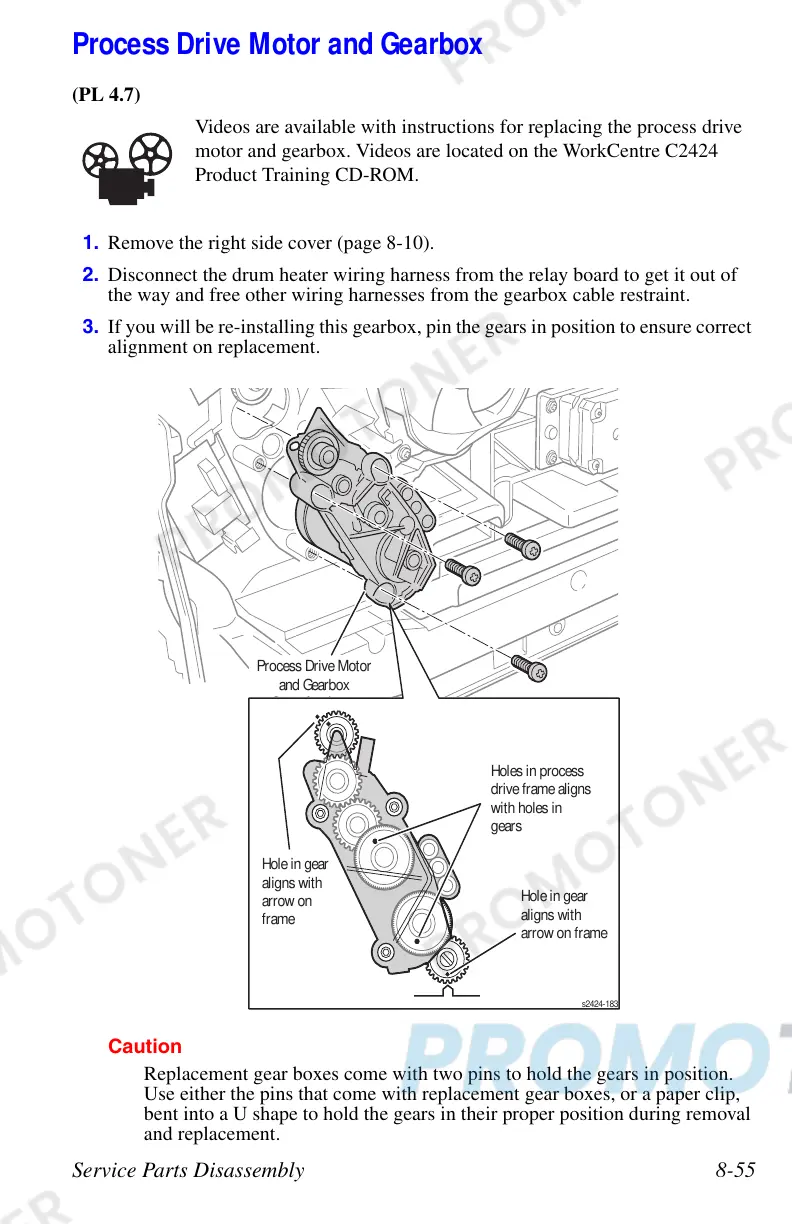
Process Drive Motor and Gearbox
(PL 4.7)
Videos are available with instructions for replacing the process drive
motor and gearbox. Videos are located on the WorkCentre C2424
Product Training CD-ROM.
1. Remove the right side cover (page 8-10).
2. Disconnect the drum heater wiring harness from the relay board to get it out of
the way and free other wiring harnesses from the gearbox cable restraint.
3. If you will be re-installing this gearbox, pin the gears in position to ensure correct
alignment on replacement.
Caution
Replacement gear boxes come with two pins to hold the gears in position.
Use either the pins that come with replacement gear boxes, or a paper clip,
bent into a U shape to hold the gears in their proper position during removal
and replacement.
Process Drive Motor
and Gearbox
Hole in gear
aligns with
arrow on
frame
Holes in process
drive frame aligns
with holes in
gears
Hole in gear
aligns with
arrow on frame
 Loading...