8-48 WorkCentre C2424 Service Manual
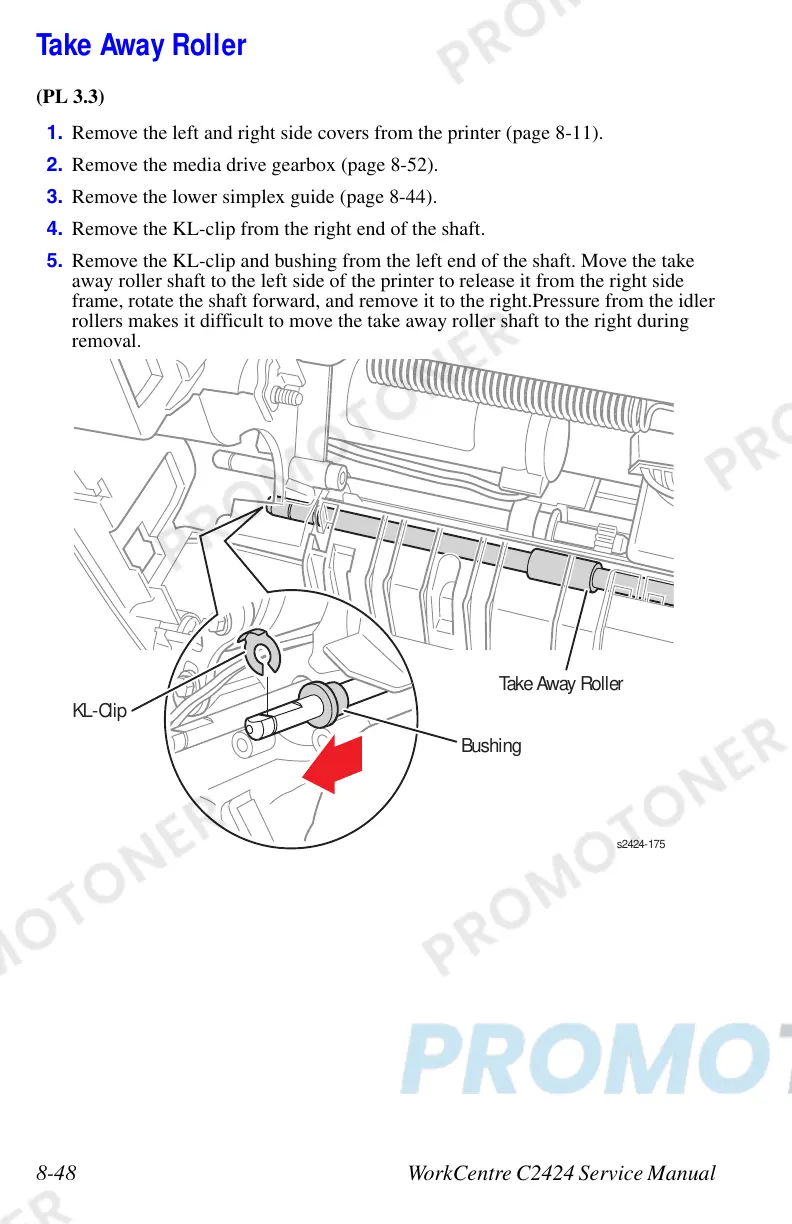
Take Away Roller
(PL 3.3)
1. Remove the left and right side covers from the printer (page 8-11).
2. Remove the media drive gearbox (page 8-52).
3. Remove the lower simplex guide (page 8-44).
4. Remove the KL-clip from the right end of the shaft.
5. Remove the KL-clip and bushing from the left end of the shaft. Move the take
away roller shaft to the left side of the printer to release it from the right side
frame, rotate the shaft forward, and remove it to the right.Pressure from the idler
rollers makes it difficult to move the take away roller shaft to the right during
removal.
s2424-175
Take Away Roller
Bushing
L-Clip
 Loading...