8-26 WorkCentre C2424 Service Manual
Media Release Blade (Stripper) Carriage Assembly and
Transfix Roller
(Carriage PL 2.12) (Roller PL 2.13)
Videos are available with instructions for replacing the Transfix
Roller. Videos are located on the WorkCentre C2424 Product Training
CD-ROM.
1. Remove the right side cover (page 8-10).
2. Disconnect J250 from the I/O Board.
3. Remove 2 screws securing the I/O Board to the chassis (see "Electronics Module,
Circuit Boards and Cables" on page 9-12), slide the board towards the rear, and
move the board out of the way.
4. Loosen 1 screw securing the transfix roller shaft restraint and remove the
restraint.
Caution
Hold the transfix roller and the media release blade with one hand during
removal to prevent the roller from damaging the printer (or the roller itself).
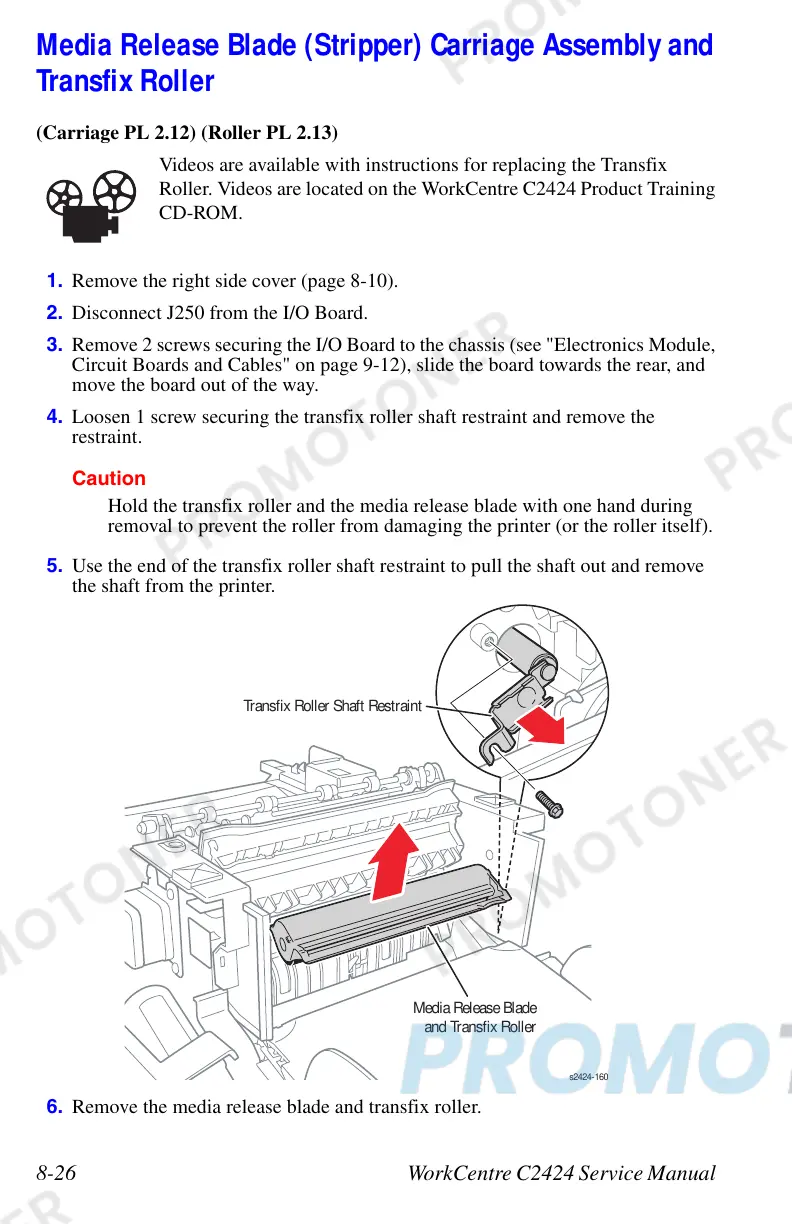
5. Use the end of the transfix roller shaft restraint to pull the shaft out and remove
the shaft from the printer.
6. Remove the media release blade and transfix roller.
Transfix Roller Shaft Restraint
Media Release Blade
and Transfix Roller
 Loading...