Service Parts Disassembly 8-35
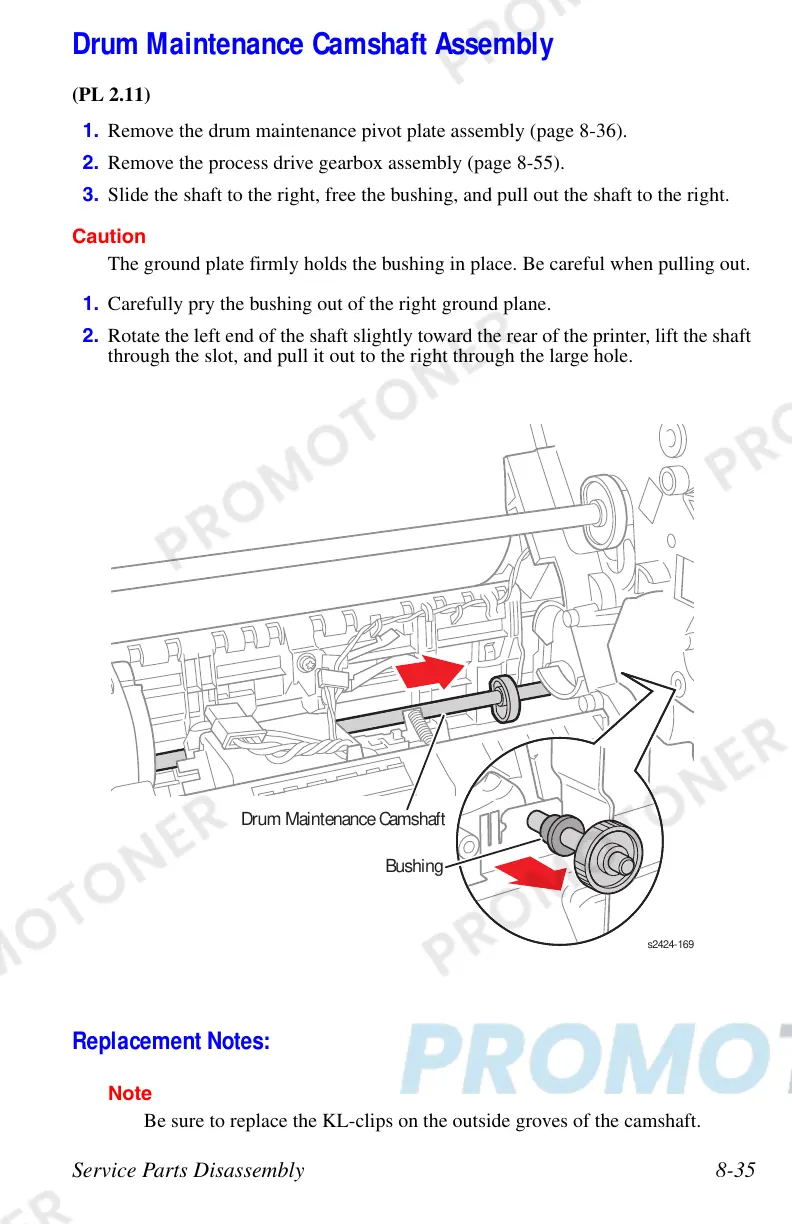
Drum Maintenance Camshaft Assembly
(PL 2.11)
1. Remove the drum maintenance pivot plate assembly (page 8-36).
2. Remove the process drive gearbox assembly (page 8-55).
3. Slide the shaft to the right, free the bushing, and pull out the shaft to the right.
Caution
The ground plate firmly holds the bushing in place. Be careful when pulling out.
1. Carefully pry the bushing out of the right ground plane.
2. Rotate the left end of the shaft slightly toward the rear of the printer, lift the shaft
through the slot, and pull it out to the right through the large hole.
Replacement Notes:
Note
Be sure to replace the KL-clips on the outside groves of the camshaft.
Bushing
Drum Maintenance Camshaft
 Loading...