EN 261Get help in this guide
Check all of the following firewall settings, and change them if necessary.
• Update the security software to the current version.
• Make sure firewall settings have not been changed from default.
• Set the Firewall strength to medium or an equivalent level when connected to your home network.
• Set your network as a trusted zone.
• Make sure Ricoh programs are trusted programs and are not blocked.
• Enable alert messages. For example, if you install new Ricoh software, your security software should
confirm if you want to allow, permit, or unblock the installation. Always allow the Ricoh software to
install.
• If the firewall has a Remember this action or Create a rule for this option, select it.
• Make sure Ricoh ports are not blocked. Create rules to allow the following ports, if necessary.
◦ Inbound rules: TCP 80, TCP 443, TCP 631, TCP 8080, UDP 427, UDP 3702, UDP 5353
◦ Outbound rules: TCP 80, TCP 139, TCP 443, TCP 631, TCP 8080, TCP 9100, TCP 9200, TCP
9290, TCP 9500, UDP 139, UDP 161, UDP 427, UDP 3702, UDP 5353
Find the wireless network password or PIN to connect a Ricoh printer
Find the WPS PIN
Find and enter the WPS PIN to complete printer setup. You have a short time (90 seconds for most models) to
enter the PIN before it expires.
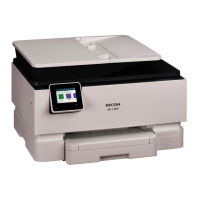
1. After the WPS PIN prompt displays on the computer, look for a PIN on the printer control panel.
• From the printer control panel, touch or swipe down the tab
at the top of the screen to
open the Dashboard, and then touch
(Wi-Fi Direct).
2. Enter the PIN, and then click Next to finish the setup.
 Loading...
