P
r
o
t
e
c
t
e
d
b
y
c
o
p
y
r
i
g
h
t
.
C
o
p
y
i
n
g
f
o
r
p
r
i
v
a
t
e
o
r
c
o
m
m
e
r
c
i
a
l
p
u
r
p
o
s
e
s
,
i
n
p
a
r
t
o
r
i
n
w
h
o
l
e
,
i
s
n
o
t
p
e
r
m
i
t
t
e
d
u
n
l
e
s
s
a
u
t
h
o
r
i
s
e
d
b
y
V
o
l
k
s
w
a
g
e
n
A
G
.
V
o
l
k
s
w
a
g
e
n
A
G
d
o
e
s
n
o
t
g
u
a
r
a
n
t
e
e
o
r
a
c
c
e
p
t
a
n
y
l
i
a
b
i
l
i
t
y
w
i
t
h
r
e
s
p
e
c
t
t
o
t
h
e
c
o
r
r
e
c
t
n
e
s
s
o
f
i
n
f
o
r
m
a
t
i
o
n
i
n
t
h
i
s
d
o
c
u
m
e
n
t
.
C
o
p
y
r
i
g
h
t
b
y
V
o
l
k
s
w
a
g
e
n
A
G
.
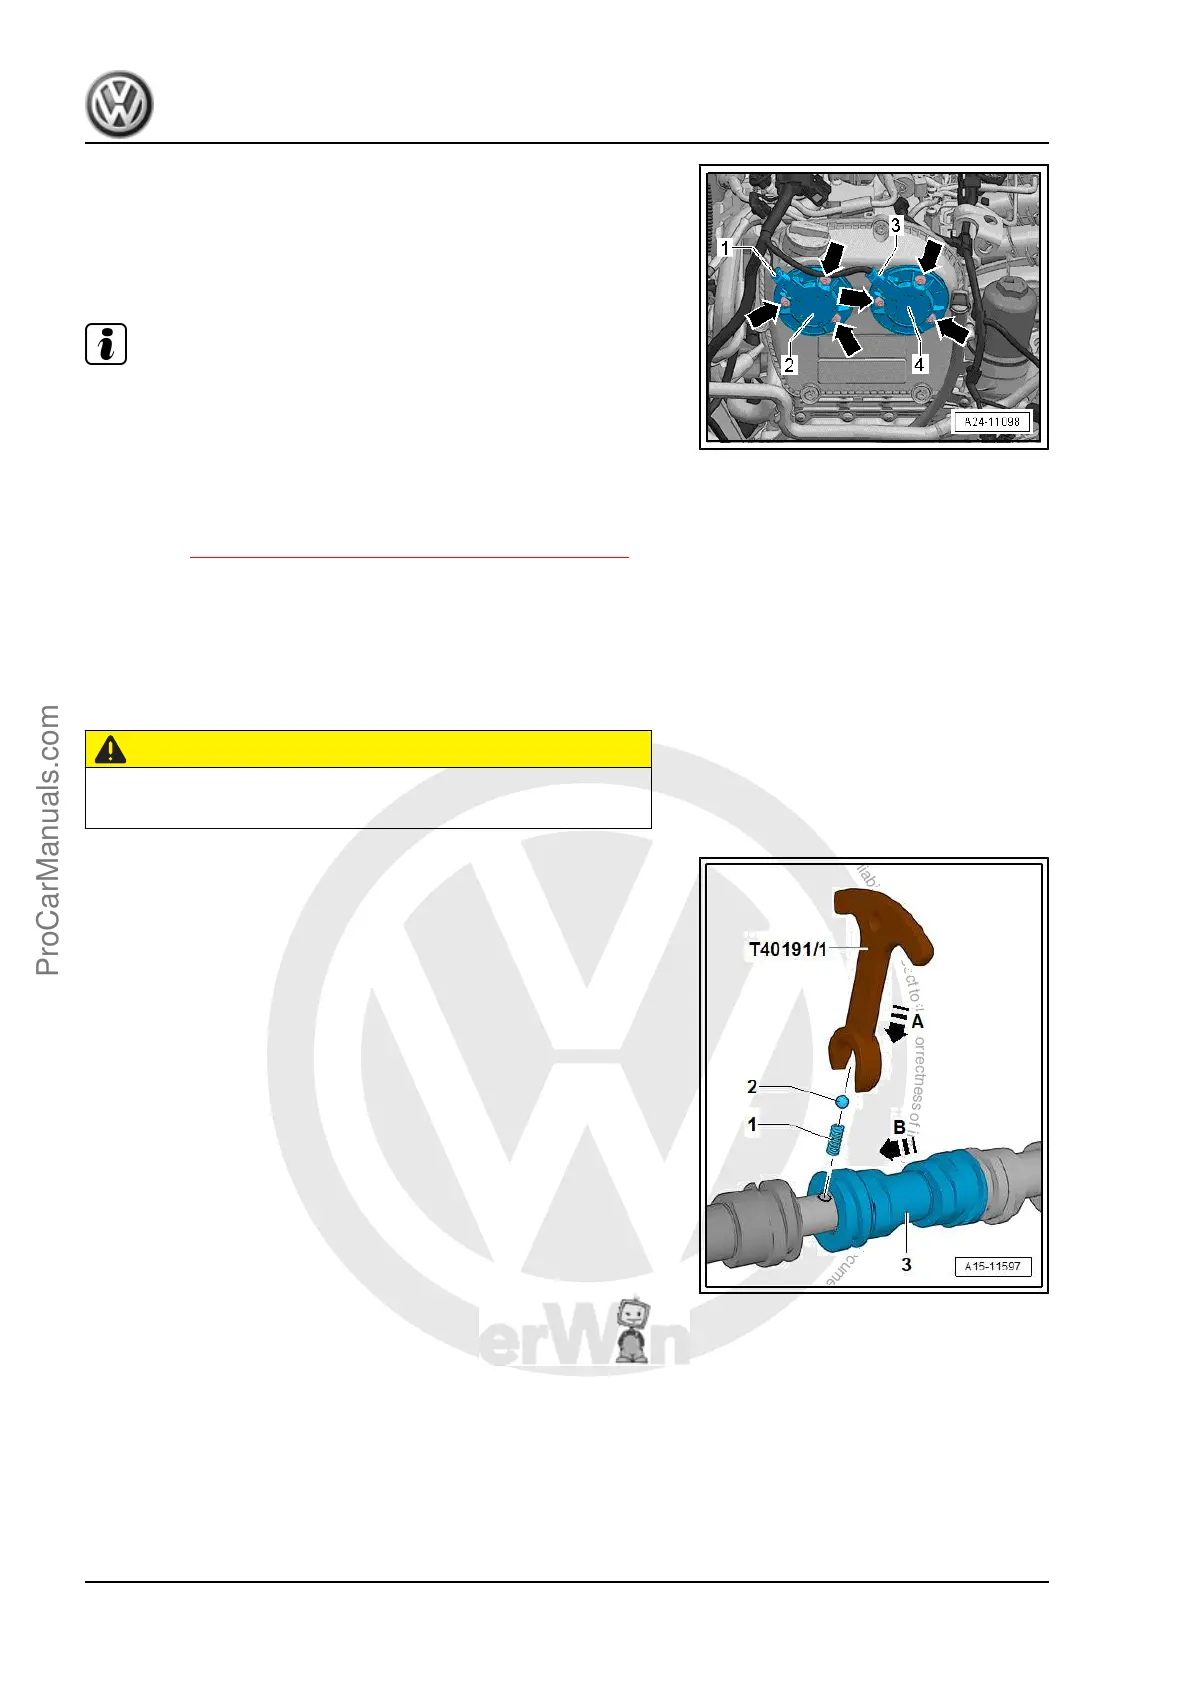
– Remove the bolts -arrows- and Camshaft Adjustment Valve 1
- N205- -4- and Exhaust Camshaft Adjustment Valve 1 - N318-
-2-.
Installing
Install in reverse order of removal. Note the following:
Note
Replace seals and O-rings.
– Lubricate seals on the Camshaft Adjustment Valve 1 - N205- /
Exhaust Camshaft Adjustment Valve 1 - N318- sealing surfa‐
ces with engine oil.
Tightening Specifications
♦ Refer to ⇒ 2.1 Overview - Timing Chain Cover, page 104 .
4.5 Sliding Bar Ball, Installing
Special tools and workshop equipment required
♦ Camshaft Spacer - T40191-
Installing
CAUTION
Risk of injuring the eyes due to the sliding ball bar springing out.
– Wear protective eyewear.
– Insert the spring -1- in the camshaft.
– Place the ball -2- on the spring in the camshaft.
– Push the ball and spring downward in direction of -arrow A-
using the Camshaft Spacer - T40191/1- and hold.
– Push the sliding bar -3- in the direction of -arrow B-.
Golf 2015 ➤ , Golf Variant 2015 ➤
Engine Mechanical, Fuel Injection and Ignition - Edition 04.2015
162 Rep. Gr.15 - Cylinder Head, Valvetrain
ProCarManuals.com
 Loading...


