P
r
o
t
e
c
t
e
d
b
y
c
o
p
y
r
i
g
h
t
.
C
o
p
y
i
n
g
f
o
r
p
r
i
v
a
t
e
o
r
c
o
m
m
e
r
c
i
a
l
p
u
r
p
o
s
e
s
,
i
n
p
a
r
t
o
r
i
n
w
h
o
l
e
,
i
s
n
o
t
p
e
r
m
i
t
t
e
d
u
n
l
e
s
s
a
u
t
h
o
r
i
s
e
d
b
y
V
o
l
k
s
w
a
g
e
n
A
G
.
V
o
l
k
s
w
a
g
e
n
A
G
d
o
e
s
n
o
t
g
u
a
r
a
n
t
e
e
o
r
a
c
c
e
p
t
a
n
y
l
i
a
b
i
l
i
t
y
w
i
t
h
r
e
s
p
e
c
t
t
o
t
h
e
c
o
r
r
e
c
t
n
e
s
s
o
f
i
n
f
o
r
m
a
t
i
o
n
i
n
t
h
i
s
d
o
c
u
m
e
n
t
.
C
o
p
y
r
i
g
h
t
b
y
V
o
l
k
s
w
a
g
e
n
A
G
.
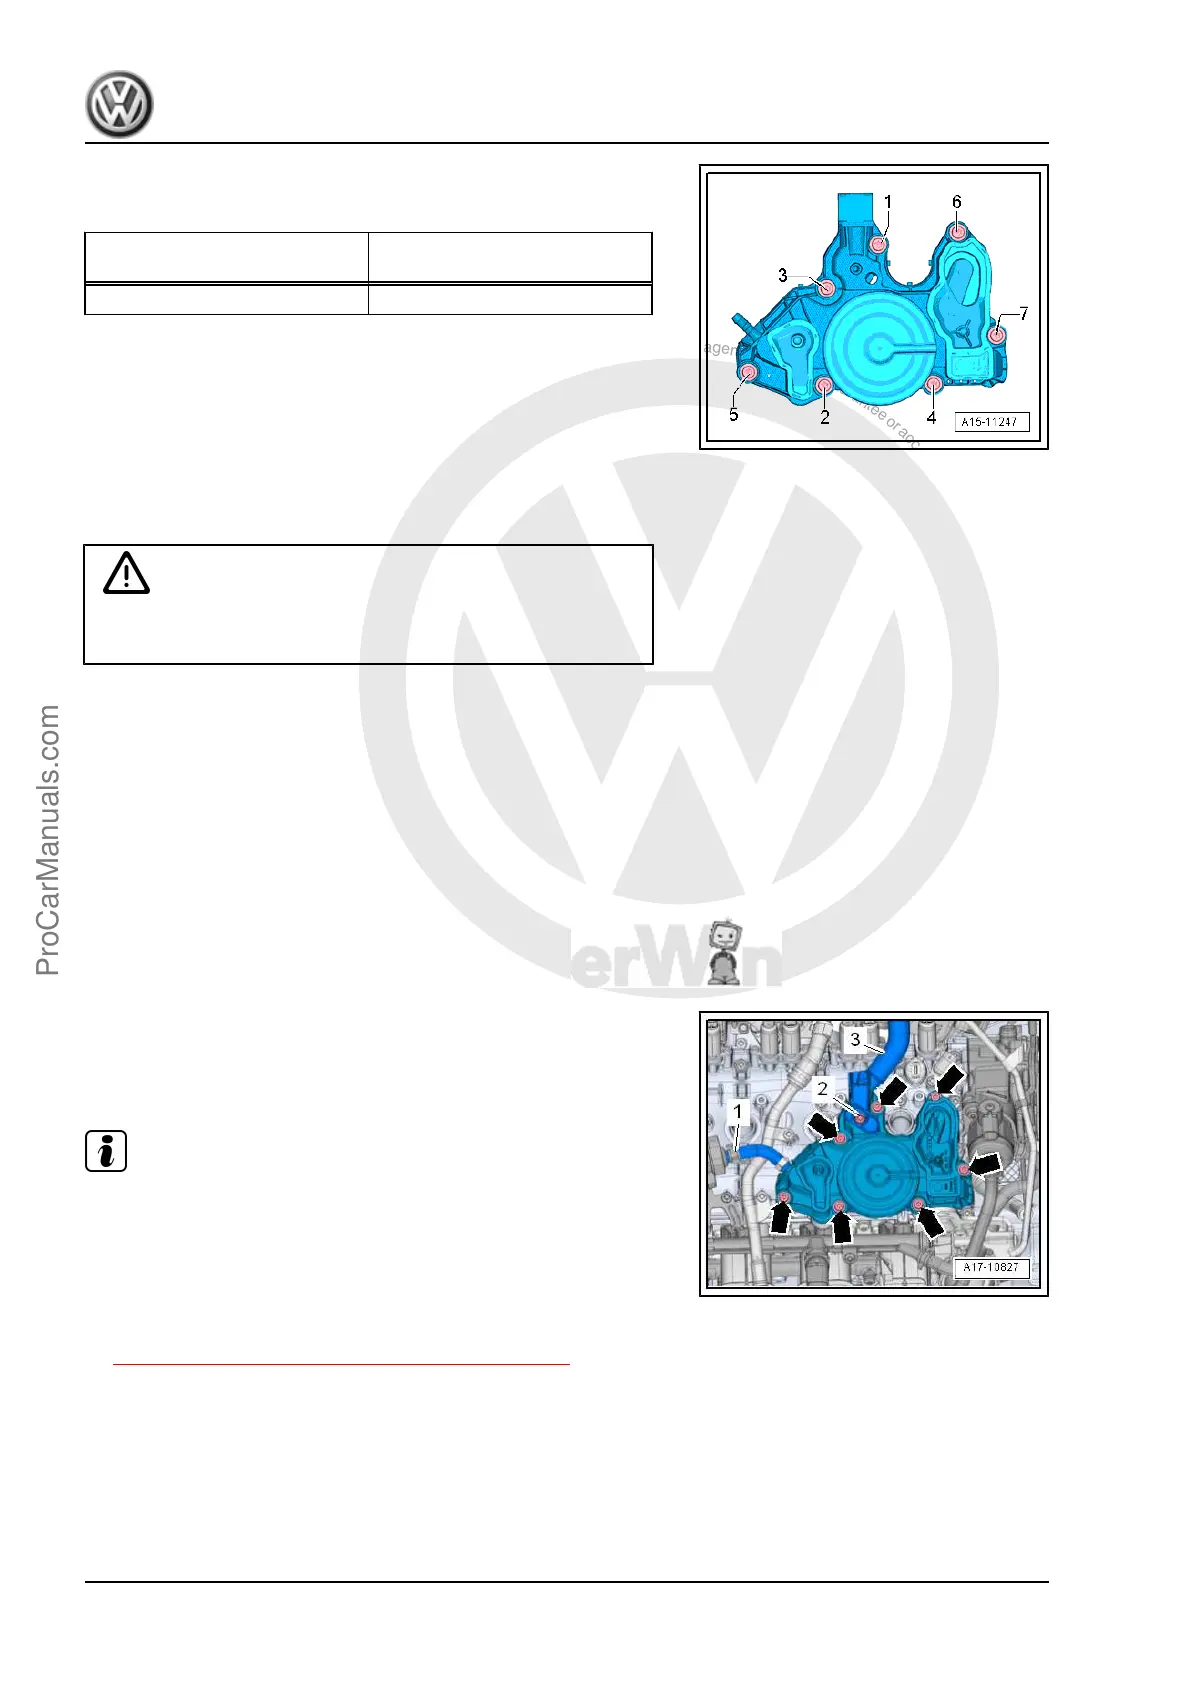
Oil Separator - Tightening Sequence
– Tighten the bolts in the sequence -1 through 7-.
Bolts Tightening Sequence and Tor‐
que Specification
-1 through 7- 9 Nm.
3.2 Oil Separator, Removing and Installing
Removing
Caution
This procedure contains mandatory replaceable parts. Refer
to component overview prior to starting procedure.
Mandatory Replacement Parts
♦ Seal - Oil Separator
♦ Seals - Oil Separator to Crankcase Hose
– Disconnect the ignition coil sensors connectors and remove
them from the ignition coils at the same time.
– Remove the ignition coils bolts 3, 4, and remove the ignition
coils.
– Loosen the hose clamp -1- and remove the hose from EVAP
Canister Purge Regulator Valve 1 - N80- .
– Remove bolt -2- and then remove crankcase ventilation hose
-3- from oil separator.
– Remove the bolts -arrows- and the oil separator.
Installing
Install in reverse order of removal. Note the following:
Note
♦
Always replace gasket and seals.
♦
Secure hose connections with standard production clamps.
Refer to the Parts Catalog.
Tightening Specifications
♦ Refer to
⇒ 3.1 Overview - Crankcase Ventilation, page 195 .
Golf 2015 ➤ , Golf Variant 2015 ➤
Engine Mechanical, Fuel Injection and Ignition - Edition 04.2015
196 Rep. Gr.17 - Lubrication
ProCarManuals.com
 Loading...


