P
r
o
t
e
c
t
e
d
b
y
c
o
p
y
r
i
g
h
t
.
C
o
p
y
i
n
g
f
o
r
p
r
i
v
a
t
e
o
r
c
o
m
m
e
r
c
i
a
l
p
u
r
p
o
s
e
s
,
i
n
p
a
r
t
o
r
i
n
w
h
o
l
e
,
i
s
n
o
t
p
e
r
m
i
t
t
e
d
u
n
l
e
s
s
a
u
t
h
o
r
i
s
e
d
b
y
V
o
l
k
s
w
a
g
e
n
A
G
.
V
o
l
k
s
w
a
g
e
n
A
G
d
o
e
s
n
o
t
g
u
a
r
a
n
t
e
e
o
r
a
c
c
e
p
t
a
n
y
l
i
a
b
i
l
i
t
y
w
i
t
h
r
e
s
p
e
c
t
t
o
t
h
e
c
o
r
r
e
c
t
n
e
s
s
o
f
i
n
f
o
r
m
a
t
i
o
n
i
n
t
h
i
s
d
o
c
u
m
e
n
t
.
C
o
p
y
r
i
g
h
t
b
y
V
o
l
k
s
w
a
g
e
n
A
G
.
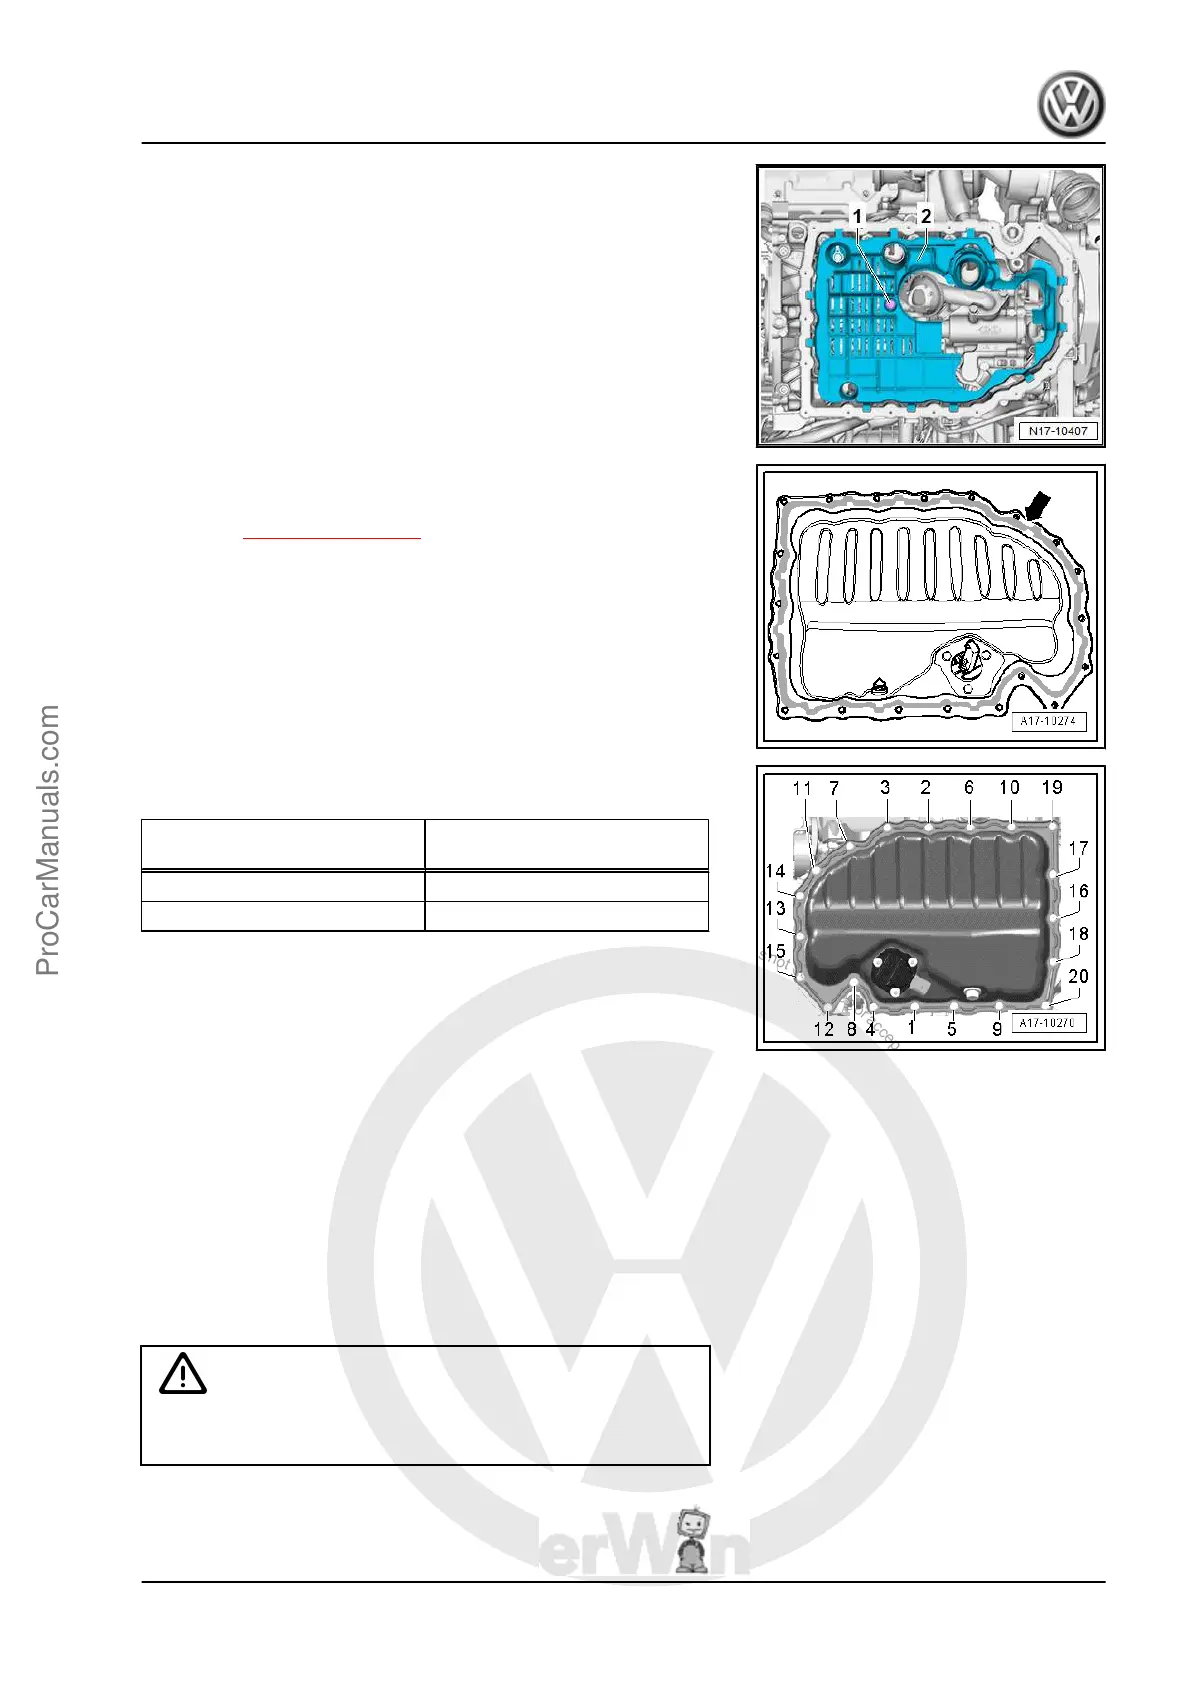
– Remove the bolt -1- and remove the oil baffle -2-.
Installing
– Install a new oil baffle. Tightening specification. Refer to
-item 7- ⇒ Item 7 (page 180) .
– Remove the sealant residue and clean the sealing surface.
– Apply silicone sealant on the sealing surface of the oil pan
lower section as shown.
– Tighten the new bolts -1 through 20- in two stages in the se‐
quence shown:
Step Tightening Sequence and
Tightening Specification
1. Bolts -1- through -20- Pre-tighten to 8 Nm
2. Bolts -1- through -20- 45° additional turn
– Fill with engine oil and then check the level. Refer to ⇒ Main‐
tenance ; Booklet ; Engine; Draining; Oil Filter, Replacing;
Engine Oil, Filling .
1.4 Oil Pan Upper Section, Removing and
Installing
Special tools and workshop equipment required
♦ Elbow Assembly Tool - T10118-
♦ Chain Tensioner Locking Tool - T40265-
♦ Hand drill with plastic brush attachment
♦ Protective eyewear
♦ Silicone grease. Refer to the Parts Catalog.
Caution
This procedure contains mandatory replaceable parts. Refer
to component overview prior to starting procedure.
Mandatory Replacement Parts
♦ Bolts - Upper Oil Pan
Golf 2015 ➤ , Golf Variant 2015 ➤
Engine Mechanical, Fuel Injection and Ignition - Edition 04.2015
1. Oil Pan/Oil Pump 185
ProCarManuals.com
 Loading...


