P
r
o
t
e
c
t
e
d
b
y
c
o
p
y
r
i
g
h
t
.
C
o
p
y
i
n
g
f
o
r
p
r
i
v
a
t
e
o
r
c
o
m
m
e
r
c
i
a
l
p
u
r
p
o
s
e
s
,
i
n
p
a
r
t
o
r
i
n
w
h
o
l
e
,
i
s
n
o
t
p
e
r
m
i
t
t
e
d
u
n
l
e
s
s
a
u
t
h
o
r
i
s
e
d
b
y
V
o
l
k
s
w
a
g
e
n
A
G
.
V
o
l
k
s
w
a
g
e
n
A
G
d
o
e
s
n
o
t
g
u
a
r
a
n
t
e
e
o
r
a
c
c
e
p
t
a
n
y
l
i
a
b
i
l
i
t
y
w
i
t
h
r
e
s
p
e
c
t
t
o
t
h
e
c
o
r
r
e
c
t
n
e
s
s
o
f
i
n
f
o
r
m
a
t
i
o
n
i
n
t
h
i
s
d
o
c
u
m
e
n
t
.
C
o
p
y
r
i
g
h
t
b
y
V
o
l
k
s
w
a
g
e
n
A
G
.
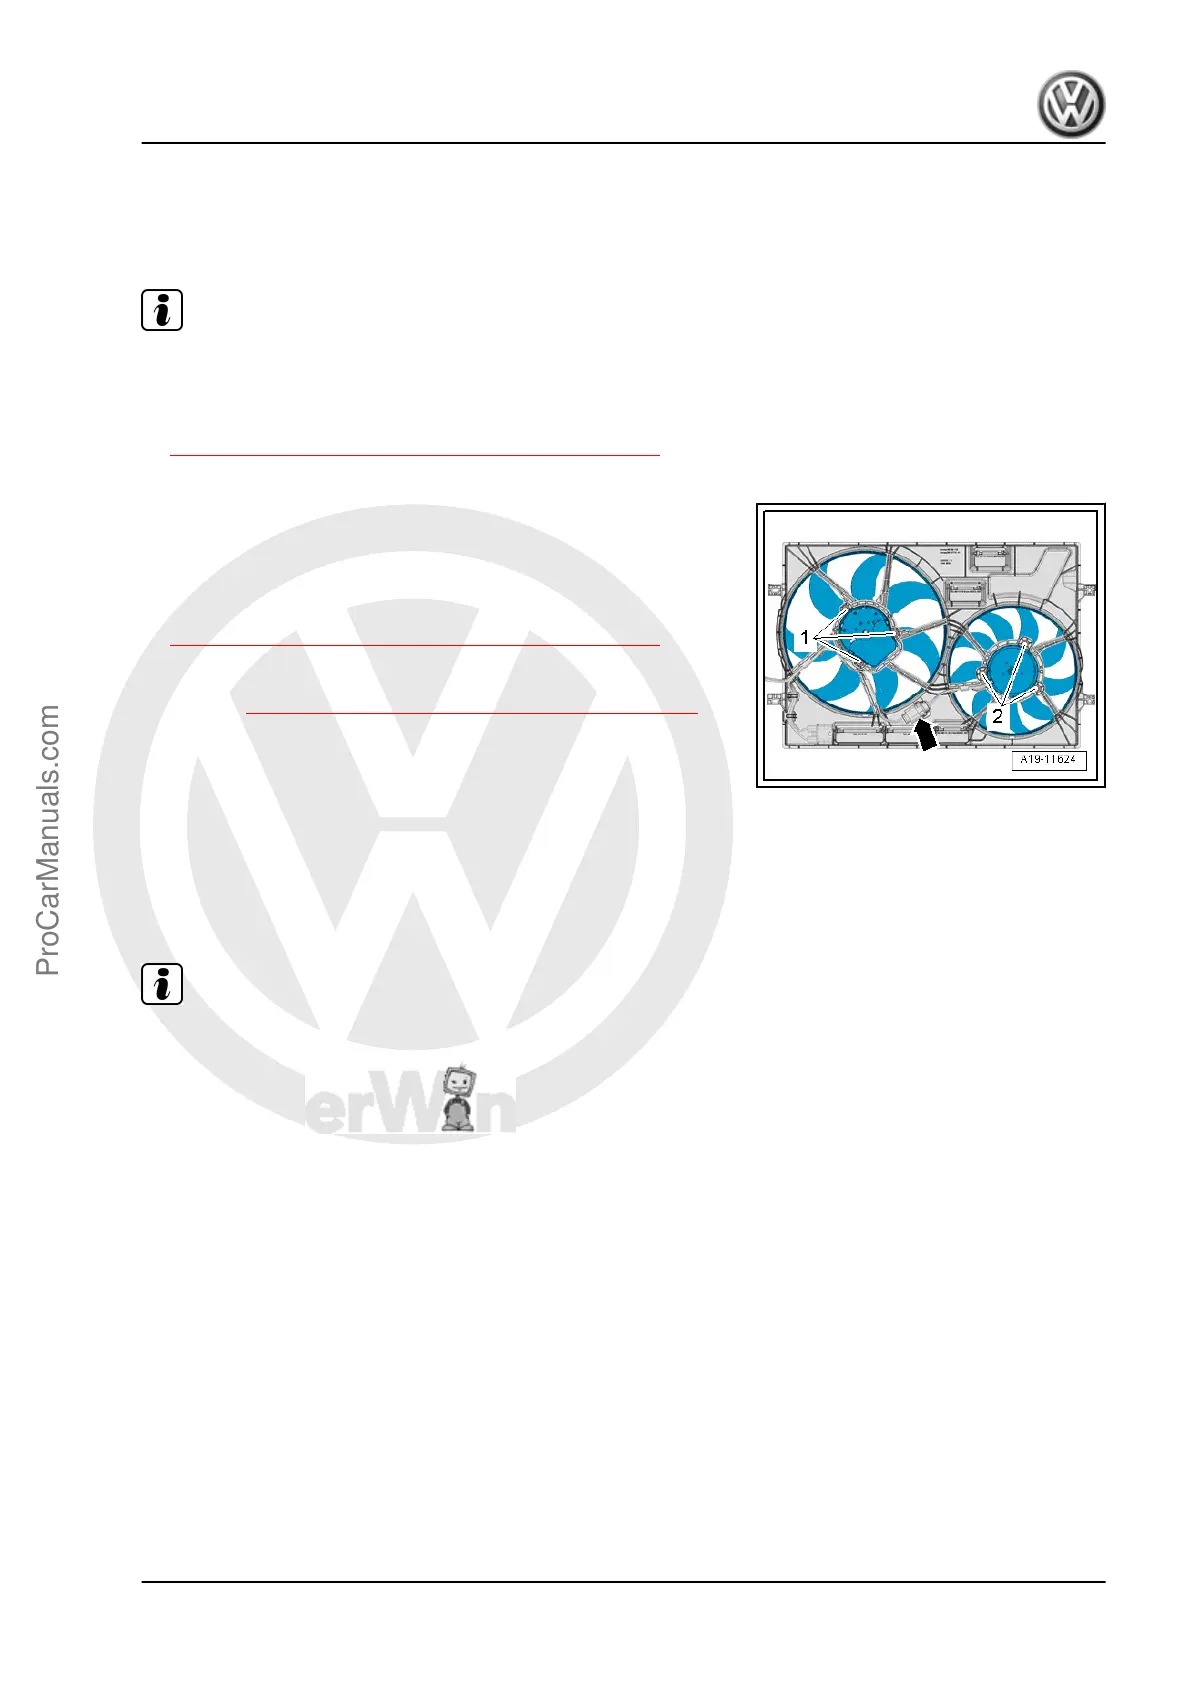
4.6.2 Coolant Fan 2 - V177- , Removing and
Installing
Removing
Note
During installation, all cable ties must be installed at the same
location.
– Remove the fan shroud. Refer to
⇒ 4.5 Fan Shroud, Removing and Installing, page 249 .
– Disconnect the connector -arrow-.
– Remove the bolts -2-, and remove the Coolant Fan 2 - V177- .
Installing
Install in reverse order of removal. Note the following:
– Install the fan shroud. Refer to
⇒ 4.5 Fan Shroud, Removing and Installing, page 249 .
Tightening Specifications
♦ Refer to ⇒ 4.1 Overview - Radiator/Coolant Fan, page 244 .
4.7 Auxiliary Cooler, Removing and Instal‐
ling
Special tools and workshop equipment required
♦ Hose Clamps - Up To 25mm - 3094-
Note
For vehicles with a DSG
®
transmission depending on the version
an auxiliary cooler is installed front right.
Removing
– Remove the right front wheel. Refer to ⇒ Suspension, Wheels,
Steering; Rep. Gr. 44 ; Wheels and Tires .
– Remove the noise insulation. Refer to ⇒ Body Exterior; Rep.
Gr. 66 ; Noise Insulation; Overview - Noise Insulation .
– Remove right front wheel housing liner. Refer to ⇒ Body Ex‐
terior; Rep. Gr. 66 ; Wheel Housing Liner; Front Wheel Hous‐
ing Liner, Removing and Installing .
– Remove the front bumper cover. Refer to ⇒ Body Exterior;
Rep. Gr. 63 ; Front Bumper; Bumper Cover, Removing and
Installing .
Golf 2015 ➤ , Golf Variant 2015 ➤
Engine Mechanical, Fuel Injection and Ignition - Edition 04.2015
4. Radiator/Coolant Fan 251
ProCarManuals.com
 Loading...


