P
r
o
t
e
c
t
e
d
b
y
c
o
p
y
r
i
g
h
t
.
C
o
p
y
i
n
g
f
o
r
p
r
i
v
a
t
e
o
r
c
o
m
m
e
r
c
i
a
l
p
u
r
p
o
s
e
s
,
i
n
p
a
r
t
o
r
i
n
w
h
o
l
e
,
i
s
n
o
t
p
e
r
m
i
t
t
e
d
u
n
l
e
s
s
a
u
t
h
o
r
i
s
e
d
b
y
V
o
l
k
s
w
a
g
e
n
A
G
.
V
o
l
k
s
w
a
g
e
n
A
G
d
o
e
s
n
o
t
g
u
a
r
a
n
t
e
e
o
r
a
c
c
e
p
t
a
n
y
l
i
a
b
i
l
i
t
y
w
i
t
h
r
e
s
p
e
c
t
t
o
t
h
e
c
o
r
r
e
c
t
n
e
s
s
o
f
i
n
f
o
r
m
a
t
i
o
n
i
n
t
h
i
s
d
o
c
u
m
e
n
t
.
C
o
p
y
r
i
g
h
t
b
y
V
o
l
k
s
w
a
g
e
n
A
G
.
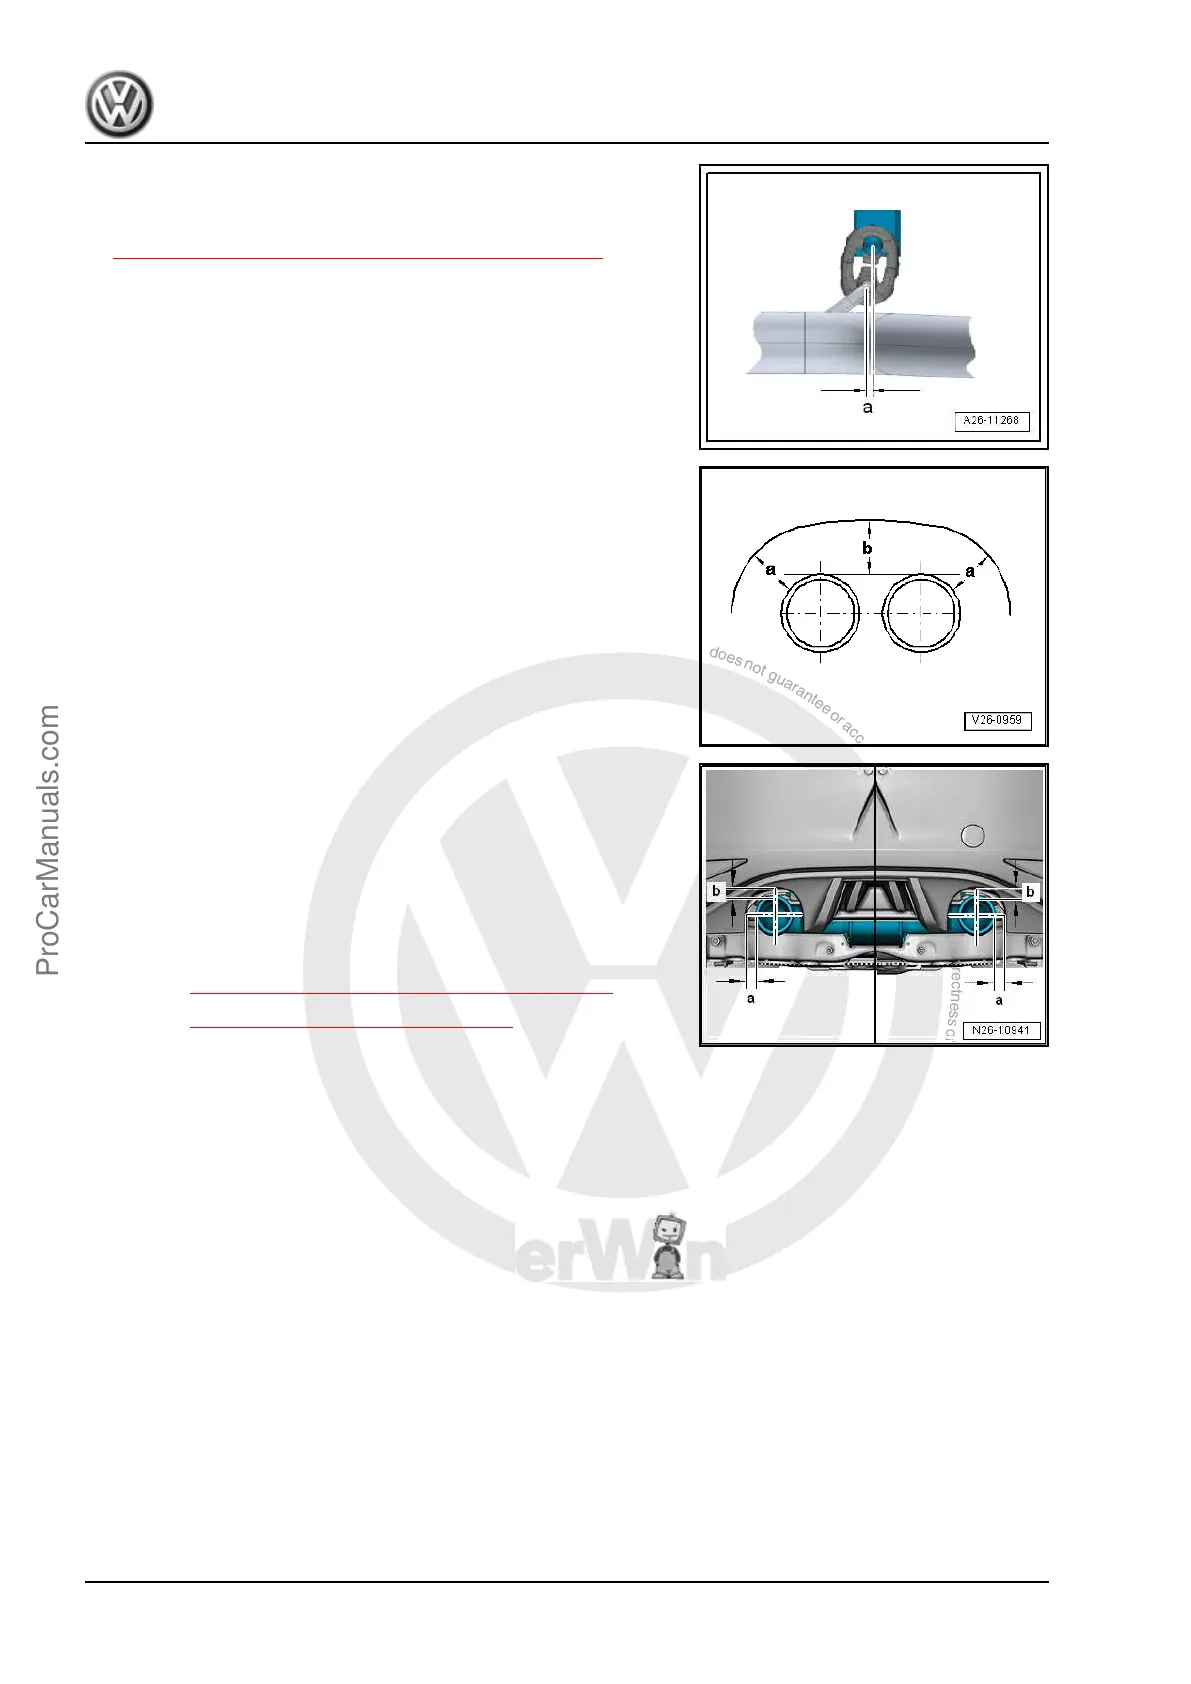
– Push the exhaust system far enough forward until the pre-load
on the retaining loops at the exhaust pipe -a- = 5 mm.
– Install the rear clamping sleeve
⇒ 1.6 Clamping Sleeve Installation Position, page 347 .
Tail Pipes, Aligning
– Align the rear muffler so that the distance -a and b- between
the bumper opening and the tail pipes is the same.
Vehicles with One Tail Pipe
– Align the rear muffler, so that the distance it is even between
the bumper and the tail pipe.
All Vehicles
– Loosen the rear muffler suspended mount to align the tail
pipes.
Tightening Specifications
♦ Refer to ⇒ 2.1 Overview - Emissions Control, page 348
♦ Refer to ⇒ 1.1 Overview - Muffler, page 338
1.5 Exhaust System, Checking for Leaks
– Start the engine and let it run at idle.
– Seal the tail pipes with cloths or plugs during the leakage test.
– Check for leaks where the exhaust manifold attaches to the
cylinder head and where the turbocharger attaches to the front
exhaust pipe.
– Repair detected leaks.
Golf 2015 ➤ , Golf Variant 2015 ➤
Engine Mechanical, Fuel Injection and Ignition - Edition 04.2015
346 Rep. Gr.26 - Exhaust System, Emission Controls
ProCarManuals.com
 Loading...


