P
r
o
t
e
c
t
e
d
b
y
c
o
p
y
r
i
g
h
t
.
C
o
p
y
i
n
g
f
o
r
p
r
i
v
a
t
e
o
r
c
o
m
m
e
r
c
i
a
l
p
u
r
p
o
s
e
s
,
i
n
p
a
r
t
o
r
i
n
w
h
o
l
e
,
i
s
n
o
t
p
e
r
m
i
t
t
e
d
u
n
l
e
s
s
a
u
t
h
o
r
i
s
e
d
b
y
V
o
l
k
s
w
a
g
e
n
A
G
.
V
o
l
k
s
w
a
g
e
n
A
G
d
o
e
s
n
o
t
g
u
a
r
a
n
t
e
e
o
r
a
c
c
e
p
t
a
n
y
l
i
a
b
i
l
i
t
y
w
i
t
h
r
e
s
p
e
c
t
t
o
t
h
e
c
o
r
r
e
c
t
n
e
s
s
o
f
i
n
f
o
r
m
a
t
i
o
n
i
n
t
h
i
s
d
o
c
u
m
e
n
t
.
C
o
p
y
r
i
g
h
t
b
y
V
o
l
k
s
w
a
g
e
n
A
G
.
Assemble in reverse order of disassembly.
Tightening Specifications
♦ Refer to
⇒ 1.1 Overview - Cylinder Block, Belt Pulley Side, page 44 .
1.5 Auxiliary Components Bracket, Remov‐
ing and Installing
Special tools and workshop equipment required
♦ Shop Crane - Drip Tray - VAS6208-
Caution
This procedure contains mandatory replaceable parts. Refer
to component overview prior to starting procedure.
Mandatory Replacement Parts
♦ Bolts - Auxiliary Components Bracket
♦ O-ring - Engine Oil Cooler
♦
Removing
– Drain the coolant. Refer to
⇒ 1.3 Coolant, Draining and Filling, page 217 .
– Remove the generator. Refer to ⇒ Electrical Equipment; Rep.
Gr. 27 ; Generator; Generator, Removing and Installing .
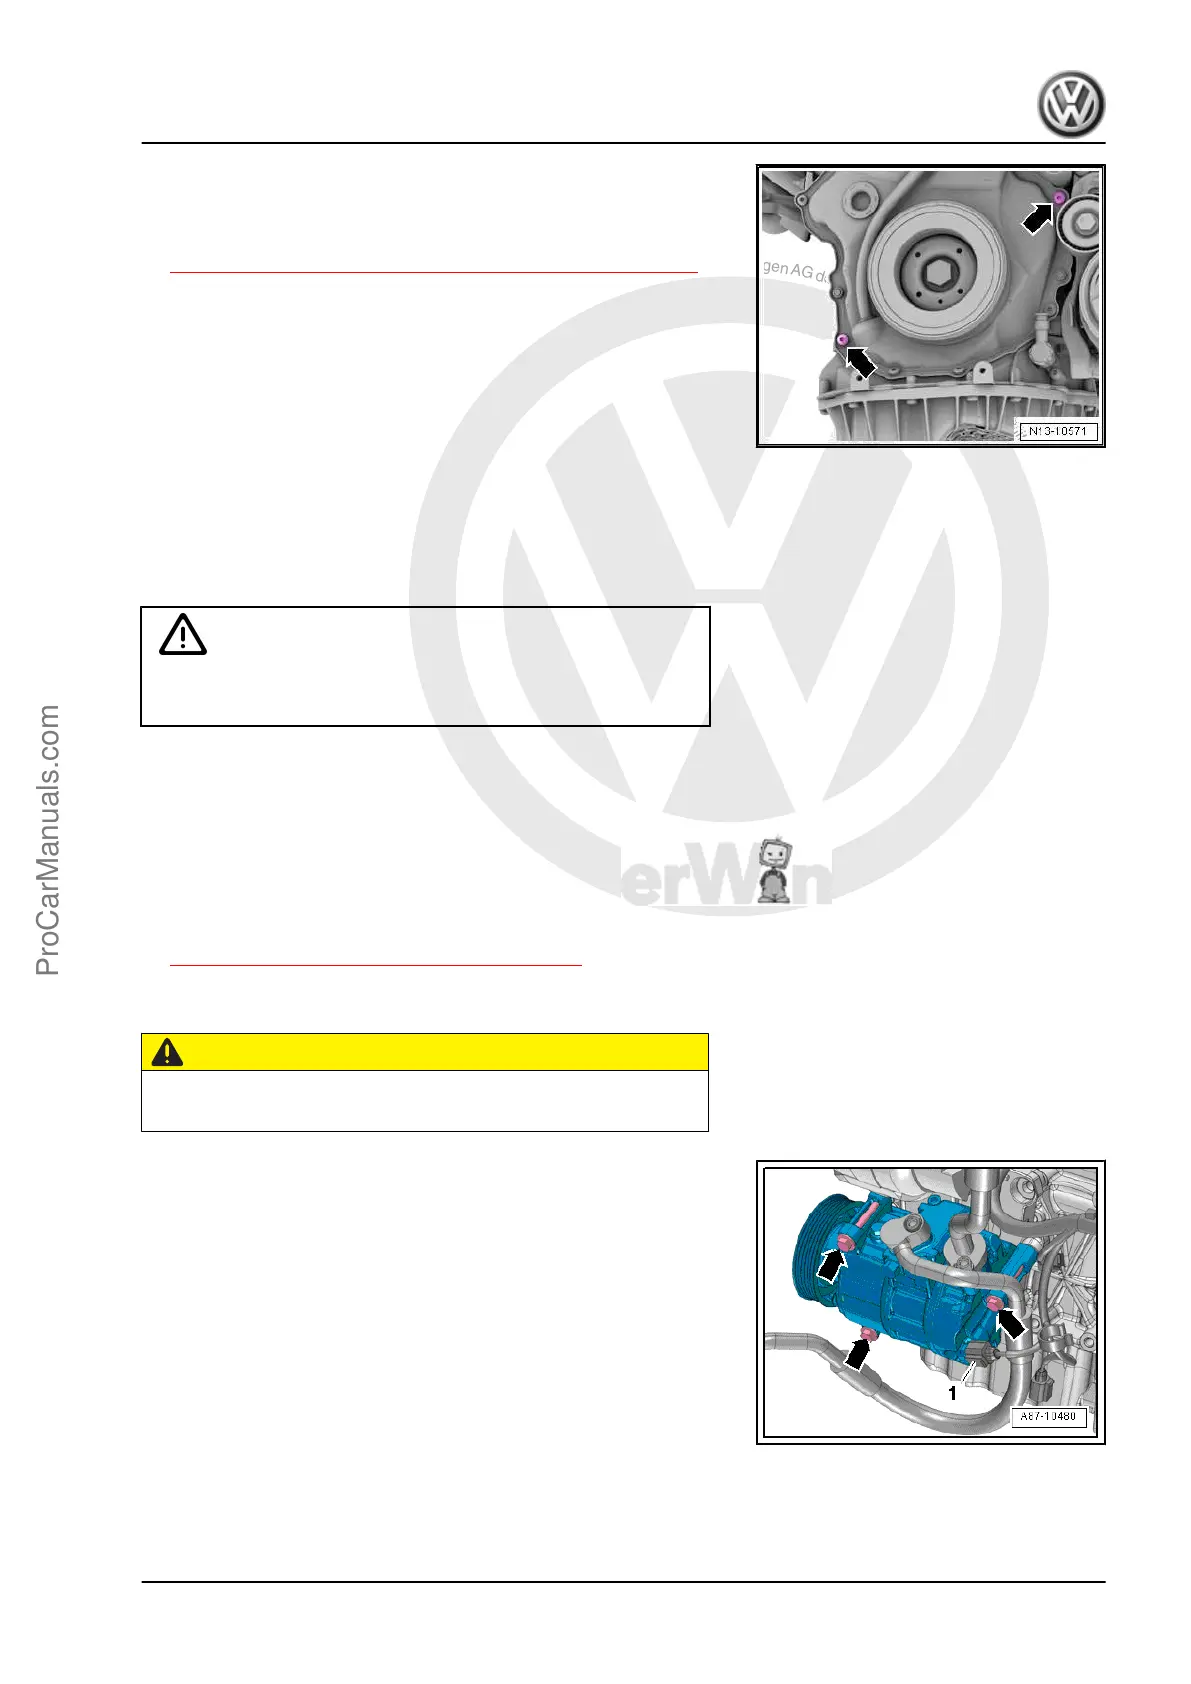
CAUTION
Danger of frostbite from refrigerant.
– Do not open the A/C system refrigerant circuit.
– Disconnect the connector -1- on the A/C Compressor Regu‐
lator Valve - N280- .
– Remove the bolts -arrows-.
– Remove the A/C compressor from the bracket with the refrig‐
erant hoses attached and tie up to the right side. Do not bend,
twist or stretch the refrigerant lines and hoses.
Golf 2015 ➤ , Golf Variant 2015 ➤
Engine Mechanical, Fuel Injection and Ignition - Edition 04.2015
1. Cylinder Block, Belt Pulley Side 53
ProCarManuals.com
 Loading...


