P
r
o
t
e
c
t
e
d
b
y
c
o
p
y
r
i
g
h
t
.
C
o
p
y
i
n
g
f
o
r
p
r
i
v
a
t
e
o
r
c
o
m
m
e
r
c
i
a
l
p
u
r
p
o
s
e
s
,
i
n
p
a
r
t
o
r
i
n
w
h
o
l
e
,
i
s
n
o
t
p
e
r
m
i
t
t
e
d
u
n
l
e
s
s
a
u
t
h
o
r
i
s
e
d
b
y
V
o
l
k
s
w
a
g
e
n
A
G
.
V
o
l
k
s
w
a
g
e
n
A
G
d
o
e
s
n
o
t
g
u
a
r
a
n
t
e
e
o
r
a
c
c
e
p
t
a
n
y
l
i
a
b
i
l
i
t
y
w
i
t
h
r
e
s
p
e
c
t
t
o
t
h
e
c
o
r
r
e
c
t
n
e
s
s
o
f
i
n
f
o
r
m
a
t
i
o
n
i
n
t
h
i
s
d
o
c
u
m
e
n
t
.
C
o
p
y
r
i
g
h
t
b
y
V
o
l
k
s
w
a
g
e
n
A
G
.
2.4 Charge Air Pressure Sensor - G31- ,
Removing and Installing
Removing
Caution
This procedure contains mandatory replaceable parts. Refer
to component overview prior to starting procedure.
Mandatory Replacement Parts
♦ O-ring - Charge Air Pressure Sensor
– Remove the noise insulation. Refer to ⇒ Body Exterior; Rep.
Gr. 66 ; Noise Insulation; Overview - Noise Insulation .
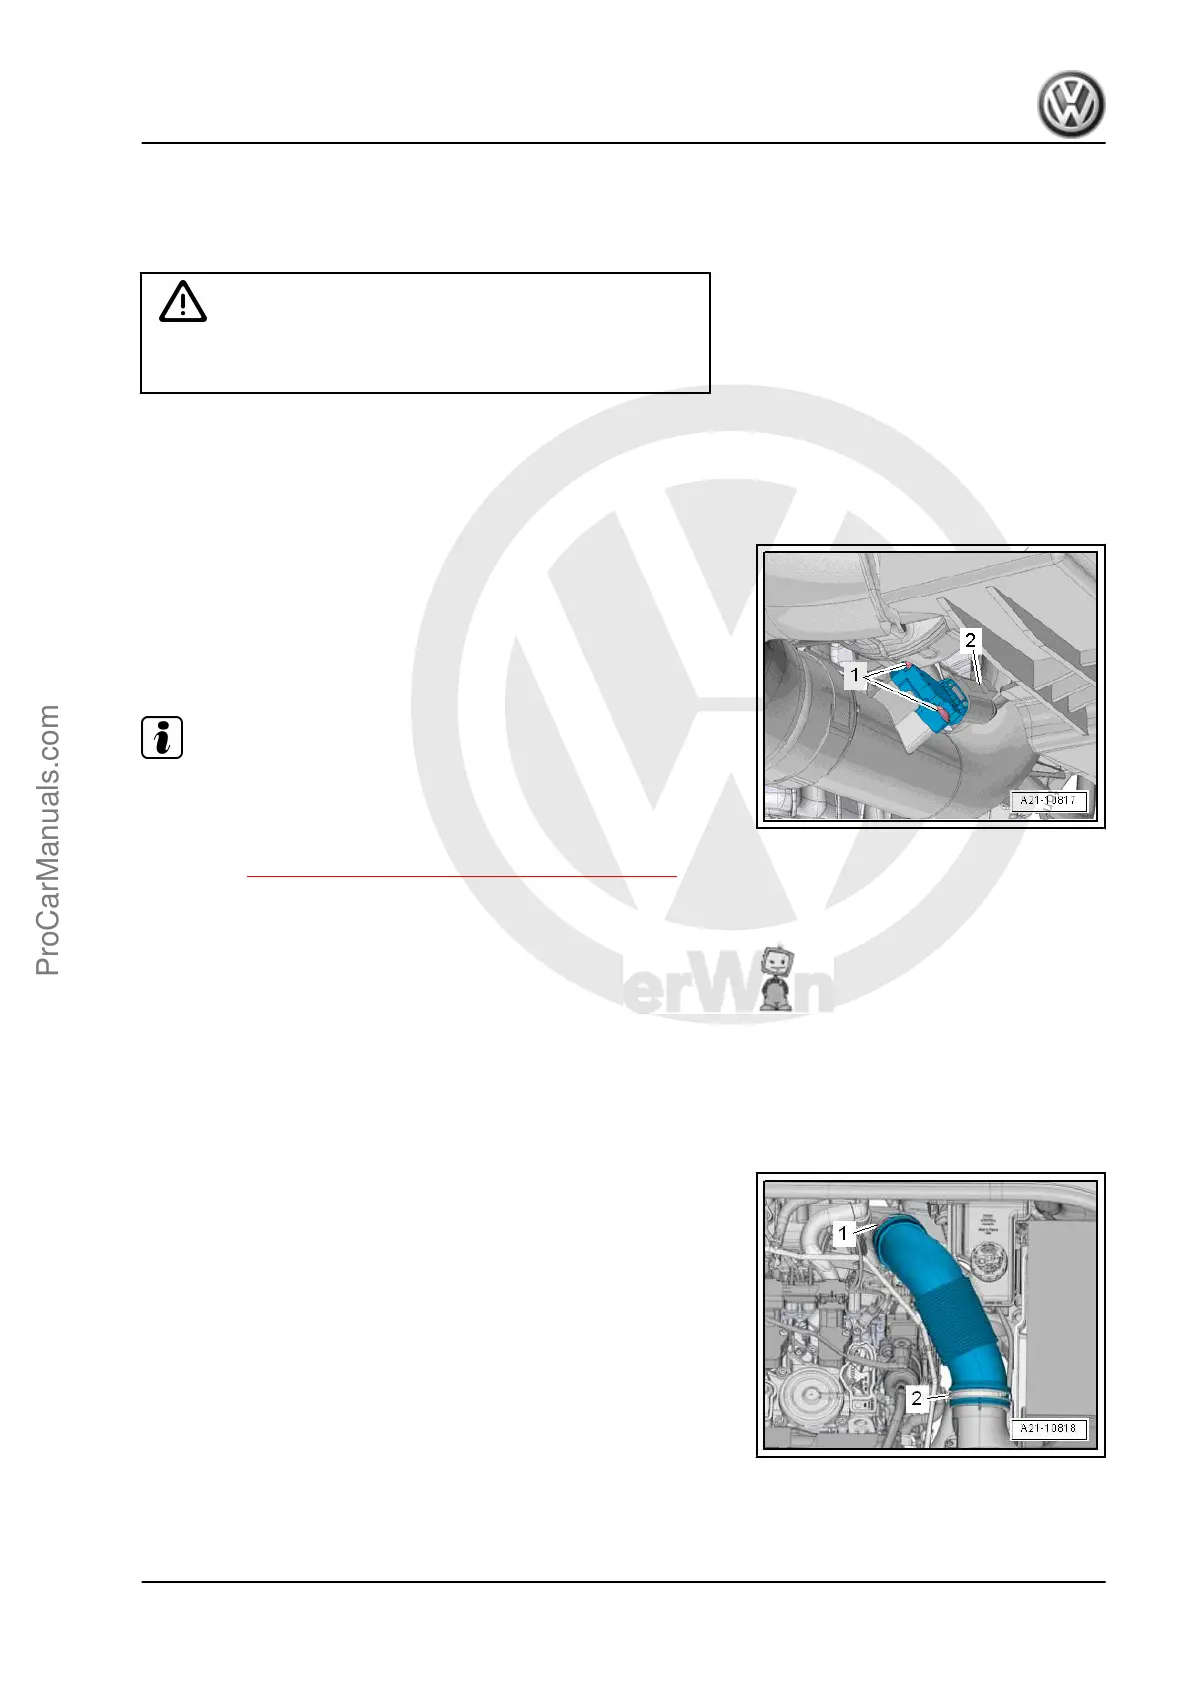
– Disconnect the connector -2-.
– Remove the bolts -1- and remove the Charge Air Pressure
Sensor - G31- from the air duct pipe.
Installing
Install in reverse order of removal. Note the following:
Note
Replacing the O-ring.
Tightening Specifications
♦ Refer to ⇒ 2.1 Overview - Charge Air System, page 264 .
♦ Refer to ⇒ Body Exterior; Rep. Gr. 66 ; Noise Insulation;
Overview - Noise Insulation .
2.5 Charge Air System, Checking for Leaks
Special tools and workshop equipment required
♦ Turbo System Tester Kit - VAG1687-
♦ Turbo System Tester Kit - Adapter 10 - VAG1687/10-
♦ Turbo System Tester Kit - Adapter - VAG1687/14-
♦ Ultrasonic Tester - VAG1842S-
Procedure
– Loosen the hose clamps -1 and 2- and remove the air guide
pipe.
Golf 2015 ➤ , Golf Variant 2015 ➤
Engine Mechanical, Fuel Injection and Ignition - Edition 04.2015
2. Charge Air System 269
ProCarManuals.com
 Loading...


